Photoshop Gurus Forum
Welcome to Photoshop Gurus forum. Register a free account today to become a member! It's completely free. Once signed in, you'll enjoy an ad-free experience and be able to participate on this site by adding your own topics and posts, as well as connect with other members through your own private inbox!
You are using an out of date browser. It may not display this or other websites correctly.
You should upgrade or use an alternative browser.
You should upgrade or use an alternative browser.
You create the after.
- Thread starter Paul
- Start date
-
- Tags
- completely full fun.mrgreen make nuts
Eggy
Retired Moderator
- Messages
- 5,313
- Likes
- 5,085
Normally I manage to isolate hair pretty well, but this time no luck. I mean the hair on the shirt of this lady. I can't isolate the hair because of the shadows of the hair on the fabric and the fabric itself.
I wish someone give it a try or show me how to do this one.
Anyways, I had to give her a haircut.

I wish someone give it a try or show me how to do this one.
Anyways, I had to give her a haircut.

MrToM
Guru
- Messages
- 3,595
- Likes
- 3,321
colleague
Guru
- Messages
- 824
- Likes
- 1,254
@ Eggy
sometimes isolating the hair is almost not possible
and then you can try all kinds of tricks to get to your after-image without selecting precisely
I used shadow/highlights a few times , color match with another image , blending modes like screen
and very rough masking
sometimes isolating the hair is almost not possible
and then you can try all kinds of tricks to get to your after-image without selecting precisely
I used shadow/highlights a few times , color match with another image , blending modes like screen
and very rough masking
Eggy
Retired Moderator
- Messages
- 5,313
- Likes
- 5,085
@ colleague
Thanks for the tips. There are a bunch of ways to mask hair but in this case the texture of the lady's shirt is playing tricks on me. I even went visit to a friend who has Topaz Remask 4 and even with this plugin the result was not satisfactory.
But hey, 'al doende leert men' and time to move on.
Thanks for the tips. There are a bunch of ways to mask hair but in this case the texture of the lady's shirt is playing tricks on me. I even went visit to a friend who has Topaz Remask 4 and even with this plugin the result was not satisfactory.
But hey, 'al doende leert men' and time to move on.
Last edited:
Yes, that just confused me.Some of our newer members would find that mind blowing mate, thanks for the share
- Messages
- 22,762
- Likes
- 13,269
MrToM I think there's a lot more going on in your clown make up.
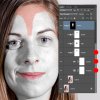
What do you have your WHITE layers LEVELS blending mode set to?
Can you show what's within the RED groups folders? The BLACK group?
I've only played with clown make up once before and it's been a while back. (never interested me until now......always looked fake)
Is there a tutorial that explains your technique?
I have not even come close to getting your results.

Eggy
Retired Moderator
- Messages
- 5,313
- Likes
- 5,085
@ Sam
Well Sam, I always had the same problem. Any attempt to make a white skin always resulted in failure.
So I spend nearly the whole evening to figure out how Mr Tom did it.
Here is my result:

Anyway, I had to add a color layer (white) and play with 'brightness/contrast', 'Hue/Saturation' and 'levels'.
On the 'color fill' and 'levels' I used a soft light blend.
Then I used the burn tool at 15 % on the background copy 2 and background copy layer to accentuate the details.
Maybe tomorrow I'll try to do the other colors but I'm not sure now that I know how to do a white skin.
Well Sam, I always had the same problem. Any attempt to make a white skin always resulted in failure.
So I spend nearly the whole evening to figure out how Mr Tom did it.
Here is my result:

Anyway, I had to add a color layer (white) and play with 'brightness/contrast', 'Hue/Saturation' and 'levels'.
On the 'color fill' and 'levels' I used a soft light blend.
Then I used the burn tool at 15 % on the background copy 2 and background copy layer to accentuate the details.
Maybe tomorrow I'll try to do the other colors but I'm not sure now that I know how to do a white skin.
Last edited:
MrToM
Guru
- Messages
- 3,595
- Likes
- 3,321
You bet there is!...I think there's a lot more going on in your clown make up...

...What do you have your WHITE layers LEVELS blending mode set to?...

These are of course particular to this image.
...Can you show what's within the RED groups folders? The BLACK group?...

The mask thing may be confusing but essentially you could add a mask to each layer within a group OR a single mask to the whole group. I started with a mask to the group but as this is in 'portrait' mode it just made the layers panel too long an difficult to navigate.
Adding a mask to the group is easier as you only need the one mask but I went for a mask on each layer as when the group is closed it kept the panel tidy.....this is purely personal preference....had I have used smaller icons in the panel it would have been better but this is how I like my panel set-up so I went with a mask on each layer......they are duplicates anyway so it makes no odds.
I didn't follow a tutorial but I have seen one similar where 'flags' were painted on the face....Is there a tutorial that explains your technique?...
It looks ok so far mate!...I have not even come close to getting your results...
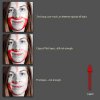
White and black are always going to be the most difficult to get right, but white can be achieved by a simply removing all the colour with a desat adj layer.....adding black to a 'white' layer then becomes much easier.
Here's a basic run-down of the workflow:
OPTIONAL:
Frequency Separation: Duplicate the original layer and add a 'High Pass' filter. Set to 'Linear Light' and KEEP at the very top of the stack....use 'opacity' if needed....do everything else underneath it.
Blur the original slightly until the detail is just gone.....then start at step #1 below.
Do not blur the original if you don't use this option.
1. Duplicate original image and add 'Hue Saturation' layer adj. Set 'Saturation' to -100.
2. Add 'Levels' adj layer and set as image above....or to taste...as long as it looks 'white' but keeps the detail.
3. Group these two adj layers if you want to.
4. New layer for 'RED' paint.
5. EITHER: Put this layer into a group and add a mask to the group...OR...just add a mask to the layer.
6. Paint in RED and use [whichever] mask to fine tune it.
7. Set layer blend mode to 'Overlay'.
This will look too washed out particularly on the right so...
8. Duplicate the layer.
9. If it still isn't enough then duplicate again....like I needed to or if its too much lower the opacity.
Continue to duplicate the layer and adjust opacity until it looks right.
Its at this point that a mask on the 'group' makes more sense, otherwise if you need to edit the mask then turn off all the duplicate layers except the bottom one....edit the mask and then use 'Alt' + Drag to copy the new mask and drop it onto the old ones....choose 'yes' if asked to replace mask.

10. Repeat this 'Paint and Duplicate' technique for the 'Black' paint.
11. Place all those layers into a group (White, Red and Black), and mask that to reveal the original image...OR..you can do this from the start before adding the paint layers.
Thats it.
Sometimes 'Overlay' may not be the best blend mode.....'Color' is often used but any blend that 'looks' right will do......the trick is to NOT to try and get it right with just one layer but a combination of 2 or 3 with the last one being used to fine tune via its opacity.
The most important thing here is the first 'White' layer....adding colour to 'white' is much easier although in a kind of backwards adding to 'Subtractive Colour' kind of way.....if you know what I mean.
Anyway, its not as difficult as I've made out, but maybe the idea of duplicating layers to 'build up' the colour is not really that well used....or known about?
I've probably missed something out but honestly, its pretty simple....as long as you have the 'Knowledge and Practice' plugin installed she'll be right!
Regards.
MrToM.
MrToM
Guru
- Messages
- 3,595
- Likes
- 3,321
Start with the original image and just follow the workflow....I really don't know from where to start...
Give it a go, you may surprise yourself.
Regards.
MrToM.
Eggy
Retired Moderator
- Messages
- 5,313
- Likes
- 5,085
I've found a nice tutorial about bodypainting. Have a look and see for youself:
https://www.youtube.com/watch?v=hKXN6a64MbE
https://www.youtube.com/watch?v=hKXN6a64MbE
gedstar
Guru
- Messages
- 4,378
- Likes
- 4,533
Last edited:


