What's new
Photoshop Gurus Forum

Welcome to Photoshop Gurus forum. Register a free account today to become a member! It's completely free. Once signed in, you'll enjoy an ad-free experience and be able to participate on this site by adding your own topics and posts, as well as connect with other members through your own private inbox!

Analyzing images for scientific research


Messages
19
Likes
0
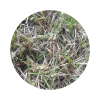
I am a lab assistant at Norther Arizona University's Ecosystem Science research lab with the task of analyzing thousands of images in photoshop.

The goal is to calculate the amount of living, green plant matter within a specific circular area.

I am hoping for advice on how I can streamline this process.

Any help would be greatly appreciated! Thank you .Here is a link to a video a made detailing my problem.

 
Last edited:

IamSam

Administrator
Staff member
Administrator
Messages
22,747
Likes
13,267
EDIT: After playing with variations of using Color Range, I'm not sure my suggestion will help.
 
Last edited:

MrToM

Guru
Messages
3,595
Likes
3,321
The thing that makes this even more tricky for anyone but yourself is what exactly constitutes 'plant matter'.

With that in mind the first thing I thought of was to do things backwards.....ie, select everything that definitely isn't 'plant matter' and delete it as you go.

This way you'll not only be making the image easier to work with, (less pixels), but you should then be able to use the PS tools more efficiently as they will only be used on 'valid' parts of the image.

I maybe totally way off base but it appears that you have far less 'non-plant matter' and so it makes sense to me to select and remove that first.

Just a thought.

Regards.
MrTom.
 
Messages
19
Likes
0
Thanks for the responses.

Remember, I have to do this on thousands of images so deleting all non-plant matter is not feasible.

Let me clarify - I only need plant matter that is GREEN (or would appear green if it weren't for shadows.

I was able to refine my selected color range by (if I remember correctly) decreasing fuzziness and making sure the eye drop was selecting a point sample, and not set to 3 by 3 or something else.
 

thebestcpu

Guru
Messages
2,994
Likes
2,760
Hi Andrew

I took a screen shot of your video and tried the following steps

1) Convert to LAB mode
2) Added Curves Adjustment Layer
3) In this Curves Adjustment Layer I went to the A and B channel respectively and in each clicked on the Auto function (this super saturates the colors)
4) Using magic wand tool with tolerance of 64 clicked one in the greenest part of the image.

Results are below:

Click on thumbnail


Screen Shot 2015-04-14 at 12.50.11 PM.png

There are ways where this could be automated even further yet thought I would start with the above and see if that helps some.

John Wheeler
 

Tom Mann

Guru
Messages
7,223
Likes
4,343
Just to confirm one point: Some might consider both the dry/dead material, as well as the green living matter to both be "plant material". Am I correct in assuming you only want the living /healthy material?

Tom M
 

thebestcpu

Guru
Messages
2,994
Likes
2,760
Just to confirm one point: Some might consider both the dry/dead material, as well as the green living matter to both be "plant material". Am I correct in assuming you only want the living /healthy material?

Tom M

From Andrew in is last post:

"Let me clarify - I only need plant matter that is GREEN (or would appear green if it weren't for shadows."

I had the same question BTW
 

Tom Mann

Guru
Messages
7,223
Likes
4,343
Your fundamental difficulty seems to be that it takes multiple steps to ensure that you have selected all of the living material and nothing else. In this selection process, the hue (ie, greens and green-yellows) seems to play the most important role, the degree of saturation somewhat less of a role, and the brightness very little role (as you want to include living matter that is in the shadows). Because of this, I would suggest that you think of working (...or, at least, performing your selections) in a color space that makes use of this information. In any RGB or CMYK space, these three variables are all intertwined with each other.

Accordingly, I would suggest that you use a tool such as Asiva Selection. I described this tool in this 2 year old thread:
https://www.photoshopgurus.com/foru...-asiva-select-eg-great_wave_off_kanagawa.html

As you can see from looking at the screen shots I attached in that thread, one can develop very precise selection conditions, including widths and rates of fall-off of each of the three selection conditions, hue, saturation, and intensity. One can ensure absolutely no selection of certain regions of this color space (eg, no yellows, no matter how saturated, and no matter how bright or dark). Also, one can save a selection profile that has been shown to work, and with perfect consistency, apply that profile to other images.

I suspect that by using this tool, you will save yourself a *LOT* of intermediate steps and a lot of mouse clicks.

The only problem with this tool is that it's old, hasn't been updated recently, and, as far as I know, it only runs under 32 bit versions of PS, and possibly only older (ie, pre CC) versions, so you will likely have to install an old version of PS specifically for this plugin to run. Googling it, although I can't find the original mfgr's site, I see that several places are still selling it, e.g.,
http://www.softpedia.com/get/Multimedia/Graphic/Graphic-Plugins/Asiva-Selection.shtml

I have it installed on one of my machines, and later tonight, will try to apply it to one of your images.

HTH,

Tom M
 

Tom Mann

Guru
Messages
7,223
Likes
4,343
PS - BTW, I forgot to say this in my last post, but I very much like John's suggestion to work in the Lab color space to enhance saturation, expand the range of hues, etc.. In addition to the changes John suggested, one can even drop the contrast in the "L" channel to make sure that both light and dark regions are easily "seen" by the selection method.

I use this technique all the time, myself. If Asiva doesn't work well enough on its own, I would suggest that a 1-2 punch starting with expanding in Lab space followed by selection using Asiva will likely be as good as you can get in any non-manual, global method.

T
 

Tom Mann

Guru
Messages
7,223
Likes
4,343
PPS - Also, to ensure consistency (ie, the least unintentional spread of your data), I strongly suggest that in all future photos, you include something like a "MacBeth Color Checker" card in the corner of the photo. With this included in each image, you can do a quick normalization for white, gray, and black points in terms of both luminosity and color balance.

For older images, there may be other ways to sorta-kinda do the same sort of thing.

HTH,

Tom M
 
Messages
19
Likes
0
Awesome, thanks guys!

I will attach another image that is fairly representative of the difficulty: https://drive.google.com/file/d/0B208tul7Kbkbd1pKWkpZNUMybFk/view?usp=sharing

I will try out some of your suggestion.

ASIVA sounds great, but unfortunately I'm using Photoshop on a lab computer which I don't have the ability to make changes on (i.e. run 32 bit Photoshop) and they're not going to be willing to spend any money on this tool.

This was the method suggested to me by another professional I contacted.

1. Use a flash on camera if you really want to measure greens in shadows. Overpower sunlight with flash. Otherwise, don’t bother measuring the greens in shadows because you shouldn’t be measuring the dead stuff shadowed areas either. If you already took your pictures, you’ll just have to assume that the dead stuff in shadows is approximately equal to shadowed green areas per blade of grass/stem.

2. Find one image you will use as the target exposure image. Then use Image > Adjustment > Color Match to get all images to look the same.

3. Saturate the hell out of the image using Hue/Saturation. Increase saturation with saturation slider to a constant set point.

4. Set your circle with a selection tool and eliminate other parts of image and crop image.

5. Now use Color Range to find greens

6. Under Analyze you can get the sum area (1st line) or get off histogram

7. Then use Color Range to find everything else + greens.

8. Under Analyze you can get the sum area (1st line) or get off histogram

9. You will only have to get the total area of the circle once.

10. Then you will have the area in pixels squared of the green, the area of green + not green, and the area of the circle. So it will be like total growth (green + non-green), surviving growth (green), total area (by circle you put down).

I will report back with my results.

Thanks again!
 
Last edited:
Messages
19
Likes
0
What is the advantage of switching to Lab Mode and adding an adjustment layer versus just going to Image > adjustments > hue/saturation?
 

thebestcpu

Guru
Messages
2,994
Likes
2,760
What is the advantage of switching to Lab Mode and adding an adjustment layer versus just going to Image > adjustments > hue/saturation?

Higher color differentiation between the green and the brown (not live foliage) if I understand what you are going after.

The upper part of the image is your sample with Hue/Sat in RGB maxed out. The lower part of the Image is using the technique I described before with Lab.

Not good or bad so it is up to you what meets your needs the best. Just an idea to try out.

John Wheeler

RGB-vs-Lab.jpg
 

Tom Mann

Guru
Messages
7,223
Likes
4,343
As I promised in post #8 of this thread, here is an example of how well Asiva Select works. I used the image that Sam provided for the demo. It wasn't necessary to do any preprocessing on the image (eg, enhancing the colors using the Lab color space conversion) other than to recognize that Sam's image was in the Adobe RGB color space and convert it to sRGB before posting.

It took me about 2 minutes to develop the appropriate curves:

Asiva_selection_curves.jpg

and then, only one mouse click to apply the selection criteria to this image. No further refinement of the selection was done -- no "refine edges", no adding and subtracting areas using the color range tool, etc.. The only additional step was that to make the selection area easily visible, I filled in the selected area with a solid bright green color and prepared a animated GIF of the results.
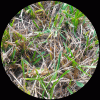
grass_01png-acr0-ps01d-for_GIF-blk_surround-698px-sRGB.gif


As you can see, with the curves I used, it nicely digs down well into the shadows to find every bit of green present, and if it has to make a decision as to what to include and what not to include, I hate to say it, but it will do this much more consistently than any human can possibly do, and that's likely to carry a lot of weight in getting the methodology section of your papers accepted by reviewers. At least by eye, it looks like both the false negative and false positive ID rates for this example are extremely low.
---------

re your statement: "...unfortunately I'm using Photoshop on a lab computer which I don't have the ability to make changes on (i.e. run 32 bit Photoshop) and they're not going to be willing to spend any money on this tool....":

a) Any lab manager worth his / her salt will realize that the cost of labor is almost always the largest factor in any research activity, so demonstrating that this technique reduces your time-spent-per-image by an enormous factor, as well as increases the repeatability of the analysis technique should be very persuasive and make them drag the IT guy in and install a 32 bit version of PS for you.

b) re not spending any money on this tool, I did some more looking around, and it seems that since the developer has gone out of business, some places are giving away Asiva Select for free, apparently including a license key, so there is a good chance that it won't even cost the lab the princely sum of $30 that I initially thought it would be, LOL.

Anyway, I hope this helps you guys out.

Cheers,

Tom M
 
Last edited:

Tom Mann

Guru
Messages
7,223
Likes
4,343
Oh, and w.r.t. the suggestions you quoted, I fully agree with #1. In fact, I will go further and tell you exactly what type of flash to use. You should be using what is called a "ring flash", It's used a lot in dentistry, forensic and scientific work because it does the best job of illuminating shadow areas.

If you go this route, do not, under any circumstances purchase a cheap LED ring light. It will not have enough light output (in a reasonable exposure time) to overcome sunlight. You need one with a flash tube, like one of these:
http://www.bhphotovideo.com/c/product/1030212-REG/canon_9389b002_mr_14ex_ii_macro_ring.html
http://www.bhphotovideo.com/c/product/352443-REG/Sigma_F309306_EM_140_DG_Macro_Ring.html
http://www.bhphotovideo.com/c/product/832690-REG/Nissin_NDMF18_N_MF18_Macro_Flash.html

You'll notice that all the ones with a real flash tube cost 10x the price of an LED ring light. There is a very good reason for this: They work. The LED-based units are barely useful except under very specific limitations, ie, darkness, camera on a tripod, etc.

WRT his other suggestions, they all sound pretty reasonable to me, except (a) I would use Asiva Select as my selection tool, not "color range", and (b) to get all the exposures consistent, I would use the MacBeth color chart as the standard, and a method using "curves", not "match color" to get all exposures and color balances as close as possible.

Tom M
 
Last edited:
Messages
19
Likes
0
PS - BTW, I forgot to say this in my last post, but I very much like John's suggestion to work in the Lab color space to enhance saturation, expand the range of hues, etc.. In addition to the changes John suggested, one can even drop the contrast in the "L" channel to make sure that both light and dark regions are easily "seen" by the selection method.

I use this technique all the time, myself. If Asiva doesn't work well enough on its own, I would suggest that a 1-2 punch starting with expanding in Lab space followed by selection using Asiva will likely be as good as you can get in any non-manual, global method.

T

How do you drop the contrast in the L channel? I assume you're referring to the lightness channel? is this something that needs to be done differently for each image? I'm considering adding this to my list of actions to be automatically performed on each image.

Thanks again!

Andrew
 

thebestcpu

Guru
Messages
2,994
Likes
2,760
HI Andrew
All you need to do to get starting in reducing contrast in the L channel is raise the black point and lower the white point on the L Channel of the Curves Adjustment Layer:

Screen Shot 2015-04-17 at 7.06.49 PM.png

Hope that helps.
 

Tom Mann

Guru
Messages
7,223
Likes
4,343
TheBestCPU's suggestion definitely works, but I generally like to have at least some pixels remain full black and others full white to help whatever selection tool(s) you use, so, instead, I usually reduce the contrast in the "L" channel by putting a "Brightness/contrast" adjustment layer above the image, and play with the contrast slider. I'm pretty sure that if you are in Lab mode, this adjustment layer only works on the "L" channel, so you can leave the blending mode on "normal", and you'll be fine, but if you want to check this for yourself, just switch the blending mode to "Luminosity", and you should see no difference in the image.

The above technique adjusts primarily mid-tone contrast, but each image is different, so you should play around with the different methods on your specific type of images.

Cheers,

Tom M
 

Top