What's new
Photoshop Gurus Forum

Welcome to Photoshop Gurus forum. Register a free account today to become a member! It's completely free. Once signed in, you'll enjoy an ad-free experience and be able to participate on this site by adding your own topics and posts, as well as connect with other members through your own private inbox!

Creating shapes with light effect


Alex30

Member
Messages
5
Likes
5
Hello,
I am quite new to Photoshop.
I would like to create an image like the one that is displayed on the attachment, but with blue color instead of gray.
Can you advice a method for creating such an image?
Thanks in advance,
Alex.
 

Attachments

  • footer.gif
    footer.gif
    9.3 KB · Views: 46

IamSam

Administrator
Staff member
Administrator
Messages
22,745
Likes
13,267
Hello Alex and welcome to PSG.

(There are many ways to do things in Photoshop, this is one way.)

While simple, these types of effects require a basic understanding of selections. So let's start there.

The rule is that you can only work on the inside of a selection. A selection (or some call it a marquee) is identified by the marching ants.

So if I have a selection like the one below....
Screen Shot 2016-09-10 at 8.07.10 PM.png

........and I make a swipe at the selection with the Brush Tool, I will only see the color inside the selection.
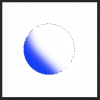
Screen Shot 2016-09-10 at 8.08.22 PM.png

Taking the same selection as the first image above and inverting it like this.............
Screen Shot 2016-09-10 at 8.08.39 PM.png

I now have marching ants on the original ellipse as well as the outside edge of canvas.
So now where will a brush stroke appear?
It will still always appear inside the selection like this.......
Screen Shot 2016-09-10 at 8.11.36 PM.png

In order to make the effect like the one you asking about, you must first make a selection on your canvas.
Here I have used the Pen Tool to make the selection.
Screen Shot 2016-09-10 at 8.28.09 PM.png

Then I used the Brush Tool to add in the color.
Screen Shot 2016-09-10 at 8.29.28 PM.png

Hit Cmd/Cntrl + D to deselect............and your done.
Screen Shot 2016-09-10 at 8.29.36 PM.png
 

IamSam

Administrator
Staff member
Administrator
Messages
22,745
Likes
13,267
OK, let us know if you need any help or understanding of my explanation. I did omit some details since I didn't know if you knew the procedure or not.
 

fredfish

Guru
Messages
887
Likes
1,247
Hi,
here is the result.

Quite good, but not as good as original.

View attachment 67179

I dont think you are a million miles away - you just need to tone it down a bit and add the radial gradient to get closer to your original (great first try BTW!).

Untitled-1.jpg

All I did here was to place 2 layers below yours - the bottom one had your base blue colour. I then turned down the opacity on your top layer until you get the softness you want (I could probably have gone a bit further).

Then on the middle layer select the gradient tool - create a new gradient with you base blue on the right and white on the left. Choose radial gradient from the options and draw a gradient centered on the intersection. Again you can use opacity on this layer to soften the effect.

One of many ways to do this!

Cheers

John
 

IamSam

Administrator
Staff member
Administrator
Messages
22,745
Likes
13,267
@Alex30 By your own admission you stated you were very new to Photoshop. Since your very new, I kept my explanation as simple as possible. I think there was some layer masking with linear gradients involved in making the original effect. I felt you might have a hard time with this so I opted for the easier approach.

For now, trying to keep it simple, the best way to match your original effect is in adjusting how you made your brush strokes.

Notice that you carried your brush stroke to the very edge......
Screen Shot 2016-09-18 at 10.19.12 AM.png

It's my fault as I failed to elaborate, my original hope was that you would notice from the images.
In order to achieve the softer ends, I did not carry my brushstrokes to the very edge.
Screen Shot 2016-09-18 at 10.26.17 AM.png

I used a large brush with the softest setting. I also lowered brushes flow to around 1%.

Make each of the brush effects on separate layers, this way you can lower the opacity of each to achieve a softer effect.
 

IamSam

Administrator
Staff member
Administrator
Messages
22,745
Likes
13,267
Here's the bottom curve at 100% opacity.
Screen Shot 2016-09-18 at 10.55.57 AM.png

Here's the top curve added (on it's own layer) at 100% opacity.
Screen Shot 2016-09-18 at 10.56.23 AM.png

The curves are on their own layers.
I adjusted the top curve to 25% opacity.
I adjusted the bottom curve to 45% opacity.
The final effect is very similar to your original example.
Screen Shot 2016-09-18 at 10.57.02 AM.png

Layers panel.
Screen Shot 2016-09-18 at 10.57.41 AM.png
 

Alex30

Member
Messages
5
Likes
5
Thanks John and IamSam,
I've tried both methods and get much better results.
I didn't realize that working with layers and manipulating with opacity can do the iob.
Thanks again,
Alex.
 

Top