- Messages
- 22,832
- Likes
- 13,288
Ok, let's try a different approach. We will go through each step one at a time. I will create a step and you do exactly as I do.
The following is one complete step and not an outline. This is layer preparation.
STEP 1
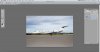
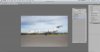
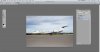
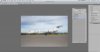
Open your selected plane image in Photoshop.
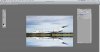
Use Command/Control + J to make three duplicate plane layers.
Double click on the text of the very top copy and name it "Plane copy 1"
Double click on the text of the copy..... second layer from the top... and name it "Plane copy 2"
Double click on the text of the copy..... third layer from the top... and name it "Plane copy 3"
Turn off (deactivate) the original/background layer. You do this by clicking the eye.
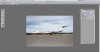
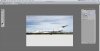
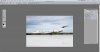
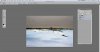
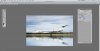
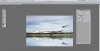
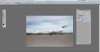
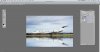
Your canvas will look like this:

Your layers panel will look like this:

Waiting for your post where you re-create the above step............with screenshots, one of your canvas and one of your layers panel.
The following is one complete step and not an outline. This is layer preparation.
STEP 1
Open your selected plane image in Photoshop.
Use Command/Control + J to make three duplicate plane layers.
Double click on the text of the very top copy and name it "Plane copy 1"
Double click on the text of the copy..... second layer from the top... and name it "Plane copy 2"
Double click on the text of the copy..... third layer from the top... and name it "Plane copy 3"
Turn off (deactivate) the original/background layer. You do this by clicking the eye.
Your canvas will look like this:
Your layers panel will look like this:
Waiting for your post where you re-create the above step............with screenshots, one of your canvas and one of your layers panel.