What's new
Photoshop Gurus Forum

Welcome to Photoshop Gurus forum. Register a free account today to become a member! It's completely free. Once signed in, you'll enjoy an ad-free experience and be able to participate on this site by adding your own topics and posts, as well as connect with other members through your own private inbox!

Help Making Wood Grain More Prominent In Attached Photo


claytron3030

New Member
Messages
2
Likes
1
Hi All,

I have researched and tested a lot trying to figure out how to do this, but haven't found anything that works so far.

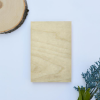
I am trying to make the wood grain lines in the attached photo (the center wood rectangle) pop/look darker, while still maintaining the overall color of the wood.

If anyone can figure it out and explain to me how they went about doing it, it would be a HUGE help.

Thanks in advance!

ClayPortrait Large Wood Round Flowers.jpg
 

fogo00

Power User
Messages
279
Likes
361
Hello claytron3030
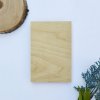
To make the wood's lines darker, you simply use some sharpening (high pass+overlay) and bring the contrast up while managing brightness. (First image)
The problem with getting more contrast into this photo is that it's a fairly low quality one, causing more contrast to also bring out more noise, which makes the image look worse in general.
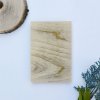
you could just try to darken the lines manually, but its going to be less accurate and often look more "photoshoppy" (second image)
I would recommend getting a better quality picture taken so contrast/brightness filters wouldn't make noise pop out so much or really take your time making the lines darker using a layer mask on a curves or brightness/contrast layer
Hope I helped
Portrait Large Wood Round Flowers.png6iJFKnj.png
 

MrToM

Guru
Messages
3,595
Likes
3,321
Two quick examples...the first is just darkening with black, the second is burning and sponging.

Any good?...

grain_MT_01.jpg

grain_burn_sponge_MT_01.jpg


Depends what you ultimately want to do with it really but a good mask for the grain is the key....you can do anything you want with a good mask.

Regards.
MrToM.
 

claytron3030

New Member
Messages
2
Likes
1
Hi Fogo00,

Thanks so much for your input!

The second one actually looks great in my opinion relative to what I was able to come up with...how did you go about darkening the lines manually?

Thanks again for the help,
Clay
 

fogo00

Power User
Messages
279
Likes
361
I just made a new curves layer, lowered the middle a little, made a layer mask and painted it black and then started painting it white with a soft brush and about 10% flow over the lines

You're welcome d:
 

thebestcpu

Guru
Messages
2,994
Likes
2,760
Here are two version just using the ACR filter from PS.

I duplicated the image twice, made the two new Layers Smart Objects and separately masked the two pieces of wood.

Then individually I took the two new Smart Ojbect Layers and applied the ACR filter turning the contrast and clarity to full and moving the black slide to the left till if felt about right. Also added some sharpening

The first set is making those changes with the blend modes set to Normal

The second set is making those changes with the blend mode set to Luminosity to preserve the original color

Just another option and sliders are real quick and easy

John Wheeler

Portrait-Large-Wood-Round-Flowers-adj.jpg

Portrait-Large-Wood-Round-Flowers-adj-retain-color.jpg
 

Top