What's new
Photoshop Gurus Forum

Welcome to Photoshop Gurus forum. Register a free account today to become a member! It's completely free. Once signed in, you'll enjoy an ad-free experience and be able to participate on this site by adding your own topics and posts, as well as connect with other members through your own private inbox!

Gold Leaf?


Status
Not open for further replies.

SellersSign

New Member
Messages
3
Likes
0
I have been trying to create an engine turned gold leaf fill to be printed on an ecosolvent printer. I was told to use a bump map to make it realistic, but after multiple attempts I can't get it right. Basically I need to make one circular "turn" that I can then copy and paste on text or striping to mimic how real gold would be gilded and turned on a fire truck. Here are some examples:image.jpgimage.jpg

I have some of the generic gold engine turn fills but the turns are random and don't line up with the letters like they should. Any help with this would be greatly appreciated.
 

MrToM

Guru
Messages
3,595
Likes
3,321
Basically I need to make one circular "turn" that I can then copy and paste on text or striping to mimic how real gold would be gilded and turned on a fire truck.
Ok...so do you need something like this or do you already have it?

http://www.psdgraphics.com/backgrounds/radial-stainless-steel-background/


But then...
I have some of the generic gold engine turn fills but the turns are random and don't line up with the letters like they should.
This is the confusing bit...what doesn't "line up" with what exactly?

If you are trying to just fill text with that pattern then fill a complete new layer above the text with that pattern and then set the layer to be a 'Clipping Mask'.....that will use the text underneath it to form a 'Mask' and just show the pattern where the text is.

is that what you want?

Regards.
MrTom.
 

SellersSign

New Member
Messages
3
Likes
0
Real gold is laid on the truck and then a spinning tool is used to make the spins or turns in the leaf. If you look closely, the spins follow the shape of the letter or striping. I have the tileable patterns that are just random spins that repeat, but it doesn't look right. I am needing to find some way to basically put the spins in just like the real hand lettering. Here is another example, zoom in and look at each letter. The spins go up each side of the "A", straight up each "L" etc.

image.jpg
 

MrToM

Guru
Messages
3,595
Likes
3,321
Ah....right....I see what you mean now.

I don't know if there is a 'prefered' or 'usual' way to do this but personally I'd try this:

Have just 1 'spin' by itself on a layer.
Position it at the start of a letter you want to fill.
text_A_01.png


With the 'Move' tool selected, Ctrl + Click the 'spin' layers thumbnail, this will make a selection based on the pixels on that layer.
Whilst holding Ctrl + Alt, Click and Hold within that selection and drag to the next position in the letter.
Repeat this till you fill the entire letter.
text_A_02.png


When finished repeat the Ctrl + Click on thumbnail process for the TEXT layer....making a selection based on the text.
text_A_03.png


With the 'spin' layer selected add a layer mask.
Any 'spill' from the 'spin' layer should then be masked out based on the shape of the text.
text_A_04.png


Alternatively you could make the 'spin' layer a clipping mask. Either way gives the same result.
text_A_05.png

You'll obviously need to adjust the size of the 'spin' to fit the text you're using so it fits better than my quick example and also colour it to whatever you want.

Thats what I'd try anyway.

Regards.
MrTom.
 
Last edited:

SellersSign

New Member
Messages
3
Likes
0
That will definitely get me headed in the right direction! Thank you! Now what if I wanted to crop part of the second picture (the close up of the spins) and use it for my spin... it would need to be cropped in a circle, is that possible?
 

MrToM

Guru
Messages
3,595
Likes
3,321
Sure...although making your own would be better.

Use the 'Eliptical Marquee' tool:
Hold Shift whilst dragging out a selection and it will be circular.
Hold down the spacebar and you can move the selection.

Using a combination of these keys get the selection into the right place and at the right size....and shape.
When done, add a layer mask.

Your pixels on that layer will now be a circle....as in my example.

Regards.
MrTom.
 

IamSam

Administrator
Staff member
Administrator
Messages
22,754
Likes
13,268
Hey SellersSign, you probably don't want to crop from the second image. If you look closely, the the spins are overlapped. This will cause an alignment problem. Your better off making you own gold spins.
 

IamSam

Administrator
Staff member
Administrator
Messages
22,754
Likes
13,268
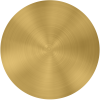
Here is a gold spin brushed circle you can use to make your own pattern.

GoldSpinBrushTexure_01.png

Here is a pattern I made from the above image.
It's a little small.

GoldSpinBrushTexure_03.png

Screen Shot 2014-10-11 at 7.35.26 PM.png
 
Status
Not open for further replies.

Top