What's new
Photoshop Gurus Forum

Welcome to Photoshop Gurus forum. Register a free account today to become a member! It's completely free. Once signed in, you'll enjoy an ad-free experience and be able to participate on this site by adding your own topics and posts, as well as connect with other members through your own private inbox!

Mockup - writing behind arch


oodya

Well-Known Member
Messages
79
Likes
10
Hello all,

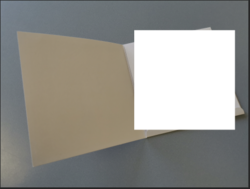
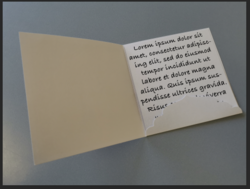
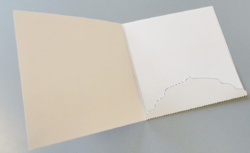
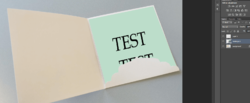
I have a square invitation card. I would like to insert a square layer behind the 'arch on the right side' - so in essence the writing will show behind the arch, but in front of the back card.

Would someone be able to point me in the right direction and tell me how to do this?

Thank you,

Oodya
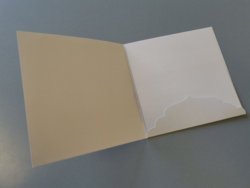
square mockup.jpg
 
You used the term mock-up, are you trying to create a smart object based PSD file where the "writing" can be changed by double clicking?
 
Ok............

Create a rectangle about the approximate size of the card.
Screen Shot 2019-05-16 at 8.01.26 AM.png

Convert the rectangle into a smart object.
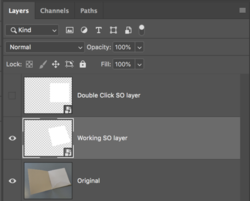
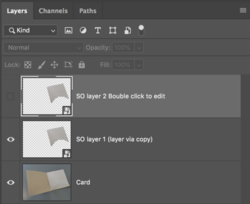
Copy the rectangle smart object layer and turn off the copy.

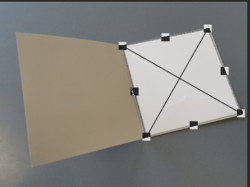
Go back to the first rectangle layer, reduce the opacity, use free transform to "roughly" place the corners to match the card in the image.
Return to original opacity when done.
Screen Shot 2019-05-16 at 8.03.20 AM.png
Screen Shot 2019-05-16 at 8.04.10 AM.png

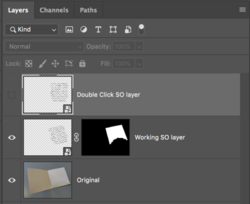
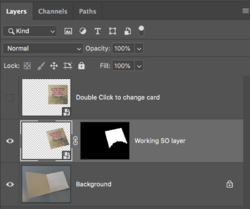
Select/Highlight the first smart object layer (working SO layer in my example)

Add a layer mask.

Turn off the the first smart object layer while working with the Pen Tool.
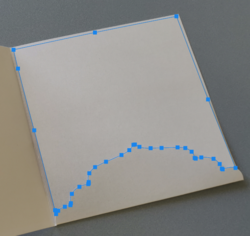
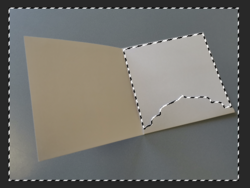
Use the Pen Tool to make an exact selection of the card.

Screen Shot 2019-05-16 at 8.11.16 AM.png

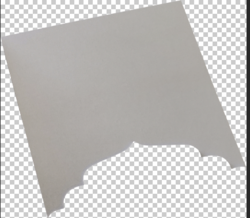
Convert the path to a selection, invert the selection if needed so it looks like this...
Screen Shot 2019-05-16 at 8.25.30 AM.png

Turn the first smart object layer back on after you have made your selection.
Make sure you have the layer mask selected by clicking on it. It should have white brackets around it.
Then fill the layer mask/selection with black.

Now double click the second smart object layer (no need to turn it on). A PSB file will open.
Create a new transparent layer
Turn off the original layer
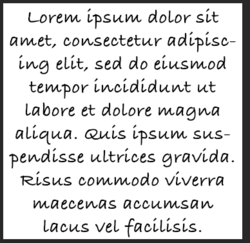
Use the Type Tool to add text............or copy and paste.
Close the PSB file and save.

Done.

Screen Shot 2019-05-16 at 8.17.15 AM.png

Screen Shot 2019-05-16 at 8.30.23 AM.png
 
Hello,

I am attempting this now and have a couple of questions. For where it says 'Return to original opacity when done', if I do this, then the complete top of the card gets covered i.e. the arch is behind the layer - am I missing something? I have changed the opacity to 20% then used the pen tool to make the selection (then went to 'Select' - 'Inverse').

Also, where you have wrote 'Use the Pen Tool to make an exact selection of the card' - which layer should be selected?

Thank you for all your help,

Oodya
 
Hello,

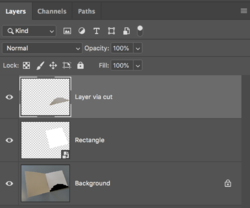
So I tried something different. I used the lasso tool to select the arch, then clicked on 'Make via cut'. I created a rectangle smart object layer as you mentioned and used that to in the middle of the arch and the back of the card.

That seems to work,

Thank you for all your help.

Oodya
 
For where it says 'Return to original opacity when done', if I do this, then the complete top of the card gets covered i.e. the arch is behind the layer - am I missing something?
No, you're not missing anything. I assumed that you would know to turn the layer off while working with the Pen Tool. My mistake.......I will add that to the instructions.

Also, where you have wrote 'Use the Pen Tool to make an exact selection of the card' - which layer should be selected?
The first Smart Object rectangle layer......."Working SO layer" in my layers panel example.
 
So I tried something different. I used the lasso tool to select the arch, then clicked on 'Make via cut'. I created a rectangle smart object layer as you mentioned and used that to in the middle of the arch and the back of the card.

That seems to work,
Please post a screen shot of this.................I don't think this works for editing.

Using the techniques I describe, you can easily edit the card by double clicking the second (2nd) SO layer.
Screen Shot 2019-05-18 at 8.15.31 AM.png
 
If I'm understanding you........is this what you have done?

Screen Shot 2019-05-18 at 8.19.03 AM.png

This is what your PSB will look like.......
Screen Shot 2019-05-18 at 8.20.16 AM.png

This is what mine looks like.....
Screen Shot 2019-05-18 at 8.21.00 AM.png
or
Screen Shot 2019-05-18 at 8.22.15 AM.png
 
Hello,

I used the Polygonal lasso tool to draw around the arch. I then right clicked on the arch and went to layer by cut. I then created a smart object rectangle (which I learned from you) and put that layer in between the main image file and the new arch layer.

mockup 1.png


mockup 2.png
 
Ok, I see now what you have done.

Your method would be destructive to the original image and not editable. When you use "Layer via cut" it removes the selected area from the original image. Layer via copy would be the better choice..............even though it's still not editable.
Screen Shot 2019-05-22 at 9.52.09 AM.png

Whereby using the layer mask is non-destructive to the original. The layer mask also allows you to constrain and match all the subtle curves of the card as well as make changes/edits to the masked area.
Screen Shot 2019-05-22 at 9.50.19 AM.png

The reason why you make a copy of the Smart Object rectangle is so you can group all the working layers in a larger more complicated mock-up and anyone, such as a novice, can easily just double click the "Click on me to change" layer.

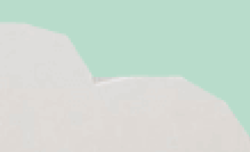
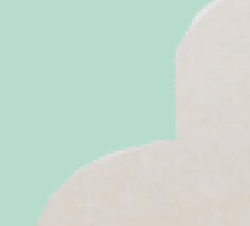
You cant use the Polygonal Lasso Tool to cut out curves. It only works in straight lines.
Screen Shot 2019-05-22 at 9.53.37 AM.png

Screen Shot 2019-05-22 at 9.54.57 AM.png

Compared to the Pen Tool which should be used to cutout curves.
Screen Shot 2019-05-22 at 9.54.37 AM.png
 

Back
Top