Thank-you very much Tom, that does exactly what I needed...much appreciated.
So, a run down of producing the above image....where to begin?
Software used:
Autodesk 3dsMax 2014.
VRay renderer.
Adobe Photoshop.
Camera:
Canon 300D with canon 28-80mm lens. Polarizing filter.
I guess it all starts with the 3d model, the above 'RC Car' was just something I found interesting, It does actually exist which makes finding 'reference' images that much easier. The whole thing is modelled to scale, as much as it can be, and also 'rigged' for the steering. 'Rigging' involves setting pivot points and then linking each part together as it would be in reality, this enables you to 'pose' the model in whatever position you need easily and quickly, negating the need to move every part individually. This is also the basis for any animation you may do.
The modelling / material stage:

Once the model is done it then requires some materials. Materials are created very much like the real thing, with properties resembling those of actual materials....things like 'diffuse' colour, reflectivity, IOR, texture, glossiness, translucency, self-illumination etc etc....many many different things. Complex materials like metallic car paint require a multi-layered material much like PS layers, built up in stages until the effect is created.
The whole 'material' creation relies heavily on 'maps', much the same as 'masks' in PS they are greyscale images which can denote the presence of, or lack of, any property of any material. Diffuse maps are used to colour the material, opacity maps are used for the opacity of a material, texture maps for the texture.....etc etc. These 'maps' can also be avi, mp4 or gif animations which will sync with the animation of the scene....things like water ripples and smoke.
Once the model is built, and materials applied its then time for the lighting.
This can make or break a scene, a good model is nothing without good lighting. The 'scene' itself plays a big part in this too as light is calculated using data from not only the model and the lights but the surrounding 'environment' as well.....this is where the HDR comes into it.
You can add normal lights to the scene which follow religeously the technical specifications of real lights, rendering the scene takes everything into consideration...the position and size of every part of the model, the materials on the model...will they reflect light...will absorb light, will they bounce light onto parts of the scene etc etc, how many lights there are, where they point, their intensity, their distance from the subject.....and then there is the camera too!!....f-stops, shutter speed, ISO, distance to subject etc etc....all properties of the real thing....and you have to get it all right too!
Adding the camera:

So, back to the HDR. Instead of using 'lights' in the scene you can also use an HDR image. This is effectively placed in a hemi-spherical environment around the whole scene. Used as IBL it will illuminate the scene just as if the scene were part of that image meaning that any reflections on the model will in fact reflect the image of the HDR. This means you can create very complex 'scenes' without having to build any additional models to represent buildings or roads or rooms etc etc. IBL does of course mean that the lighting is absolutely spot on for that environment...it coming from the image itself.
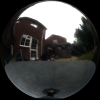
To create the HDR used in the above I first had to take a series of photographs in RAW of a chrome ball placed as near to the position of where the object (the RC Car) would end up being. One final photo is taken without the chrome ball to act as the BG Plate for the final image....ie the environment in which the model will sit.
The RAW Chrome Ball photographs:

A chrome ball is used to gather as much 'light' information as possible...a chrome ball gives you more than 180° viewing angle making it ideal for this purpose. These photographs are then processed in PS to generate one HDR image. Placing that image as the 'environment' in 3dsMax results in the model being lit by the exact same lighting as when the photographs were taken, and when used in conjunction with the BG Plate it does of course match perfectly.
The final HDR image:

The 'render' can be set to exclude objects from the final image....an example of this is the ground plane on which the model sits. I don't need the ground plane as such but I do want the shadows cast by the 'Car' and any light reflections that may shine onto the table surface. When saved as a png or tiff file this is achieved via the 'alpha' channel, or you can save the 'Alpha' channel directly out of 3dsMax if you want to use it elsewhere.
And that's about it. The final stage is to just merge the model image with the BG Plate, levels and colour balance in PS.
It is a little more complex than I've described here but that's the general 'basics' of the workflow.
Regards.
MrTom.


