What's new
Photoshop Gurus Forum

Welcome to Photoshop Gurus forum. Register a free account today to become a member! It's completely free. Once signed in, you'll enjoy an ad-free experience and be able to participate on this site by adding your own topics and posts, as well as connect with other members through your own private inbox!

Autoshape Drawings Pixelated Edges


phoshopdesign

Member
Messages
8
Likes
1
Hey guys,

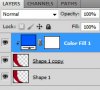
Trying to design a layout for a Print Brochure. The problem is the autoshape i'm using is too pixealted on the curvatures. I'm hoping someone can help me fix this. I've googled and all I see is to gaussian blur it which makes it look terrible.

Also if anyone could give me tips for the best quality possible in terms of printing the finished product once I am done that would be awesome.

Side note - Any of you indesign pros that can help here would be awesome. I tried saving this as a PDF and imported it to indesign and it looks even worse. It's insanely pixelated. How should I import it properly once i've fixed the previously mentioned pixelation/jagged edged in photoshop?

Thanks in advanced for any help guys. I have attached the PSD.
 

Attachments

  • PageBackGround.psd
    16.3 MB · Views: 17
It's the downside of using pixel based images; the lower the resolution, the worse the quality will be. All comes to the number of pixels per inch, the lower that number, the worse things are going to look.
If you want to get the maximum quality, then either increase the resolution (which will of course increase your file size) or, depending on the content of your image, consider using dedicated vector editing software (Illustrator for example). This shape for example would be razor sharp in Illustrator and only be limited by the resolution of the actual output device.

Btw...every shape edge in Photoshop will look bad if you just zoom in far enough, but that doesn't mean that it will also look bad on your output device. It's all about resolution. if you zoom in that far, you're basically "virtually" lowering the number of pixels on your screen, so it's to be expected that it will look bad, even if your original document is set to 2000ppi. Also don't forget that all monitors have a really bad resolution, so what you see at 100% zoom is not a true reflection of the current quality of your image.
 
Last edited:
Thanks a lot Furio. I've realized this through test printing and messing around with the resolutions. You mentioned using illustrator, would that mean drawing the shape over again in illustrator or simply importing it and smoothing it out? Cheers.
 
Just had a follow up question actually, it seems to have smoothed out. I've tried changing the colour of the shape by filling it using the paintbucket and it pixelates it more. Not sure why this is happening, if anyone could help that would be great.
 
I'm not getting that problem. In fact, the left edge is less pixelated than the original border and the red layer below it. And to see that pixelation you have to zoom way in, so of course you're going to see pixels. PS is pixel based as stated above.
 
I've tried changing the colour of the shape by filling it using the paintbucket and it pixelates it more. Not sure why this is happening, if anyone could help that would be great.
This is caused by the anti-aliasing. What happens is that the Paint Bucket Tool does not only replace the main color, but also the different shades of this color that are being used for anti-aliasing, the pixels that you see when you magnify an edge.

You can avoid this by clicking on the checkerboard icon on top of your layers palette, before you fill the shape.

Personally I seldom use the Paint Bucket Tool, I prefer to use a Solid Color clipping fill layer as shown in the example. Not only does it avoid the issue that you are facing, it also gives me more control over:

- the actual color
- its blending mode
- its visibility (the little eye icon)
- the opacity
- masking

Etc, etc.

To each his own of course.
 

Attachments

  • layer.jpg
    layer.jpg
    13.4 KB · Views: 6
You mentioned using illustrator, would that mean drawing the shape over again in illustrator or simply importing it and smoothing it out? Cheers.
In its current state, based on the content of the file that you linked to in your first post, you can't import it in Illustrator as a vector based shape, because right now it's a pixel based shape. This is one of the reasons why I recommend people to keep their original vector shapes intact, because you never know when you're going to need them again.

In this example however it shouldn't be too hard to make that same shape in Illustrator or any other dedicated vector software.
 
Thank you again Furio, you've been an immense help. I've used the transparent pixel lock as you've suggested and the result is immaculate. If you could explain how the solid clipping fill layer works that would be great. I've never tried doing that before.
 
If you could explain how the solid clipping fill layer works that would be great. I've never tried doing that before.

Sure.

In this example I'm clipping a photo with some clouds, but it could be anything, not just a Solid Color adjustment layer like I've shown in my previous post, but also another shape or even a levels or curves adjustment layer.

Basically you right click on the empty area on the right side of the layer's name in the layers palette. A new Window will pop up that allows you to select Create Clipping Mask.
If the layer is already a clipping mask, it will show Release Clipping Mask.

You can also create a clipping mask by holding the alt key (option key on the Mac) and moving your mouse over the line that separates the two layers in your layers palette. Once your cursor turns into an icon that looks like a white circle that intersects with a black circle, press the left mouse button to create the clipped layer. Do the same thing again to release the clipped layer.

Basically what a clipped layer does is applying the pixels or adjustment ONLY to the layer below. So if I add a clipped Levels adjustment, it will ONLY affect the the layer below. Pixels that are part of a solid color layer, an image, a brush stroke, etc.... will only be placed on top of existing pixels on the layer below.

It even works on transparent pixels as shown in my second screenshot. This explains why it also works on anti-aliased shapes like yours.
 

Attachments

  • clip.jpg
    clip.jpg
    47.8 KB · Views: 5
  • trans.jpg
    trans.jpg
    23.8 KB · Views: 5

Back
Top