What's new
Photoshop Gurus Forum

Welcome to Photoshop Gurus forum. Register a free account today to become a member! It's completely free. Once signed in, you'll enjoy an ad-free experience and be able to participate on this site by adding your own topics and posts, as well as connect with other members through your own private inbox!

Help me with this furry cat


Techno

New Member
Messages
3
Likes
0
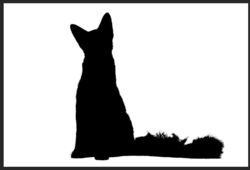
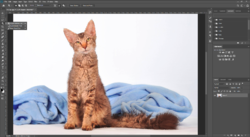
I have a photo of a furry cat. It is in front of a background which is mostly white, but there's also a blue towel behind part of it. Now what I want to do is to have the cat itself unchanged, but only make the background completely black. And I also want to remove the towel.

The problem I'm having is that the cat is very furry, so it has a lot of small hairs in front of the background, and also the very edge of the fur is slightly transparent. How can I solve that?
The reason I didn't post this in the free requests forum is because I want to learn myself how to do it. So help with that would be appreciated!

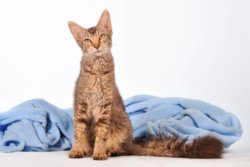
AdobeStock_64782637.jpeg
IHEFqJi.jpg
 
Last edited:
Selecting hair is always tricky. The good news in your case is that you have a sharp, well-lit photo with clear separation beween the fur and the background. Your photo is a lot easier to deal with than if the background were autumn leaves of a similar color to the fur. Go to YouTube and query "Photoshop select hair" to find lots of tutorials. Here are two of them. The first one uses the Select & Mask feature (known as Refine Edge in older versions of Photoshop). The second tutorial uses the Channels method. Both should work well in this situation. There are also 3rd party plug-ins available, such as Topaz Mask, that do a good job.


I've been intending to try Topaz mask. Ps has an AI coming out (or is already out???) that will probably be the most efficient way for creating selections.

In the mean time, I stick to Alpha Channel selections combined with select and mask. This works well.
The tail closest to the cats body will be the most challenging! (except for the whiskers on the cats left! White whiskers on a mostly white bg!)
Screen Shot 2020-03-09 at 12.04.00 PM.png

Before select and mask. There's some tweaking to do!
(Will work on it later, for now I have to run)
Screen Shot 2020-03-09 at 12.07.59 PM.png


Alpha Channel Masking.

Masking with channels.

Using channel to make better selections in Adobe Photoshop.

How to mask hair in Photoshop.

ADVANCED Hair selection - Masking hair in Photoshop.
 
Thank you that was very useful. I tried and it went well until I came to the part shown from 7:22 in the second video ( Link ). How are you supposed to use the clone stamp here? Maybe I didn't do it correctly. Which layer should be clone stamp be Alt+clicked on and which layer should the clone stamped be used on?

IamSam: I see you also still need to do something to make the fringe hair darker, especially around the tail. Would you also do it with the technique shown at 7:22 in the video or in another way?
 
Thank you that was very useful. I tried and it went well until I came to the part shown from 7:22 in the second video ( Link ). How are you supposed to use the clone stamp here? Maybe I didn't do it correctly. Which layer should be clone stamp be Alt+clicked on and which layer should the clone stamped be used on?

That part of the video is optional. It's a way to darken any fringes that are too faint, if needed. (Another very simple way to darken the fringes is to duplicate your Cat and Mask layer so that you have two layers, one on top of the other. That will double-up the density of the fringes and may be good enough for your purposes. Yet another way is to use the brush tool with low opacity and paint-in your own fringes on a blank layer.)

Here's an explanation of the video starting from 7:22.
  • Create a new, blank layer directly above your layer with the Cat and Mask.
  • Create a clipping mask by clipping this new layer to the Cat layer. To do this, go into the Layer menu and select Create Clipping Mask. If successful, you should see a small downward arrow in the layers panel indicating that these two layers are now clipped together.
  • Use the Clone Stamp on this new blank layer. Make sure that the settings on the Clone Stamp tool say Current & Below, which allows you to do everything with the Clone Stamp in the new blank layer. Use the Alt key to select an area in the interior of the cat's fur as your clone source, and then paint with the clone stamp over the fringe areas. The clone stamp will grab the correct colors, and the clipping mask will prevent the clone stamp from straying beyond the fringes (i.e., straying beyond the mask you created).
 
I've been intending to try Topaz mask. Ps has an AI coming out (or is already out???) that will probably be the most efficient way for creating selections.
Its out already, i.ve been using it for quite a while, so cant say exactly which version introduced it. but it is available in CC2020 latest update.
Its not that perfect and most of the times you still have to make manual adjustments.
Here i've made a selection with it. I did nothing other than selecting the tool and click drag a rectangle selection around the cat.
And as you can see it did a pretty good job making a selection but you still need to refine edges to make the selection perfect. Maybe its having some difficulty detecting the cats fur but it works a little better with people (just sometimes).

Untitled.png
 

Back
Top