What's new
Photoshop Gurus Forum

Welcome to Photoshop Gurus forum. Register a free account today to become a member! It's completely free. Once signed in, you'll enjoy an ad-free experience and be able to participate on this site by adding your own topics and posts, as well as connect with other members through your own private inbox!

How can i remove the spots from this image?


Coffee_Girl

Active Member
Messages
39
Likes
8
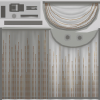
Sorry if this is a stupid question, but I am wondering how I can remove the little orange spots on this image? I tried to paint over it with paintbrush but it leaves weird discolorations that look really ugly lol.

Is there a way to remove the spots but keep the image seamless as if the spots were never there?
44c20c3e-6a05-4113-8cf5-894a8aa6fffbeb4-green_txtr_1024x1024-Recovered.png
 
Just to be certain that we are talking about the same thing, I presume by "small orange spots", you mean the dozens of orange squares, each several pixels wide and tall, right?

Tom M
 
Hmmm I tried that, but it leaves a spotted mess, perhaps I am doing something wrong? awwda.png

It works great on areas where the colors are seamless, but when i color on areas with deep shadows contrasted by light colors, it doesn't seem to pick up very well.
 
In my honest opinion, due to the tonal gradations of the BG image, this is going to be a huge undertaking. This is more of a job for the Clone Stamp Tool.

Is there any chance you could upload the original file?
 
To get close to the desired result without all the work:

1. Use the color range tool to select all of the orange squares. Here's one corner of your image showing the marching ants selection display.

selection_using_color_range_tool.jpg

2. Use the content aware fill tool to fill them all in at once, then use the patch tool to touch up individual small groups of squares.

44c20c3e-6a05-4113-8cf5-894a8aa6fffbeb4-green_txtr_1024x1024-Recovered-tjm01-ps01a-01.jpg

If one is serious about this and needs an even better degree of removal (especially around the edges), just do more touch-up work on groups of remaining squares.

Tom M
 
Last edited:
WOW that is absolutely amazing, I don't understand most of the technical language, but I am going to study this and figure it out. Thank you so much!
 
Great idea Tom.

I still see all the spots. But I realize you don't have the original to experiment with.
Screen Shot 2016-01-19 at 1.11.40 PM.png
 
Last edited:
This will explain what TomMann is talking about

Go to Select and Color Range
Select Color Range.jpg

Select one of the orange colors with the eye dropper, you'll see what you have selected the preview window, then use the +eye dropper to select more shades of orange, lighter and darker ones
You can also increase the Fuzziness slider in my case I increased it to about 90
Color Range.jpg

Then hit the Ctrl + Backspace to open up the fill dialog and select Content Aware from the drop down menu, click OK and you should get something like this
On a new layer I just used the Spot Healing Brush Tool to clean up the leftovers
Spot Healing.jpg
 
Last edited:
Great idea Tom. I still see all the spots. But I realize you don't have the original to experiment with.

You're absolutely right, Sam, I sure see the remnants of the squares as well.

But I'm a great believer in using successive approximations to get to a desired result. This is why I was sure to start the previous message with, "To get close to the desired result..".

In this case, as more time is available, one can either use Ged's refinement of the technique, or use my previous result and then just add a bit of noise, Gaussian blur, and then some large radius USM and come up with something like this where the squares are essentially gone, but it has more of an organic, film grain look. Unfortunately, the image has a bit of banding / posterization because it started life (at least for us) as only an 8 bpc image.

T

PS - Thanks Ged for the tutorial for the OP!

PPS - IamSam - You're also right that it would have been much nicer to have been able to start with a higher rez version of that image.

44c20c3e-6a05-4113-8cf5-894a8aa6fffbeb4-green_txtr_1024x1024-Recovered-tjm01-ps01a-02_smoothed_c.jpg
 
I'm wondering why were those squares on the image in the first place...

Just seems a little odd to me.
 
At the risk of stating the obvious, I suspect they were quite intentional & a significant part of the original design. I bet we are only seeing a small part of the original, and if we could see it all, their intent would become much clearer. FWIW, I kinda liked them. They reminded me of the display on old audio graphic equalizers with a lot of bands.

T
 
Last edited:

Back
Top