What's new
Photoshop Gurus Forum

Welcome to Photoshop Gurus forum. Register a free account today to become a member! It's completely free. Once signed in, you'll enjoy an ad-free experience and be able to participate on this site by adding your own topics and posts, as well as connect with other members through your own private inbox!

Specific Please blow up


bunglefuzz

Member
Messages
8
Likes
3
Hello,

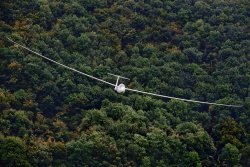
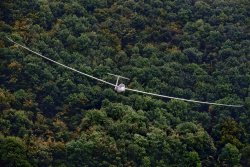
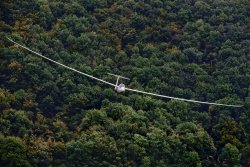
Thanks in advance. This is a friend of mine and a glider I have flown in. The glider is a Nimbus 3DT.

I have photoshop but I've really struggled with this one. I'm wanting to blow this up so it can go on a wall. The picture is too small though.

The main problem is the zig zag effect on the edge of the aircraft, in particular the wings. The tress can remain less sharp if this helps as they are background detail anyway.

Also, there are horrible black pixels around the outline of the aircraft, how did they even get there and can they be removed? I know this is a genuine picture and not pasted, so really don't know how they got there.

I'd love to know some of the tools used for this too if possible.

I don't know how big the print should be physically when printed, I'm guess half an arms length, but advice on this too would be appreciated if indeed there is an opinion.

Many many kind thanks indeed.

Dave
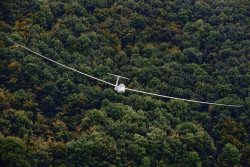
Nimbus 3DT.jpg
 
Hi @bunglefuzz / Dave
That is not too many pixels to work with.
Here is an enlargement using Topaz Gigapixel AI 6X enlargement.
That's a start.
John Wheeler

View attachment 122100
Massive improvement, but still this strange heavy black outline. Funny enough, if you zoom right in you can now see the shadow under the wing and then the lighter trailing edge behind. I hadn't appreciated that before. Many thanks
 
Hi @bunglefuzz /Dave
You're welcome.

Thought it would about the root cause of the issue surrounding the enlargement..
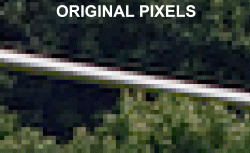
I have created a GIF animation of an enlargement of a section of the wing and background foliage.
First shows the original pixels from the very small image. Not a lot of detail
All enlargements are basically guessing at how to make it look better and filling in details when there are not details to be had. To get any more accuracy means either a better guessing algorithm of modifying it by hand.
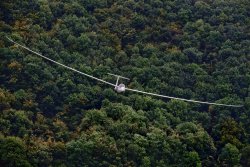
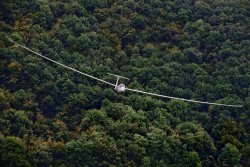
Second image is the 4X enlargement done in Photoshop with the automatic rendering
Third image is using Topaz GigaPixel AI. Note that it is putting in foliage in the background where no such detail exists in the original pixels.

Root cause issue is that with the original small number of pixels (I assume a heavily cropped original image) there just is not a lot of detail to being with.
Everything else is just trying to compensate for that original root cause of the issue.

Hope this helps to achieve a better understanding of the issue.
John Wheeler

Nimbus-3DT-comparison.gif
 
I took John's work (because I can't duplicate it) and changed the tonality of the cockpit and eliminated the black line on the upper white surfaces.

The few pixels are likely explained by severe cropping and/or having been sent by MMS where often bitmaps are down-sampled.

The black outline is a result of sharpening. Most 'sharpening' is really localized contrast enhancement and it gets out-of-hand quickly. Dark on mid-tones causes white outlines, as in mountains against the sky. Sharpening white on mid-tones causes a black outline. The best way I know is to avoid it...but we always seem to have it. Try the clone tool with a small feathered brush using 'darken' or 'lighten' blending mode as appropriate. It makes elimination fairly quick and painless

Nimbus 3DT.jpg
 
Wow people that's amazing. Going to print this now and put it on my wall.
I kind of suspected this would blow up ok, because ultimately there's not much required detail in both the aircraft, which is plain white, and the trees.
I've touched it up a bit more and broken up some of the clone stamp tell tale signs and think it looks as good as it could possibly be. Better than hoped really.
Interesting to see the enlargement gif comparison.Nimbus 3DT Finished.jpg
Many kind thanks indeed to all those who helped.
 
Another question. Is there a sharpen line tool that would define the top of the wing and the tailplane better?
 
Another question. Is there a sharpen line tool that would define the top of the wing and the tailplane better?
What’s your final poster size (eg in inches) The resolution is the limiter yet might be able to enlarge your picture with better edges too.
 
Another question. Is there a sharpen line tool that would define the top of the wing and the tailplane better?
There are sharpen tools but they would just sharpen the already poor edge, making the garbage sharp..

For good or ill I tackled the problem two different ways. I spent very little time on the tail. Since it is straight, I used the polygonal lasso tool and selected an area of forest just off the plane and 'nudged it over using the 4 arrow keys That stair-stepped too much and I feathered it using the blur tool w/ a very small brush.

I wanted to do something I've never done before. I imported the entire image into Corel Draw and used the' B-spline tool to trace one wing...no line and a fill color selected from the leading edge of the wing. Hid the bitmap and exported the wing as a huge TIFF with transparent background. Brought it into PS and shrunk it down quickly using the transform handles and used trial and error to size it to fit perfectly using the 'properties pallet'. Selected that wing and then 'modify/feather'. Duplicated that wing, flipped it horizontal and rotated it using the 'properties pallet'. The results are here:

All of these are fabricated edges and as such might look artificial to the OP but it does appear somewhat sharper and cleaner to me.

Nimbus 3DT Finished w wing.jpg
 

Back
Top