Photoshop Gurus Forum
Welcome to Photoshop Gurus forum. Register a free account today to become a member! It's completely free. Once signed in, you'll enjoy an ad-free experience and be able to participate on this site by adding your own topics and posts, as well as connect with other members through your own private inbox!
You are using an out of date browser. It may not display this or other websites correctly.
You should upgrade or use an alternative browser.
You should upgrade or use an alternative browser.
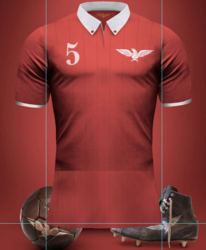
Remove ball and boot
- Thread starter hernaman
- Start date
MentosCubing
Power User
- Messages
- 400
- Likes
- 428
The best way to go about that would probably be to select the ball and the shoe and fill them with the Content-Aware Fill, then cloning another section of the shirt and blending it into the bottom. (I do not use Photoshop, so unfortunately I cannot provide screenshots, but it's simple enough.)
- Messages
- 22,837
- Likes
- 13,288
In Photoshop, you would probably have a hard time removing the ball and boot with content aware fill. I would approach it from a more traditional technique that's sure to work
Create a new layer above the original. Select/Highlight this layer.
I would start with the Pen Tool making an outline of the low/missing portion of the jersey.
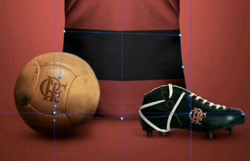
Right click and make a selection.
I would then Use the Clone Stamp Tool and the Brush Tool to fill in the selection.
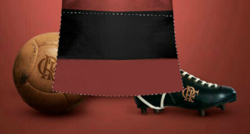
Using the Brush Tool, match the shading.
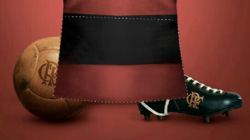
It will be almost impossible to match the gradation of the background...........so let's borrow from the top and use that to cover the remaining ball and boot.
Select/highlight the original layer and use the Rectangular Marquis Tool to make a selection of the upper portion of this image. Once you have the selection hit Cmd/Cntrl + J to copy the selection to it's own layer. Move the copied layer to the top of the layer stack.
Hit Cmd/Cntrl + T and flip vertical. Use the Move Tool to move it down into position. You will find positioning easier if you lower the layers opacity.
Remember, your tring to match the gradient in the background.
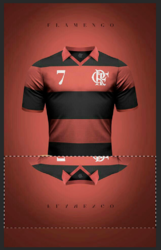
Once you have it lined up, add a layer mask to the layer. Use the Brush Tool to blend.
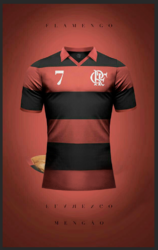
All that's left to do is to Clone out the top of the ball. Use your Pen Tool path you made earlier, turn it into a selection again and invert it by hitting Shift + Cmd/Cntrl + I, this will mask out the area of the jersey so you don't have to worry about messing it up.
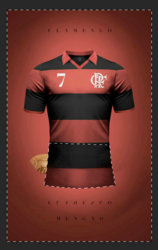
The rest is Clone and Brush work to finish off the ball and the duplicated text!
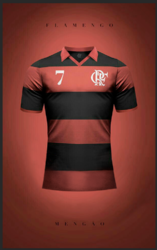
Create a new layer above the original. Select/Highlight this layer.
I would start with the Pen Tool making an outline of the low/missing portion of the jersey.

Right click and make a selection.
I would then Use the Clone Stamp Tool and the Brush Tool to fill in the selection.

Using the Brush Tool, match the shading.

It will be almost impossible to match the gradation of the background...........so let's borrow from the top and use that to cover the remaining ball and boot.
Select/highlight the original layer and use the Rectangular Marquis Tool to make a selection of the upper portion of this image. Once you have the selection hit Cmd/Cntrl + J to copy the selection to it's own layer. Move the copied layer to the top of the layer stack.
Hit Cmd/Cntrl + T and flip vertical. Use the Move Tool to move it down into position. You will find positioning easier if you lower the layers opacity.
Remember, your tring to match the gradient in the background.

Once you have it lined up, add a layer mask to the layer. Use the Brush Tool to blend.

All that's left to do is to Clone out the top of the ball. Use your Pen Tool path you made earlier, turn it into a selection again and invert it by hitting Shift + Cmd/Cntrl + I, this will mask out the area of the jersey so you don't have to worry about messing it up.

The rest is Clone and Brush work to finish off the ball and the duplicated text!

Last edited:
- Messages
- 22,837
- Likes
- 13,288
Ok, this Kit is much easier to fill in than the first.
I'm not sure how you how you reached the point you have so far, but your off to a great start.
I really cant explain how I color match and blend ..............all I can tell you is that I use the Clone Stamp Tool (CST) and the Brush Tool (BT). It's a matter of watching what your doing and trying to clone the same textures and colors without repeating elements. Once you have your selection,
use the CST and work in very small areas while zoomed in fairly close. Take your time. It's OK if your colors are too light or slightly dark, as long as the basic color is close.
Use the BT to match the shading.
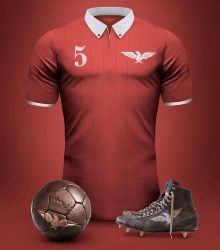
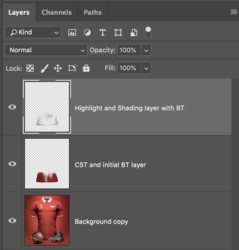
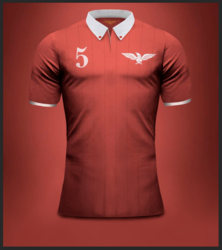
Here is my preliminary work before I start the dark shading and highlighting.
I have some more blending to do at the top edge.
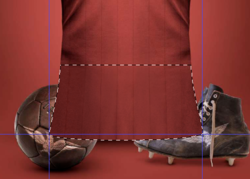
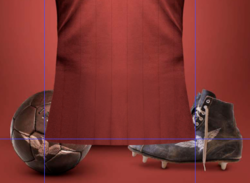
Will post more later.
I'm not sure how you how you reached the point you have so far, but your off to a great start.
I really cant explain how I color match and blend ..............all I can tell you is that I use the Clone Stamp Tool (CST) and the Brush Tool (BT). It's a matter of watching what your doing and trying to clone the same textures and colors without repeating elements. Once you have your selection,
use the CST and work in very small areas while zoomed in fairly close. Take your time. It's OK if your colors are too light or slightly dark, as long as the basic color is close.
Use the BT to match the shading.
Here is my preliminary work before I start the dark shading and highlighting.
I have some more blending to do at the top edge.


Will post more later.
- Messages
- 22,837
- Likes
- 13,288
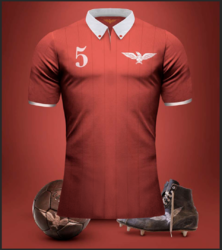
Next we need to clone out the boot and ball.
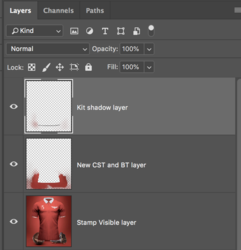
First lets create a a stamped visible layer from what we already have. This way, we're preserving all the previous work we have done just in case we need to make changes.
Select/highlight the uppermost active layer and hit Shift + Opt/Alt + Cmd/Cntrl + E.......this will merge all visible layers to it's own target layer.
Use your original path to create a selection. Then hit Shift + Cmd/Cntrl + I to invert the selection.
Now it's just a matter of getting to work with the Clone Stamp Tool (CST).
This is what I call blocking. I just do a rough block doing my best to preserve surrounding colors.
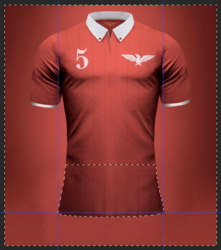
Next I use a soft round brush with the following settings:

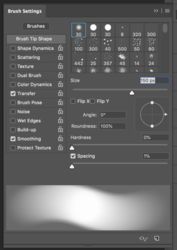
I use these brush setting to slowly match the color and shading. I sample the colors often.
On a new layer I add the strong shadow at the bottom of the Kit.
First lets create a a stamped visible layer from what we already have. This way, we're preserving all the previous work we have done just in case we need to make changes.
Select/highlight the uppermost active layer and hit Shift + Opt/Alt + Cmd/Cntrl + E.......this will merge all visible layers to it's own target layer.
Use your original path to create a selection. Then hit Shift + Cmd/Cntrl + I to invert the selection.
Now it's just a matter of getting to work with the Clone Stamp Tool (CST).
This is what I call blocking. I just do a rough block doing my best to preserve surrounding colors.

Next I use a soft round brush with the following settings:

I use these brush setting to slowly match the color and shading. I sample the colors often.
On a new layer I add the strong shadow at the bottom of the Kit.


