
Photoshop Gurus Forum
Welcome to Photoshop Gurus forum. Register a free account today to become a member! It's completely free. Once signed in, you'll enjoy an ad-free experience and be able to participate on this site by adding your own topics and posts, as well as connect with other members through your own private inbox!
You are using an out of date browser. It may not display this or other websites correctly.
You should upgrade or use an alternative browser.
You should upgrade or use an alternative browser.
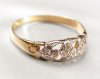
What is the best method to remove the backgrounds of the attached images.
- Thread starter zoe20
- Start date


Owl.D
Member
- Messages
- 7
- Likes
- 16
Pen tool. I know you've said that it wouldn't be helpful but in most cases pen tool is your one and only true friend when it comes to extracting objects from their background.

This is made with the pen tool...the other two you have are even more suited for the pen tool because the whole product is in focus.
Just out of curiosity, why do you think it won't help?
This is made with the pen tool...the other two you have are even more suited for the pen tool because the whole product is in focus.
Just out of curiosity, why do you think it won't help?
- Messages
- 22,812
- Likes
- 13,279
Good suggestion Zip!
I probably do about 80% percent of my masking/selections using that technique, zoomed in close, and the Brush Tool with a brush set to 80 to 85 percent hardness on a layer mask.
I also combine it with alpha channel masking and the refine mask function.
I probably do about 80% percent of my masking/selections using that technique, zoomed in close, and the Brush Tool with a brush set to 80 to 85 percent hardness on a layer mask.
I also combine it with alpha channel masking and the refine mask function.
ZipedX
Power User
- Messages
- 214
- Likes
- 142
I also combine it with alpha channel masking and the refine mask function.
That's a nice method too.
Masking using channels (RGB) is another method to try, Could probably work with the one I did with the brush.
But pen, brush and layermasks will get you far zoe.
MrToM
Guru
- Messages
- 3,595
- Likes
- 3,321
Yep, totally agree with that method, a mask, a brush and 5 minutes of your time.
As mentioned there are more fancy ways of making a selection but sometimes the simple ways win hands down.
If you're having difficulty painting around curves then here's a little trick I use, the shift key. Instead of going round the curve in one go use a series of very short 'straight' lines...by click and then hold shift + click, click, click etc around the curve. If you make the lines short enough you'll not notice they're straight and you'll have a nice smooth curve. It takes a bit of practice to get the size of the brush, its hardness and how far apart to click just right but that is just something that comes with practice....once you've done it a couple of times it becomes almost second nature.
Regards.
MrTom.
OK this is my effort i used the combinations of alpha channel and refine edge.But the the ring on the white background is giving me trouble.Also Iamsam can u explain me that brush method u
often use for the masking please. Thank you!

This is the psd :
View attachment z1.psd
often use for the masking please. Thank you!
This is the psd :
View attachment z1.psd
Last edited:
ibclare
Queen Bee
- Messages
- 11,034
- Likes
- 4,638
I am personally a fan of the pen tool, but it does take practice and knowing how to get around curves, etc. But if soft edges are a problem on a metallic object, I still go for the pen tool.
As MrTom suggested, using the jigsaw method of doing one hard, brush stroke (preferably on a mask) after the other is one solution that could work well if you have problems using the pen tool.
As MrTom suggested, using the jigsaw method of doing one hard, brush stroke (preferably on a mask) after the other is one solution that could work well if you have problems using the pen tool.
ZipedX
Power User
- Messages
- 214
- Likes
- 142
Zoe, I think you got a really great result using whatever method you used, well done.
When I use the brush technique I do as follows.
1) Make a copy of the background layer.
2) Create a new layer and fill that with a color that really sticks out. (Greenish in my example, this is just so I better can see where I paint with my brush)
3) Place the colored layer right beneth the copy of the background layer.
4) Add a layer mask to your copy of the background layer and fill it with black.
5) Choose a brush (make sure you got white color selected) and set hardness to around 80-85%, zoom in really close so you can follow the edges of the object.
6) Paint around the edges using MrTom's method (Shift-click).
7) When your done press ctrl+shift+I to invert the mask.
8) If need be now is the time to try refine edge, but if you've taken your time you'll probably won't need to.
(This method however will leave you with a bit of softness around the edges). In your pictures I don't see that as a problem though. But that's my opinion.
thsi si awesome tutorials.I haev a question for you . 4) Add a layer mask to your copy of the background layer and fill it with black. when i filled it with black the entire canvas is filling with the same color of the layered color beneath the copy background layer.

Last edited:
MrToM
Guru
- Messages
- 3,595
- Likes
- 3,321
the entire canvas is filling with the same color of the layered color beneath the copy background layer.
The 'Black' basically means HIDE...so ALL of your layer 'Layer 0 copy' is hidden, its still there but hidden.
If you paint on the MASK (the thumbnail with the white corner bits....the black one), then that basically means SHOW...so you want to make all the parts you want to SHOW, (of Layer 0 copy), equal to white.
When you select the MASK the foreground and background colours automatically turn black and white, these are the only colours you need to use on a MASK....transparency is allowed too.
Just try painting on the green bit now with a white brush....the image on Layer 0 copy will magically appear beneath your brush.
Regards.
MrTom.
- Messages
- 22,812
- Likes
- 13,279
A white layer mask reveals the layer it's masking and conceals the underlying layer.
A black layer mask conceals the layer it's masking and reveals the underlying layer.
If you use a Black brush on a white layer mask, you see through the masked layer where you are brushing to the underlying layer.


If you use a white brush on a black layer mask, you are concealing the underlying layer thus reveling the masked layer .


A black layer mask conceals the layer it's masking and reveals the underlying layer.
If you use a Black brush on a white layer mask, you see through the masked layer where you are brushing to the underlying layer.
If you use a white brush on a black layer mask, you are concealing the underlying layer thus reveling the masked layer .
Last edited: