What's new
Photoshop Gurus Forum

Welcome to Photoshop Gurus forum. Register a free account today to become a member! It's completely free. Once signed in, you'll enjoy an ad-free experience and be able to participate on this site by adding your own topics and posts, as well as connect with other members through your own private inbox!

Removing an annoying branch with the Brush Tool


IamSam

Administrator
Staff member
Administrator
Messages
23,905
Likes
13,674
I'm very curious the steps you took using the brush tool....
Sorry, It's been a long day and I'm just now finding the time to post this.

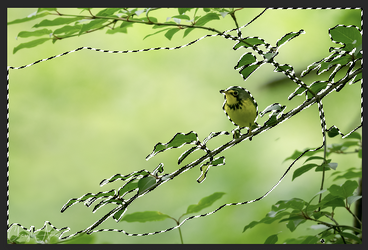
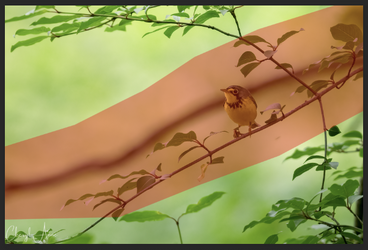
I usually start off by identifying the boundaries I will need in order to remove the offending branch.
This is the basic zone I need to make exact selections. Outside this zone can be soft transitions.
Screen Shot 2025-06-03 at 12.31.54 PM.png

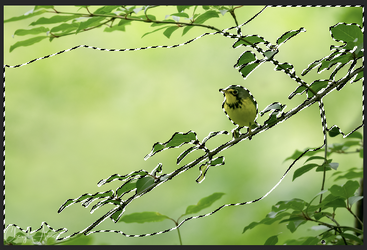
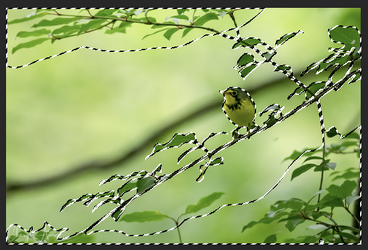
Then I make a selection of the areas I want to preserve. You can use any selection process you're most comfortable with.
For me, on a layer mask, I used a mix of alpha channel, Brush and Pen Tool. I then used Select and Mask to refine the selection.
Screen Shot 2025-06-03 at 12.32.30 PM.png

Reversed the selection.
Create a new layer.
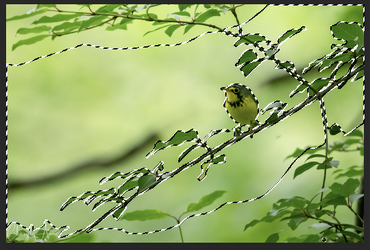
Then I just use the Brush Tool with a large and very soft (0% Hardness) brush with it's Flow set to 2%
Then it's just a matter of sampling nearby colors and painting out the annoying branch.
Screen Shot 2025-06-03 at 12.59.41 PM.png

Screen Shot 2025-06-03 at 4.20.42 PM.png

Screen Shot 2025-06-03 at 4.24.05 PM.png

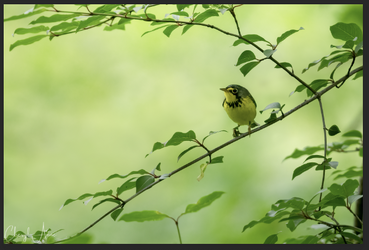
After the Brush Tool work is done, turn off the selection.
Merge the paint layer down or create a new stamp visible layer.
Then zoom in fairly close and clean up any sharp edges with the Blur Tool set to 12%
Screen Shot 2025-06-03 at 4.27.32 PM.png

Note: This was a totally new edit I did just for this demo, so it was done pretty fast! Don't look too close!
 
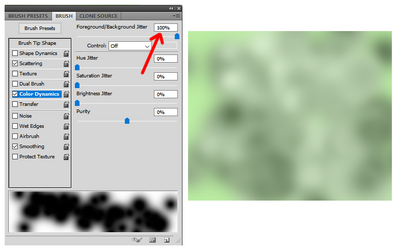
For this kind of situation, another technique I like is to set the Color Dynamics in the brush tool to toggle between your foreground and background colors to create a cloud-like effect. Set the Foreground/Background jitter to 100% and also activate the brush scattering. This allows you to quickly lay down a base layer that's halfway to the end result. Then you can then refine it by painting new colors over that, sampled from the surrounding areas.

1748991254618.png
 
So that's what you meant in that other thread. I can see this works very well with a background out of focus such as this. Nice.
 
Thanks @IamSam and @Rich54! I wasn't happy with how the cloning tool was working with this and AI was useless. I've never tried this painting technique before and I'll certainly give it a shot. Every day's a school day with Photoshop! :)
 
I am absolutely loving this painting technique! I don't use a pen so I usually shy away from this tool but the mouse gave me some control especially with the opacity pulled all the way down.

@Rich54 - can you please give me a bit more of an explanation to how foreground/background jitter affects the image? Am I choosing one foreground and one background color from the image?

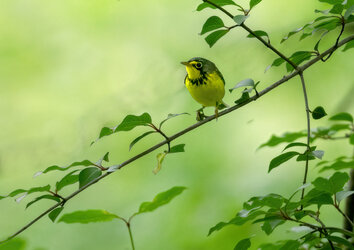
Here's where I'm at on my first pass....
bird branch.jpg
 
@Rich54 - can you please give me a bit more of an explanation to how foreground/background jitter affects the image? Am I choosing one foreground and one background color from the image?

This technique can quickly give you three shades:
  • Make a rough selection of the area you want to cover and fill it with an "average" green shade from this image.
  • Next, set you foreground color to one of the darker shades from the image and your background color to one of the lighter shades.
  • Use a large, soft brush and set the scatter and the 100% foreground/background jitter as I described above.
  • Paint these new colors over your average green area. The scatter and jitter will create a blurry, cloud-like effect from the colors you have selected.
  • Optionally, give the entire thing a Gaussian blur.
As I mentioned, this is not necessarily the finished product. But it's one way of quickly laying down a large area of unfocused colors, like the image in this thread.


Write your reply...

Back
Top