What's new
Photoshop Gurus Forum

Welcome to Photoshop Gurus forum. Register a free account today to become a member! It's completely free. Once signed in, you'll enjoy an ad-free experience and be able to participate on this site by adding your own topics and posts, as well as connect with other members through your own private inbox!

Scripting Automatically color white areas in psd files


jeacukconcaga

Member
Messages
5
Likes
2
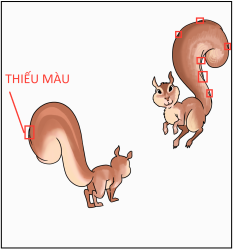
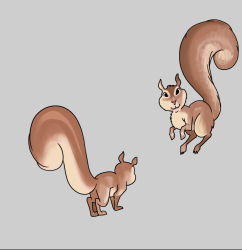
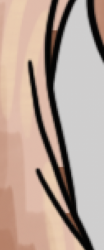
Hello everyone, I have many Photoshop files (.psd). These file is missing colors in the places I have marked. Specifically: there are white spaces (or near-white colors) that lie between other color areas and the black outlines. Specifically in the picture, I will use brown to fill in the white space. I'm looking for a way to fix this automatically. I don't know if you can suggest keywords or clips or any documents related to automatically coloring .psd files. Thank you very much.

Click to enlarge
Screen Shot 2021-06-14 at 9.55.18 AM.png
 

Attachments

  • _DNT-016.psd
    10.2 MB · Views: 1

IamSam

Administrator
Staff member
Administrator
Messages
22,772
Likes
13,270
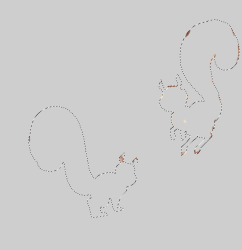
Of course I'm not a scripting expert, but a selection would need to made of the boundaries from which to work, the colors would need to be matched and filled in the proper amount.

Click to enlarge
Screen Shot 2021-06-14 at 10.21.59 AM.png

Screen Shot 2021-06-14 at 10.28.38 AM.png

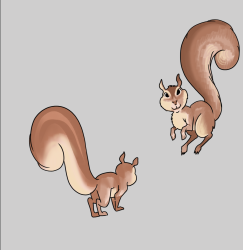
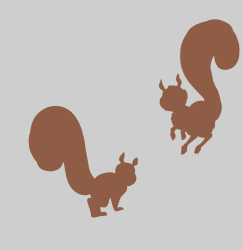
However, if you just used a brown matte bg, it could work but it would look odd.

Screen Shot 2021-06-14 at 10.28.01 AM.png

Screen Shot 2021-06-14 at 10.28.18 AM.png
Screen Shot 2021-06-14 at 10.33.29 AM.png
 

thebestcpu

Guru
Messages
2,995
Likes
2,762
Hi @jeacukconcaga
Not sure there is an easy solution that would universally work on arbitrary images.
Its also not clear from you request exactly how accurate the colors need to be and that only those very specific areas are corrected.

Note that from you description, there are other areas in the image that lie close to two black lines (around the eyes and toes) that fall into your description.

If your needs were quite flexible and the images quite similar to what you have e.g. similar resolution black outlines needed a specific color fill for the whole image (not matched) and a few extra areas got changed, here is a relatively easy way that could work in a very limited fashion.

0) I worked on a stamped version of the image
1) Make a selection with Select > Color Range set to Shadows and Range of 50
2) Select > Modify > Expand selection by 2 pixels
3) Select > Modify > Contract (Shrink) selection by 2 pixels
4) Create a new empty Layer with Blend set to Darken
5) Fill the selection with a specific color and turn off selection

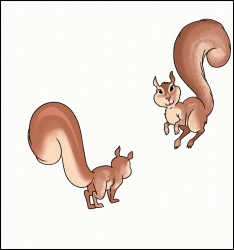
Attached is a GIF animation showing original and the modified version in 1 second intervals.
I think it got the changes you wanted a a few additional ones that you did not.
So it depends on your specific needs yet wanted to share this example approach

This could pretty easily be put into an Action

John Wheeler
_DNT-015-filled.gif
 

jeacukconcaga

Member
Messages
5
Likes
2
@thebestcpu
Many many thanks for your support. But, I only use Photoshop for a short time so I haven't done step 4-5 :
4) Create a new empty Layer with Blend set to Darken
5) Fill the selection with a specific color and turn off selection

I think you are right. If I apply your whole process to the photo, there are color gaps that don't make sense.

Could you help me with 2 things:
1) How do i do your process for each area of the image?
2) Could you record a video of your process or send me your Photoshop action?

I attach the actual video of me processing the photo:

Again, thank you for your support.
 

IamSam

Administrator
Staff member
Administrator
Messages
22,772
Likes
13,270
Your video is exactly what I described in post #2.
the colors would need to be matched and filled in the proper amount.
This difference is that I created a selection/boundary to contain the colors.

Johns solution is similar to what I described in post #2, he just took a different approach.
if you just used a brown matte bg, it could work but it would look odd.

In following Johns exact instructions, it works well with about the same results as I had in post #2.
Johns.
Screen Shot 2021-06-14 at 10.03.05 PM.png

Mine. The selection is a bit more contained but can't be automated. Johns technique allows you to make a similar selection.
Screen Shot 2021-06-14 at 10.02.51 PM.png

Johns idea will work well as an action. Just follow the instructions and you will see how the "areas" are processed.
 

[ iLLuSioN ]

Power User
Messages
388
Likes
400
You can also use a selection or mask and the spot healing brush to fill the transparent areas.

You have to do it manually, but you don't have to work very precisely.

I've written a little script (expand and copy to the script folder of photoshop) that makes the necessary preparations.

Now you can "repair" the transparent areas with the spot healing brush (be sure you use "content-aware" & uncheck "Sample all layers")

=============================

You can also duplicate the "Layer 5 copy" and apply the "radial blur" filter (Amount: 10 / Zoom / Best Quality), now duplicate this layer 15 or 20 times, select all this duplicated layers (not the '"Layer 5 copy") an merge them together. Select the layer "net 2 copy " and use the magic wand tool (Tolerance:30 - check: anti-alias & contiguous but uncheck: Sample all layers" and click in the white area to make a selection. Invert the selection (Strg +i), contract selection by 2 pixels, select the previously merged layer and add a mask.

Now all you have to do is remove the squirrel's hind legs with black paint in the mask and move the merged layer below the "Layer 5 copy" layer.

In theory, it should also be possible to automate this .
 

Attachments

  • test script.zip
    3.2 KB · Views: 3

thebestcpu

Guru
Messages
2,995
Likes
2,762
I will toss more one more input to the thread.
I agree with @[ iLLuSioN ] that finding all the areas of transparency and getting them filled is the trick.
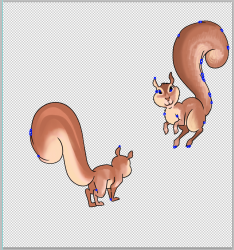
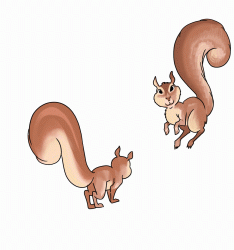
I took a slightly improve approach to finding those transparencies from my prior post yet the key change was selecting those transparencies and with the squirrel color background using the Edit > Content Aware command to better fill the transparent areas with local colors.

Below in the first image I stroked with Blue all the areas of transparency found and then provided another GIF showing the before and after. It did a better color match and a cleaner match as well.

@jeacukconcaga Providing an Action or Script I think would not be directly helpful. For automation to work many parameters have to be matching and that includes your Layer Stack structure (which is quite complex). Hopefully all of the posts in this thread give you an idea how to proceed. Mostly likely, the lowest energy path would have been to have the underlying color be completed to begin with and not spots of transparency yet I know you are well beyond that point.
John Wheeler

All transparency areas identified and highlighted:

Screen Shot 2021-06-15 at 7.54.55 PM.png


GIF showing before and after with improved color mathcing

squirrel-base.gif
 

Top