What's new
Photoshop Gurus Forum

Welcome to Photoshop Gurus forum. Register a free account today to become a member! It's completely free. Once signed in, you'll enjoy an ad-free experience and be able to participate on this site by adding your own topics and posts, as well as connect with other members through your own private inbox!

Automation - Parse Metadata to Text


RSPhotoIndy

New Member
Messages
4
Likes
0
Are there any tricks, or even aftermarket tools that can parse metadata text into an existing text layer...? I would certainly be willing to pay for the expertise to create such a tool - it would be a worthwhile expense for the person or company smart enough to make it...

I am looking to automate the more time-consuming steps of button creation. I already have actions to automate applying my custom borders and overlays (with a separate text-only layer for the name), as well as for final sizing. I cull the originals in Lightroom by adding the subjects' names in a metadata field before throwing out the bad shots...

I would like to add a step that would parse a chosen metadata field into the text layer automatically.

Any ideas?
 

Dormeur74

Power User
Messages
204
Likes
180
I wrote a script that copies metadatas in a new PS document, but I can adapt it to copy them in a layer inside the photo. Are you interested ?
 

RSPhotoIndy

New Member
Messages
4
Likes
0
I certainly might be! Can you post a step-by-step illustration? (Not the code, of course - just a visual so I can understand that we are on the same page. I want the metadata text to parse into an existing formatted text layer - replacing placeholder text in the layer.)
 

Dormeur74

Power User
Messages
204
Likes
180
My scripts are free and in open source. You can download the EXIFs.jsx file here. You paste it in your notepad (Notepad++ is far better) ans save it where you want on your HDD as EXIFs.jsx.

Now the process. You launch Photoshop and load a photo.
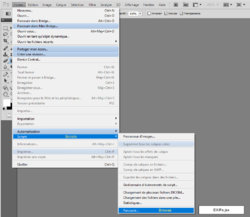
Step 1 : you execute the script using the Photoshop "Script"
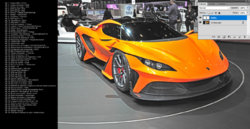
Step 2 : the script adds a black margin on the left of the photo and pastes its metadatas in it.

step001.jpg

step002.jpg

If you need a modif, it will be possible, of course.
 

RSPhotoIndy

New Member
Messages
4
Likes
0
Thanks so much for posting your script for showing the EXIF metadata! Unfortunately, that does not help with the automation I am wishing to accomplish... I want to be able to place metadata into the design - into an existing formatted text layer. I just finished creating buttons for about 500 high school choir members. and banners for another 100. Each layout required that I manually type the name into a text layer of my button design. I already put the student's names into metadata when culling the images. So, I am looking for an automation that will take that metadata and edit it into the text layer.
sequence.jpg
 

Dormeur74

Power User
Messages
204
Likes
180
Sorry, I coud not imagine what you wanted to do.
I think this is not so difficult. Is it possible to download the PSD file of the last step (here "Overlay added and text changed per metadata") with the name in the EXIFs of course ?
A last question : do you intend to cut the black mask around the circle (5th step) and save your work in PNG ?
 

RSPhotoIndy

New Member
Messages
4
Likes
0
Yeah - sorry - it was hard to explain very well. My image sequence above is very basic.

Step 1: Cull the images and add the students names to the metadata of all the files in Lightroom.
Step 2: Use a Photoshop batch action to:
- open all the culled images from a directory
- add an alignment overlay
- save as a PSD image to a working directory (retaining the metadata)
Step 3: manually open 10 or 20 images at a time and resize and position each portrait layer so the faces are properly located in the overlay - close and save (I wish I could just do the positioning reliably in-camera and skips steps 2-4 altogether...!)
Step 4: Use a Photoshop batch action to:
- reopen each image from the working directory
- remove the positioning overlay
- resave the now-properly-positioned image (still retaining the metadata)
(Step 2-4 results in the 2nd image above - "Orig File manually sized to fit overlay")
Desired Step 5: Run a script to:
- open the working image
- apply button overlay layer(s)
- replace text in let's call it "firstname" layer with text in image metadata
- [sometimes - depending on design] replace text in "lastname" layer with text in image metadata
- save the new working image with all layers (to facilitate edits/corrections as necessary)
Step 6: Run Image Processing script to resave all finished buttons as flattened JPGs in a new directory.

CAVEAT: I wonder the best way to handle lengths of names - i.e. Ian vs. Anjola-Oluwa...? Easy if the text is straight to just make it centered. But most buttons look better with curved text, in which case, I design it for about 12 letters, then add spaces before and after short names to center them so the curve remains usable.

The final images are saved as jpgs, with the black around it. The reason for this is that to the best way to make the buttons is to simply have them printed as 4x6s at a photo lab (way cheaper than inkjet). Then they are cut out either with a die press, or a circle cutter, and then fitted into a die machine to crimp the button backing and cover. The outside remains a dark color so that if the button is cut or mounted slightly off center, there is not a white partial circle showing near or on the edge of the button. I do not just leave an open bleed around it because the buttons are aligned for cut manually, so some sort of guideline is necessary.

I am not at my vision workstation, so I can't load a PSD with the text layers right at this time - but I can later if it might help you figure out the process. (I can do actions, but I am clueless to scripts...)

Here are some example buttons, and a banner:examples.jpg
 
Last edited:

Dormeur74

Power User
Messages
204
Likes
180
Perfect explanation. It will be easier to help now. Can you send me by private message a photo with its metadatas. I must know where to find the firstname.
 
Last edited:

Dormeur74

Power User
Messages
204
Likes
180
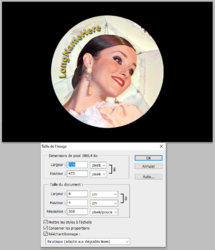
The script is ready, but as I have no photo with your metadatas inside, I cannot finish it. I tried it with some photos centered and prepared in 440x440 px (300 dpi) and it works fine. I had not to change the position of the photos in the overlay. I tried it with a very long name and think (my opinion) that it will not be necessary to cut or modify names. The final image will be saved in PSD format to let you modify an eventual error in a name or change the position of the photo. A last word : whether the circular name is short or long, it will always be centered at the top left of the layer. See photos.

button1.jpgbutton2.jpg
 

Top