What's new
Photoshop Gurus Forum

Welcome to Photoshop Gurus forum. Register a free account today to become a member! It's completely free. Once signed in, you'll enjoy an ad-free experience and be able to participate on this site by adding your own topics and posts, as well as connect with other members through your own private inbox!

Eliminating a border on feathered image


Tonyinoz

New Member
Messages
3
Likes
0
Hi All

Looking for some suggestions here.

Attached example. Face is blurred as I don't have the persons permission to use.

Frequently when I copy an image and feather edges it looks fine in photoshop. When I import it into another program the edges show.

How can I get rid of these. If the part is taken from the body of a photo it seems to be OK. It only seems to happen when getting near the edge of a photo.

Thanks in advance for any assistance,

Regards

Tonytest8.jpg
 
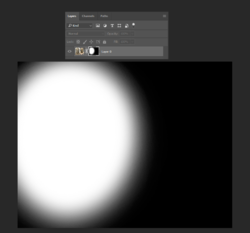
Check the image I have with the mask (Only mask is shown but the image can be seen from thumbnail). At this stage, if you hold Alt key and click on the mask, it shows only the mask on the PS screen just like below. If you do this to your image, you will see how abruptly the feather is disturbed at the top, bottom and left edges.
1.png
To overcome this, you have to:
1) Reduce Feather value so it does not extend beyond the edges,
2) get your selection border closer to the face or
3) retain those values but extend the background so your feathered edge shows well enough.

If anything is unclear, revert.
 
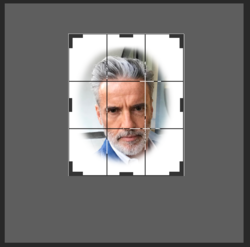
Another way would be to extend the canvas around the photo with the Crop Tool
Edit: Did not see @polarwoc's suggestion #3.......this is what he was referring to.

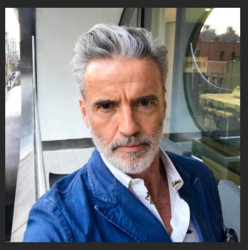
Original
Screen Shot 2020-01-19 at 1.46.58 AM.png

Extended canvas with a white BG. Use the Crop Tool to extend (Hold Shift + Opt/Alt to restrain proportions)
Screen Shot 2020-01-19 at 1.47.16 AM.png

Make a selection with the Elliptical Marquee, feather set to 20-25, inverse selection (Cmd/Cntrl + I)
Add layer mask from selection.
Screen Shot 2020-01-19 at 1.47.36 AM.png

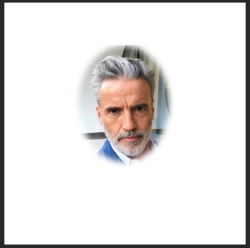
Output. Notice I have an edge at the top.
Screen Shot 2020-01-19 at 1.47.55 AM.png

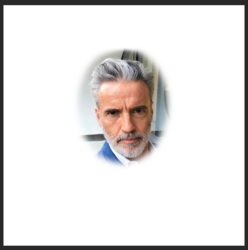
On the layer mask, use the Brush Tool set to black, 1% flow, 0% hardness, 1% spacing to clean up the visible edge.
Screen Shot 2020-01-19 at 1.48.16 AM.png

Go back to the Crop tool and crop the image if needed.
Screen Shot 2020-01-19 at 1.49.48 AM.png

Screen Shot 2020-01-19 at 1.50.42 AM.png

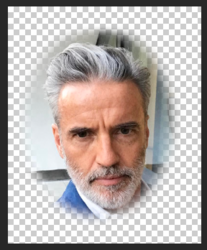
This method allows you to visualize the hard border edge and repair.

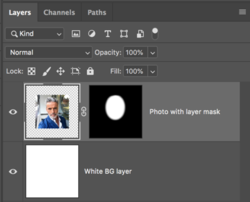
If you wanted, you can also turn off the white BG layer and have a transparent BG.
Screen Shot 2020-01-19 at 2.00.54 AM.png

Layers panel before final crop.
Screen Shot 2020-01-19 at 2.02.35 AM.png
 
Wow! That was a nice, detailed explanation @IamSam . Glad I followed it. I did not know that Crop tool can be used to extend the border too. There is a first time for everything. Thank you.
 

Back
Top