What's new
Photoshop Gurus Forum

Welcome to Photoshop Gurus forum. Register a free account today to become a member! It's completely free. Once signed in, you'll enjoy an ad-free experience and be able to participate on this site by adding your own topics and posts, as well as connect with other members through your own private inbox!
Help with changing colour


Beermonster68

Member
Messages
16
Likes
0
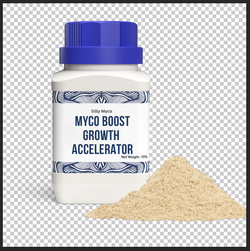
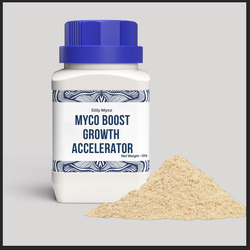
I've been trying for days to get this work, I have a bottle what I want to change the colour of the contents which I can do, but the colour isn't the same as the picked colour, it's much lighter, for example the attached shows red but the bottle is closer to pink

Untitled-1.jpg
 
Hey. All we can see is the layers and not the actual "jar/bottle" that you see on the canvas. But if I were guessing, the original color of the "jar/bottle" (yellow?) may be interacting with the new red color layer and causing the the "jar/bottle" to be slightly lighter than what you want. All layers below the PILE_COLOR layer are being affected by the color layer. I would suggest layer masks or clipping the color layer to the parts you want a color change. Another possible solution may be to adjust the color layer until you have the color you desire, change the blending mode from color to multiply, or you can adjust the the yellow "jar/bottle" layer to be white.

It would be helpful if you posted the PSD file for us to experiment with. Or at least an example photo of the jar and powder.
 
Here's a sample image.

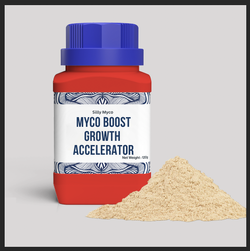
Original image. I could not find one that was yellow.
Screen Shot 2025-12-07 at 10.35.13 AM.png

Added grey background.
Screen Shot 2025-12-07 at 10.35.47 AM.png

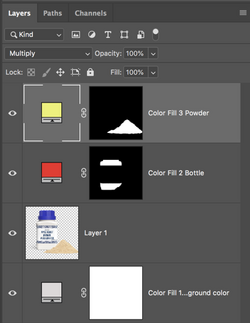
Selected the bottle and used layer mask and color fill adjustment layer set to multiply to change bottle color.
Screen Shot 2025-12-07 at 10.36.00 AM.png

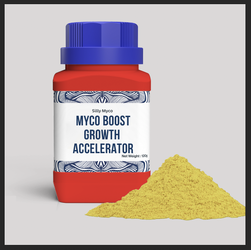
Selected the powder and used layer mask and color fill adjustment layer set to multiply to change powder color.
Screen Shot 2025-12-07 at 10.36.11 AM.png

Screen Shot 2025-12-07 at 10.39.31 AM.png
 
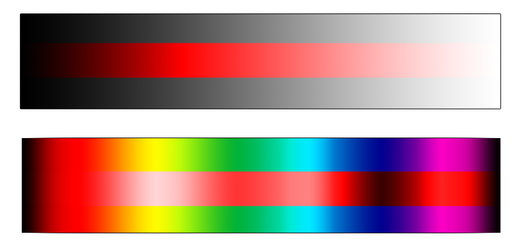
Some additional thoughts. The "color" blend mode—and pretty much every other blend mode—will always interact with the layers below it. In the image below, I created a black-to-white gradient and then placed a band of pure red on top of it, where the red band has a blend mode of Color. As you can see, the resulting shade of red is heavily dependent on the underlying darkness/brightness of the layers below.

In the bottom half of the image, I did the same thing except that I used a "rainbow" gradient as my base. Once again, the resulting red in the "color" layer is affected by what's below it.

There are many way to change the color of something and the best solution is often dependent on what image you're starting with. @IamSam shows one way in the post above. Other ways include using the Colorize feature in the Hue/Saturation adjustment, or using a Gradient Map.

If you want to stick with a blend mode of Color as your approach, here is a tip for getting better control of the result.
  • Make a selection of the area that you want to re-color and change it to Black & White by using a B&W adjustment layer.
  • Using the same selection, add a Levels adjustment layer above that.
  • Finally, add your "color" layer above that. By experimenting with the darkness/brightness in the Levels adjustment, you can fine-tune the resulting shade of red.

1765126432494.png
 
Excellent guidance above. I played with this a bit myself -
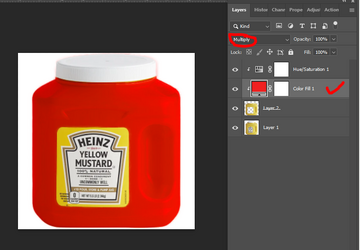
- selected the yellow mustard in the jar and placed it on its own layer
- added a red solid color layer, clipped it to the layer below, and changed the blend mode to multiply
- added a hue/saturation adjustment layer, clipped it to the layer below, and adjusted the slider as needed to change the tone of the red

1765127873261.png

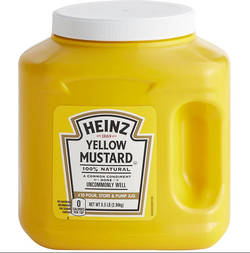
This is the orignal mustard jar


1765127954137.png
 
Thanks!!

Just change your color layers blending mode from "COLOR" to "Multiply". Then clip it to the layer below. You will have to adjust your selection(s).

Screen Shot 2025-12-07 at 12.07.45 PM.png
 
This is all you need. Selection (on layer mask) made entirely with the Brush Tool. Takes a little time but the results are worth the effort on such a small image.

Screen Shot 2025-12-07 at 12.36.46 PM.png
Screen Shot 2025-12-07 at 12.35.33 PM.png
 
Hi @Beermonster68
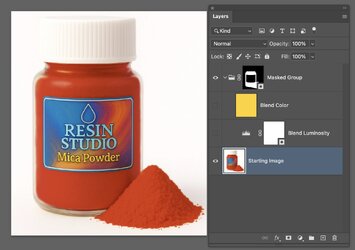
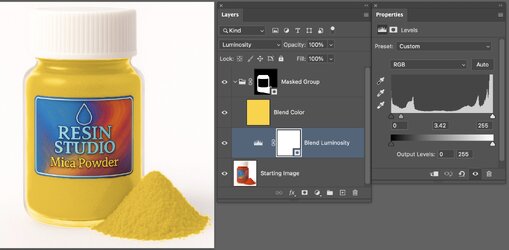
Here is a similar yet different Layer Stack and blending modes that may give you more direct control of the color and Luminosity (and maybe understanding of what you are doing)

Here is the Layer stack. The starting image was your red result. The next two Layer (turned off) are gouped with the group Layer having the Layer Mask to isolate the changes you want.
Screenshot 2025-12-07 at 1.01.19 PM.jpg

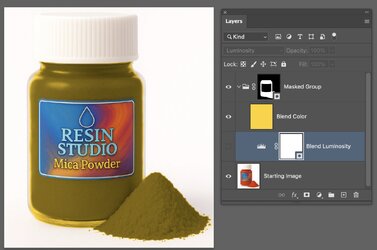
I now turn on the Yellow Layer that the blend is set to Color. This says use the Color of this Layer and the Luminosity of the Layer below. It is the correct color yet with the luminosty of the red image:

Screenshot 2025-12-07 at 1.07.27 PM.jpg

Now I turn on the Layer just above the original Layer, which is also in the Grouped Layers. This is a Levels Adjustment Layer with the Blend set to Luminosity. Changing the Levels adjustment Layer leaves the Color alone from the original image and only adjusts the luminosity. I moved the middle slider to the left to raise the overall luminosity.

So this combination of the Levels Adjustment Layer (Blend Luminosity) and the Color Layer (set to Color), sets up independent adjustments of the color and luminosity of the masked areas of that group.

Screenshot 2025-12-07 at 1.11.56 PM.jpg

There are many adjustment sliders in the Levels adjustment layer that you can try, and you could also have instead used a Curves Adjustment Layer instead of the Levels adjustment Layer (though that is a bit touchier to use).

Just another way to consider to get to the same result

John Wheeler
 

Back
Top