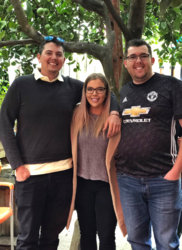
This is what I obtained in the end...:

...and this is how I approached it:
1) Make a copy of the background layer
2) Set about to select out the guy with glasses on. Many selection methods are available but I chose the "Quick Selection Tool" to start with and got a rough selection like this:

As you can see, there are lots of areas like near his Right Jeans pocket, his Right knee, the fold near his tummy, his ears, hair, etc that need a careful selection. Hence I proceed with the Quick Mask (enter Quick Mask Mode by pressing shortcut key Q). Depicted below is the Quick Mask Mode and the areas that I would like to target with better selection:

In Quick Mask Mode, I zoom in very close, ensure that every area that I do not want included is in that reddish colour while areas I want selected are without reddish colour (this is achieved by using Brush Tool with keyboard Shortcut B; painting with Black reddens-excludes from selection- and painting with White removes red-marks for selection-. Use keyboard shortcut X to toggle).
Tip 1: Do this process at a minimum of 200% zoom if you want a proper selection.
Tip 2: While using Quick Mask Mode, make use of soft brush and Hard brush judiciously. Soft brush is used when you want a slight bit of pixelation at areas where edges are not clearly demarcated, like hair. Conversely, you would use a hard edge brush when you can see the edge clearly demarcated - most of these areas with clear demarcations are already selected properly by the Quick Selection Tool.
Tip 3: Freehand drawing in this mode could get tedious and prone to mistakes, so use the Shift Key to get straight lines. It saves you a lot of time and gives better results.
Tip 4: Change the brush size as per need to save time.
Tip 5: A good quality mouse or even an entry level tablet give you an advantage with the Quick Mask Mode and making manual selections.
Tip 6: Switch between Quick Mask Mode (pressing key Q) and out of it (pressing Q again, working as a toggle) lots of times to see how your progress is going.
Tip 7: Deal with (what I call)Ghosts otherwise, they haunt you later. Check this image:

As you can see, I am working with over 200 % zoom. Arrows point towards areas on the selected body that overflow, tresspassing into where they should not be. Just take a White brush with about 65% softness to nudge them back. Do not get very close to the edge when you have a soft edge, just close enough so that the edge between normal and red coincides with the selection edge. Next picture shows how I have dealt with (what I call)Ghosts but there is still a little overlap of Red over the area of selection that needs to be pushed back.

This is where you weigh in on how accurate you want to be on one side and how much time you want to spend on the other.
This is how it looked after the Quick Mask Mode:

Still remaining is the hair and his Right cheek with beard, which will be finessed using the "Refine Edge" tool within "Select and Mask" tool while selecting the "Output Settings" as "New Layer with Layer Mask". Rename this layer "PersonSelection". After that, this is how the image looked:

Look for any areas that were overlooked or where the "Smart Selection Radius" has overstepped. As is clearly noticeable, the guy's Right knee area still needs work and that will conclude the selection process. Since we have a mask, select it, then select the Brush tool and manually correct areas that need correction. This concludes the all important selection process. You would have completed the most difficult part of the process at this stage.
3) Now our aim is to fill the area that was occupied by the person with believable background.
In most cases, the Fill tool does a good job. In this case, however it did not help much. Skip this step if you want, but I will describe it because it is a generic procedure I follow.
Select the duplicated layer obtained from Step 1. Then, press and hold CTRL key while clicking on the MASK from the layer obtained in the Step 2 above. It is illustrated in the diagram below. This will result in a selection of the person. Next, click SHIFT while pressing in F5 key to bring up a Fill dialog window. Make sure settings are the following : "Content Aware" for Contents, Check Colour Adaptation, Blendin Mode Normal, Opacity 100% and Preserve Transparency unchecked. Click Ok and the result is shown in Green box below. As mentioned, most parts of the Fill job are not usable in this case, but in most cases, this can work magic, as can be seen
here.

4) Since the aim is only to move the person Leftwards a little bit, only the area that needs covering needs to be worked on. Besides, after the person is moved Leftwards, the Right side of the photo can be cropped out. The person has been moved Leftwards as shown in the picture below. The areas that need work are highlighted with ellipses and the green line is where the picture gets cropped. These edits are best done on a layer of their own, so create a new layer calling it "CloneStampLayer" and use CloneStampTool to cover up the residual edges.

This concludes the tutorial. If you have learnt something new, practice it and keep using the new technique wherever applicable in future work. Show us your result if you don't mind.