What's new
Photoshop Gurus Forum

Welcome to Photoshop Gurus forum. Register a free account today to become a member! It's completely free. Once signed in, you'll enjoy an ad-free experience and be able to participate on this site by adding your own topics and posts, as well as connect with other members through your own private inbox!

How to wrap an image on to 3D object (say a back cover on a phone)


sanshr

Member
Messages
23
Likes
5
Hi there,

I am trying to wrap an image on a phone back.

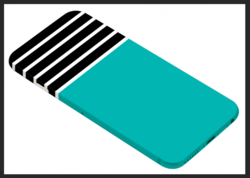
First of all i make selection with Pen tool of phone's back and make kinda template of it.
Then i place an image on template.
Going to Edit>Transform>Distort tool, i adjust the image's positions to match the edges of phone/template.
After that i create clipping mask of image to the template.
here is the screenshot for what i did.
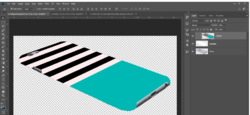
mockup.png

Its a bit tedious to work with every image. I know there is a better way to do this but could not be able to figure it out.
Also it doesn't look good in the result. I want the stripes of image should also bend with edge of phone to look realistic. Should i go to create vanishing point or is there another way. Please help me.

Thanks in advanvce

Sandeep
 
Hi Sandeep,
Since your Template layer is flat without the actual shading information which is on the Phone layer, you are unable to see it. I would suggest you to clip the STR1021 layer to Phone layer and also change the blending mode of STR1021 layer. Try different blending modes and see which suits.
Let us know your results.
 
The best result will always be obtained by using the 3D feature in PS (or other 3D program) but it is possible with PS.

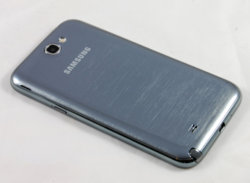
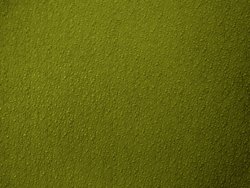
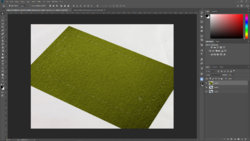
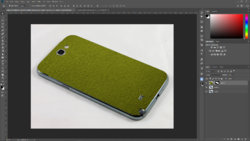
I started with a smartphone and a material
001.jpg
bumpy plastic-texture.jpg

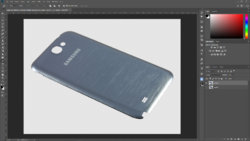
Make a selection of only the back cover using the pen tool.
Press CTRL + J to place the cover on his own layer.002.jpg

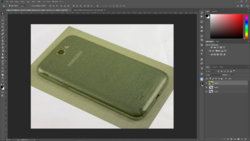
Drag the material on top and reduce the opacity.
Use free transform to make the perspective fit (in this choosen material not so important but with a geometric pattern it needs to be in perspective.
003.jpg

CTRL + click on thumbnail cover (marching ants will appear) and then select the material layer

004.jpg

Add a layer mask to the material layer

005.jpg

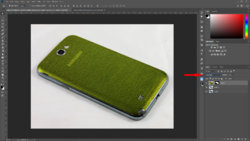
Make the material layer active and change the blend mode to hard light (in this case but you might wanna experiment)

006.jpg
(Note: this was a quick job...)

As I said before, when using a geometric pattern as material and before clipping the material layer you'll need to use the warp tool to reproduce the corner bends...
 
Last edited:
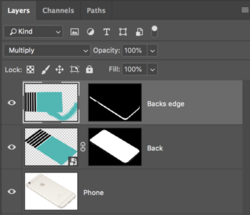
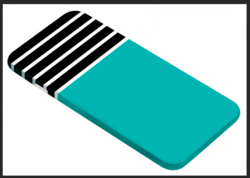
It's not a perfect solution but your going to have to make a selection of the phones edge and re-position the a copy of the cover material. You will have to use free transform to match the stripes and set it blending mode to multiply. You may also have to brush in areas that are not covered.

You would have to really work with the edge to get it to look rounded like the case/phone.

This is a quickly made example.
Screen Shot 2018-07-27 at 8.17.54 AM.png

Screen Shot 2018-07-27 at 8.20.58 AM.png
 
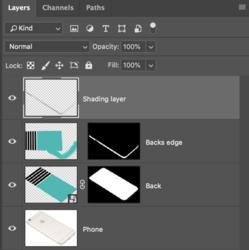
Another option to the blending mode change would be to create your own shading layer using a selection made from the backs edge layer.

When using a striped pattern like you have chosen, your going to have problems with the edge. There's really not a great solution for this, just lots of hard work to get it to look right.

Screen Shot 2018-07-27 at 8.31.38 AM.png

Screen Shot 2018-07-27 at 8.31.46 AM.png
 
Thanks polarwoc Eggy and Sam for your ample time and explanation but none of the above worked for the desired result. material could be anything like floral, geometric pattern stripes etc and curves will also have different of various phone models. I was finding a workaround that could make texture position perspective with model and covert it to smart object, double clicking to it and change the pattern accordingly but edges and curves make me suck.
 
I was finding a workaround that could make texture position perspective with model and covert it to smart object, double clicking to it and change the pattern accordingly but edges and curves make me suck.
There's no problem...............you can still do this with smart objects, you just have to do some prep work in advance.
 
There's no problem...............you can still do this with smart objects, you just have to do some prep work in advance.

Yes i have done and it looks pretty same as i was expecting.

So when i double click to image which is smart object and clipped to the template, a new tab open with that image.
I place another image over to it, create clipping mask to it.
When I try to close the tab, photoshop prompt to save that jpeg file. When i go for yes, photoshop open the file location box for a psd file. ??????

The second image doesn't place over phone.

Its something unusual or i am committing mistake somewhere.
 
I have played with the PSD file and it does exactly what you say it does. I think this is just a matter of how you have it set up.

I have an appointment to attend, so I will work on this a bit later.
 
OK, here's what I can tell you. For some reason that I'm not sure of is that when you double click on your smart object, you get a
JPG file..........
Screen Shot 2018-07-31 at 1.26.22 PM.png

When it should be a PSB file.
Screen Shot 2018-07-31 at 1.26.48 PM.png

I'm not sure what went array.

Take a look at how I have the mock-up file set up. If you have any question about how I made it, let me know.
 

Attachments

  • iPhone-6-950x734_01.psd
    7.1 MB · Views: 3
Hi, thanks for the awesome psd you shared. Beautiful result. however i figure it out my mistake, though its a common practice but rather photoshop strange behavior i guess :p. The first image, or the image you want to make a smart object must be place by copy and paste rather than drag and drop or going to file>place embedded. once you positioned that image and make it smart object, you can then double click on it that result a psb file as new document.
 
There's often a misunderstanding in how to create mock-ups using smart objects. I used a technique commonly referred to as a perspective mock-up.

This is the exact tutorial that taught me how to do this with one minor change, at 2:44 of the video, you do the extra step of duplicating the smart object. Turn off the duplicated layer then continue following the tutorial. Later this layer will be your "click on me to change" layer.

https://phlearn.com/tutorial/how-to-make-a-billboard-advertisement-in-photoshop/

I'm certain there are other tutorials that I have watched on how to do this, I will look for them.
 
I got the desired results now.Thanks a Ton to all of experts for their support and tutorial. :)
 

Back
Top