John -
Despite your clear and helpful message Photoshop still has me confused.
Here are a couple of questions that I've illustrated with some sample layers. My actual file has too many layers!
If you'd prefer I can post these questions to the whole group.
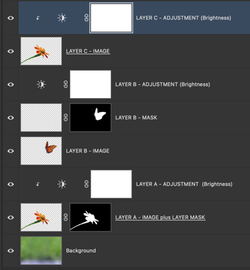
Are any of the below three layer groups (A,B,C) correct?
Starting at the bottom with "Layer A" - I selected an object in my image and created a layer mask from the selection, which automatically puts the mask in the same layer as the image. I then decide to add an adjustment layer, which goes above those two. If, as you said, I am instead to "use the Layer Mask on the Adjustment Layer" does that mean that the Layer Mask goes ABOVE the adjustment layer? How to get it there?
Or is "Layer B" more correct?
Layer C just has an image and an adjustment above it. If I want to add a Layer Mask, should I insert it in between the Image and the Adjustment Layer? How is that done?
View attachment 142666
Hi
@John BkNY
All forum members can see your above post, so you don't need to do anything else.
For my first response, let me show you two ways to approach what I believe would work for you. After that, if you need specific comments about the Layer Stack you have shared, ask.
First, if you are trying to adjust part of the image without affecting other parts of the image, here are the steps
- Make a selection around the part of the image you want to be adjusted
- Now add a Layers Adjustment Layer. What happens is that the selection you made is converted to a Layer Mask
- Now you use the sliders on the Layers Adjustment Layer, and it will affect the area
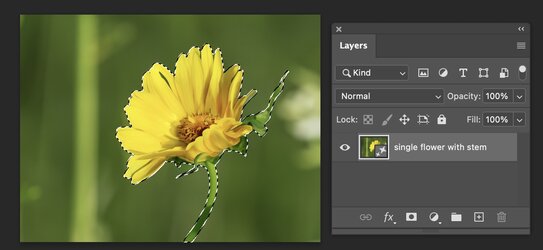
Here is an example of an image with a flower in the image, and I only want to adjust the flower in the image:
I select the image:

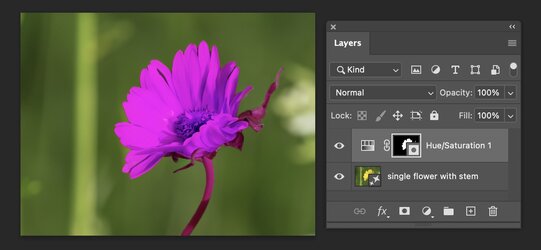
I added a Hue Saturation adjustment Layer, and the selected is converted into a Layer mask on the Layer.
I adjusted to change the color of the flower, and the rest of the image was left alone.

Now, if you have a separate image (e.g., a flower by itself) that you want to add into the image and then adjust the flower and not the background, here is what you do:
- As you have shown in your examples, the flower I am adding to the Layer Stack is surrounded by transparency. With this being the case, you do not need a Layer Mask. The transparency around the flower will allow the background image to show through.
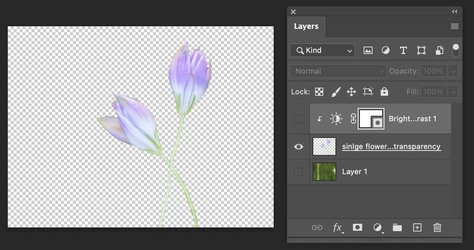
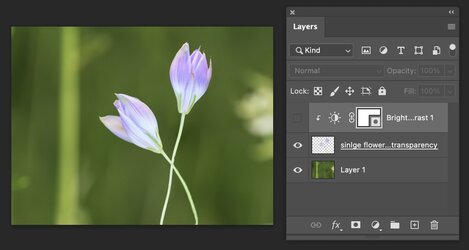
Here is an example of a flower with surrounding transparency that I want added to the scene:

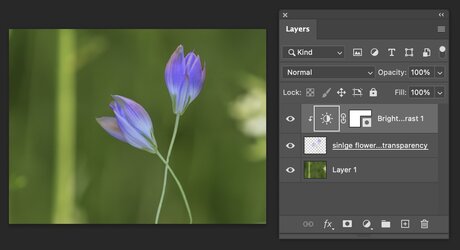
Here is background made visible with the flower that is surrounded by transparency:

You then add an adjustment Layer on top of both Layers. To make sure that the adjustment Layer only affects the Layer directly below, you right-click on the Layer Thumbnail in the blank area on the right side of the Layer in the Layers panel. One of the options in the dropdown is "Create a Clipping Mask." This means the Adjustment Layer only affects the Layer directly below. I reduced the brightness of the flower this way and note that the background was left alone: I note that in one of your options you used a Clipping Mask.

I hope this helps, and if you still have questions, just ask away.
John Wheeler

