What's new
Photoshop Gurus Forum

Welcome to Photoshop Gurus forum. Register a free account today to become a member! It's completely free. Once signed in, you'll enjoy an ad-free experience and be able to participate on this site by adding your own topics and posts, as well as connect with other members through your own private inbox!

eliminating scanner noise


nickyk

Member
Messages
7
Likes
3
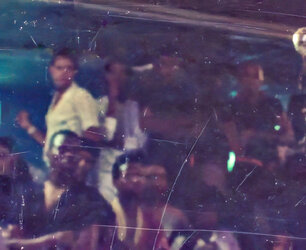
Dear All, I have a number of scanned image files, scanned from 35mm color negatives on an Imacon scanner at 8000 dpi. A detail is below attached. In all of them the appearance of film grain transformed to a subtle blizzard of green clusters of pixels. It might be just two pixels or it might be six or seven, etc. (This clearly has something to do with the grain pattern of the fairly high speed film used and push processing.) The question is, if there's a way to change these green pixels to take on the color of the background they're adjacent to, so that the image appears less green pixel-y overall?
Thanks!!

small detail.jpg
 
Hi @nickyk
I don't think this is just a green pixel issue, yet quite a bit of color noise across the spectrum.
As a sample approach, here is what I tried for your consideration as approach
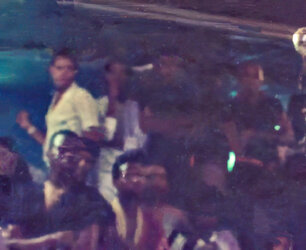
1) Here is using the Topaz AI filter with noise reduction

scanner-noise-topaza1-autopilot.jpg

Here is with Camera Raw Filter to adjust the tone some added to the previous image:

scanner-noise-topaz-plus-Camera-raw-filter.jpg

And then add a spot healing brush over the scratches.

scanner-noise--plus-spot-healing.jpg

You will have to be the judge if that is an appropriate direction for you to take on your high-noise slides
I hope this helps some
John Wheeler
 
Thank you John. Thank you Chris. Thank you both for working on this. I think calling it a noise, as opposed to a green pixel issue makes sense. The solutions you've experimented with are instructive. Perhaps I could apply them, to a lesser degree, as a compromise. The effect now smooths a bit too much detail that the grain holds, in spite of the noise/green pixels, or maybe even because of it. Up to this point I have dealt with these images, cloning for weeks. It works but I'm a bit over it. OK. I will keep experimenting. Thanks again for the support!!
 
You're welcome @nickyk and I did try another approach.

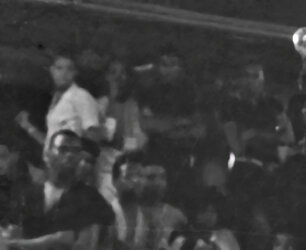
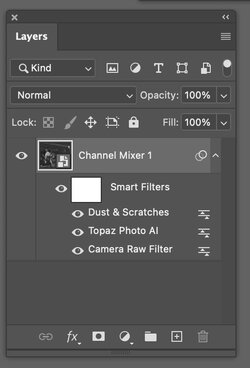
I only used the red channel then added camera raw filter for tone, Topaz filter for noise, and then dust and scratches with the following result:

Black-and-White-version.jpg

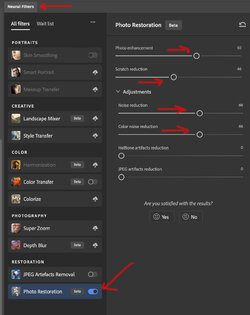
Screenshot 2024-04-19 at 10.44.29 AM.jpg

It might be able to eke out a bit more detail, yet it is quite limited by the original noise.
Just another path to try
John Wheeler
 
there are times when i think trying to make a silk purse out of a sows ear is way too difficult for the result. no offence meant to op.
 
Thanks again, John. Can I ask you to explain the channel mixer approach a bit more basically? If only working on the red channel turns the image b&w how do you get it back to color? Channels have always befuddled me!
 
Thanks again, John. Can I ask you to explain the channel mixer approach a bit more basically? If only working on the red channel turns the image b&w how do you get it back to color? Channels have always befuddled me!
HI @nickyk
First, I did not add the color back in, yet I can show you how to do so.
First, to clarify, as I did not provide all the details, I took your original image and added a channel mixer adjustment Layer set to Monochrome. I set the Red slider to 100% and turned off the Green and Blue channels by setting their sliders to 0%. I turned those two Layers into a Smart Object and then applied the other filters to get the black-and-white result.
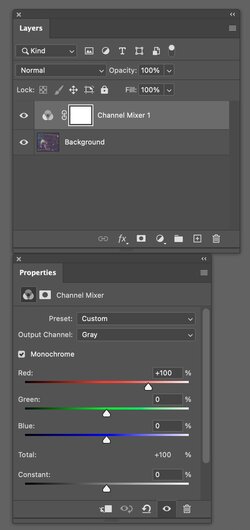
Screenshot 2024-04-20 at 8.09.03 AM.jpg

Now starting with the last Layer Stack, I added the color back in here.
First, I added another Layer by File > Place Embedded and put your original image back in as a Smart Object. I then set the blend mode to Color so it would use the Color of your original image yet the Luminosity of the Layers below:
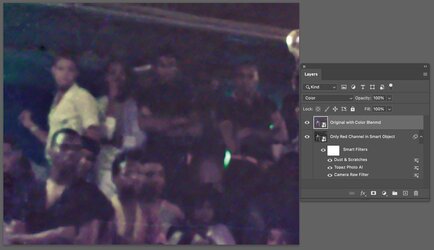
Screenshot 2024-04-20 at 8.05.53 AM.jpg

That added the color back in yet that has color noise. There are various ways to reduce the color noise, and what I did was to turn that top Layer into a Smart Object and then apply a Gaussian blur to that Layer and set it to a few pixels to take out the pixelated color. That is not perfect yet helps make it less obvious:
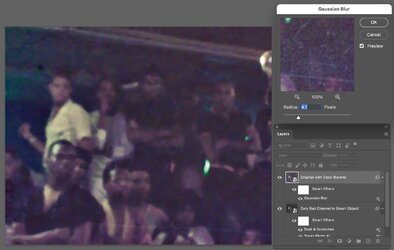
Screenshot 2024-04-20 at 8.07.47 AM.jpg

You still don't have perfect color, and if you need higher quality, other techniques would need to be used, depending on how much post-processing you want to apply.
For the most part I am just trying to show you directions you could take to proceed, they are not the only approaches.

Hope that helps some
John Wheeler
 
Interesting. This technique was once explained to me as tired and true but I didn't follow the work flow and even with your instructions I got something wrong - I couldn't make the channel mixer layer look like yours, as a smart object. Not sure why. But simply by passing the smart object option(s) all together I, after the channel mixer layer, I place embedded the original image and blended as color but then added an new layer on top of the original image, varying the opacity to let some of the original grain through. This actually looks promising, just to tone down the most egregious noise a bit. Thank you so so much! best Nick
 

Back
Top