I'm not a coder.. but the last time i did something like this i used Dreamweaver spry menu bar to do it...
Take the psd in Photoshop and if already not done when you bought it use guides then the slice tool to slice it in to the sections for each button and the graphic in the middle. save it out for web and devices .
Once you have all the individual buttons and elements that you need then open Dreamweaver.
Now use Div Tag to create the Navigation area or insert the spry menu bar where you require it to be on your site.
Once the spry menu is in you can start to modify it. this will take some time i have to say if your not use to doing it.
There will be around 19 to 20 areas that you can modify which is how the nav bar functions, one of them is back ground images.
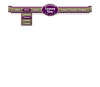
What i usually do is take note of the size of the slice images of the psd , how many images i have to create the bar, for example 10 images for 10 buttons. One thing to remember when slicing your buttons is get them all the same size except for the graphic in the middle. this helps when doing the spry menu layout in Dreamweaver.
First is to put the spry menu in to Dreamweaver , then center it, then add more button areas and drop down areas till your happy with it, then target the css of the spry menu bar for images for each button and drop down button.
There is quite a lot more to it than just this explanation but here is what i think is a good enough tutorial on spry menus and how to modify them.
http://www.youtube.com/watch?v=JAgWMDt2Otg.
He makes his own bg images but you can just use yours.
Then there's another way without using the spry menu asset, this is to slice the images as mention and create your own menu bar using div tags and css.
As i said i'm not a coder by any means.. and there will be some one who would probably be able to help you more than me..
But what ever you use as images for your buttons they need to be slice from the psd.
Mind you it was about 12 months ago i last used a spry drop down menu so things might have changed a little since then, but i hope this at least gives you some idea in which direction you need to go.
By the way when you first insert the menu it already has set colors and rollover colors etc, when you do yours you will be changing them.