Photoshop Gurus Forum
Welcome to Photoshop Gurus forum. Register a free account today to become a member! It's completely free. Once signed in, you'll enjoy an ad-free experience and be able to participate on this site by adding your own topics and posts, as well as connect with other members through your own private inbox!
You are using an out of date browser. It may not display this or other websites correctly.
You should upgrade or use an alternative browser.
You should upgrade or use an alternative browser.
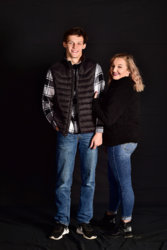
Back light didn't fire, Help plz
- Thread starter suzieqq90
- Start date
thebestcpu
Guru
- Messages
- 3,329
- Likes
- 3,071
Did you shoot the image with a camera that saved in raw format. If yes, could you share the raw file. A better result can be achieved with a better starting image.
Also, can you provide an image where the backlighting did fire correctly. That would make it easier to duplicate a similar effect.
Just suggestions
John Wheeler
Also, can you provide an image where the backlighting did fire correctly. That would make it easier to duplicate a similar effect.
Just suggestions
John Wheeler
- Messages
- 24,139
- Likes
- 13,717
John, I believe that the OP is only looking for suggestions. This was posted in the wrong section.A better result can be achieved with a better starting image.
how should I go about doing this? any suggestions would be appreciated. Thank you
But examples where the backlighting did fire will help in giving advice.
- Messages
- 24,139
- Likes
- 13,717
I briefly experimented.
I made a (quick and bad) selection of the subjects and used a Solid Color fill adjustment layer set to "soft light" to lighten the BG.
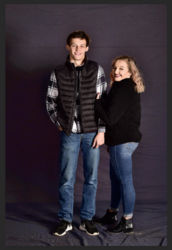
I then added a new layer with some stronger back lighting using the Brush Tool.
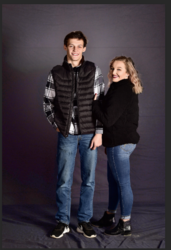
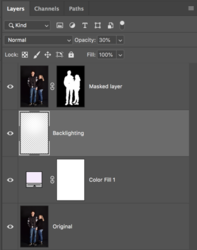
It was here that I realized (as well as reading Johns response) that I did not know what I was shooting for. I would need to see an example of a successfully back lit photo.
I made a (quick and bad) selection of the subjects and used a Solid Color fill adjustment layer set to "soft light" to lighten the BG.

I then added a new layer with some stronger back lighting using the Brush Tool.


It was here that I realized (as well as reading Johns response) that I did not know what I was shooting for. I would need to see an example of a successfully back lit photo.
thebestcpu
Guru
- Messages
- 3,329
- Likes
- 3,071
Good point by IamSam
It seems that what needs to to be done is a careful selection converted into a Layer Mask of appropriate Adjustment Layers.
One way to get a better selection is to create a temporary tone adjustment to increase contrast and bring up the black point (e.g. with curves adjustment layer. The only problem area is the black on black area and with the tone adjustment that boundary is easy to see and do a manual selection if needed. Image attached.
Then proceeding with changes such as what IamSam should above would bet you where you need to be.
John Wheeler
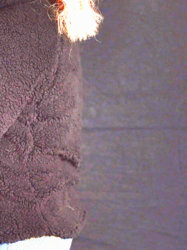

all of the photos a underexposed which makes it more difficult to work with. the attached file has a small backlight. I did shoot in raw and will send the raw file. ive edited some of the photos but taking a very long time and still no happy with the ones that ive edited.I will now upload the raw file of the above image.the raw file is a .nef file and it will not let me attach it. I suppose that I need to convert it.


thebestcpu
Guru
- Messages
- 3,329
- Likes
- 3,071
You can share the file on a file sharing site such as dropbox.all of the photos a underexposed which makes it more difficult to work with. the attached file has a small backlight. I did shoot in raw and will send the raw file. ive edited some of the photos but taking a very long time and still no happy with the ones that ive edited.I will now upload the raw file of the above image.the raw file is a .nef file and it will not let me attach it. I suppose that I need to convert it.
MentosCubing
Power User
- Messages
- 293
- Likes
- 398
This is what I came here to say. It appears that you've already said it, so I'm going to go a little more in-depth with tricks I've picked up over the years.Good point by IamSam
It seems that what needs to to be done is a careful selection converted into a Layer Mask of appropriate Adjustment Layers.
One way to get a better selection is to create a temporary tone adjustment to increase contrast and bring up the black point (e.g. with curves adjustment layer. The only problem area is the black on black area and with the tone adjustment that boundary is easy to see and do a manual selection if needed. Image attached.
View attachment 109243
Note that there's also a colour picker tool in the Curves adjustment layer (in Photoshop it has a hand icon, but in my editor it just says the word "Picker") that might help you immensely.
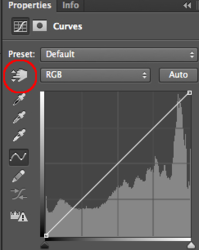
(screenshot of Photoshop from creativemarket.com)
If you find any distinguishable area of the edge, you can take the picker tool and drag down on one side of the edge, then do the same thing (but take it up) on the other side. This will increase the contrast on the edge.
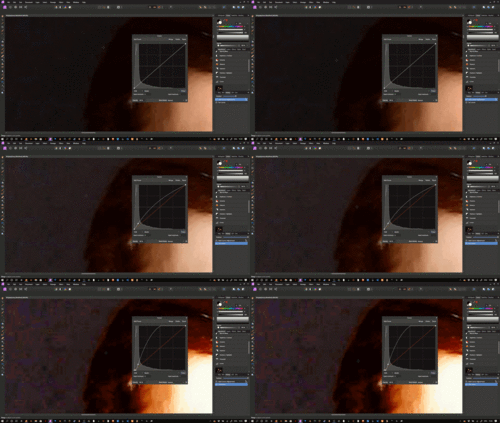
If nothing else works, there is one more option you could try. Take a Curves adjustment layer and make a tall wave shape like this.
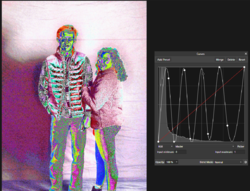
It will make your image look like one of those weird dank frog memes, but hey, it does help to bring out the edges.

