What's new
Photoshop Gurus Forum

Welcome to Photoshop Gurus forum. Register a free account today to become a member! It's completely free. Once signed in, you'll enjoy an ad-free experience and be able to participate on this site by adding your own topics and posts, as well as connect with other members through your own private inbox!

Bricks on house question


ex_teacher

Guru
Messages
569
Likes
1,179
The hardest part was making those red bricks white - got as close as I could without losing the texture of the brick.
A bit rough around the edges but should give a street-view idea of your changes.
At the risk of being nosey, did you cut out the bricks and CTRL+I ?
 
At the risk of being nosey, did you cut out the bricks and CTRL+I ?
Not being nosey and no problem with your asking.

I first worked on roof and gutters selecting and then apply a hue/saturation layer and just lowering lightness.

- For the brick, I first created a merged layer with CTRL+ALT+SHIFT+E
- Then I selected all the brickwork relying mostly on the pen tool
- Applied a mask to the merged image so only the brickwork was exposed
- Added a solid color fill layer with white and then switched the blend mode to Color
- Then added a curves adjustment layer above the solid fill layer and switched its blend mode to luminescence
- Played with the curves adjustment until I got to where I wanted the brick with ruining the texture and then grouped all the brick work
- Added a mask to the group so I could bring back any hardware I had covered, ie wall lights
- Added another curves layer above the group for a bit more brightening and retouch layer above it. Just fussing with it.

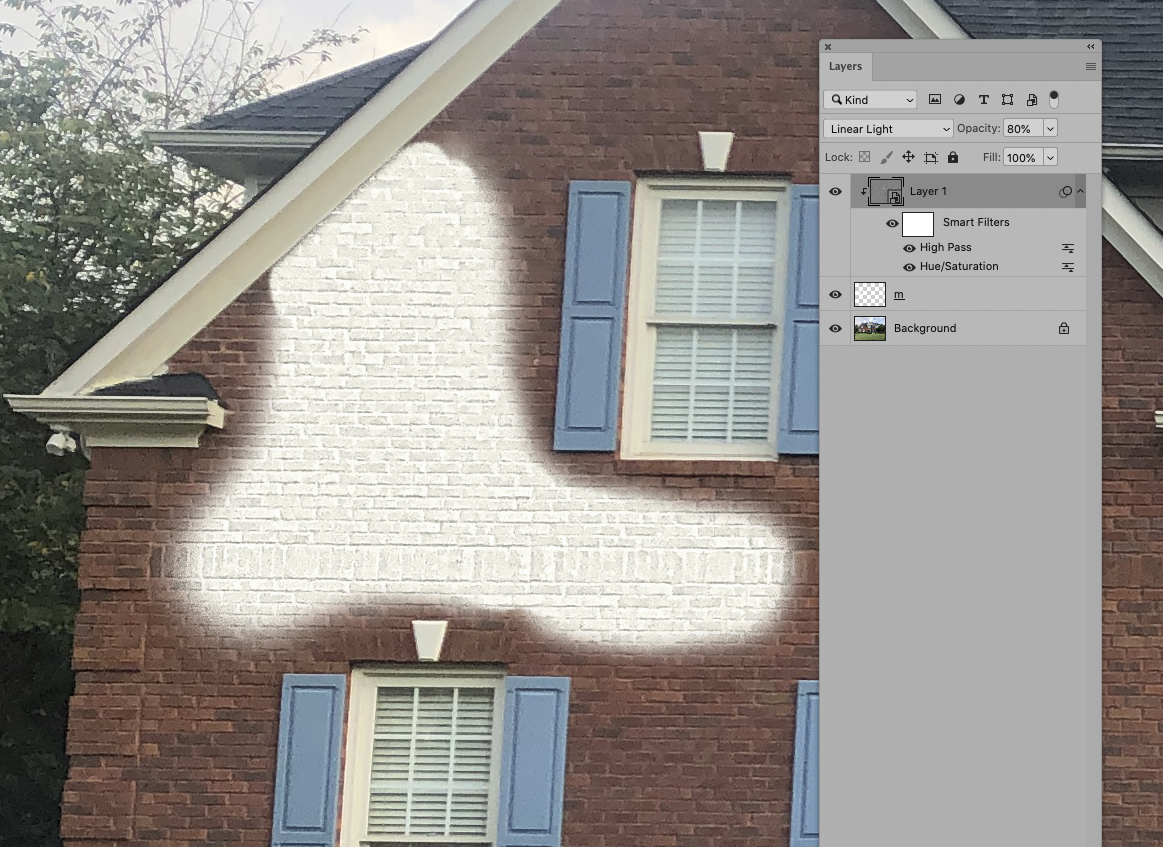
Here's my PS process:

1659530026268.png

Here's the histogram from the curves adjustment on the brick:

1659529740719.png 1659529818962.png

I had found several methods but this one worked the best for me. I think as with all things PS, different methods work on different images.

- Jeff
 
I actually did the "House Changes" free edit..................I did not post it because I could not get the brick to look right. At least for me!

Here's my completed image with distortion corrections.............almost all...........left out the chimney vent!
This was the best I could get but the brick still does not look "painted". It looks more like it was "white washed".

Click to enlarge
HouseColorChange_20.jpg
Screen Shot 2022-08-03 at 11.28.55 AM.png

This is the reason why I started this thread:
 
This was the best I could get but the brick still does not look "painted". It looks more like it was "white washed".

This was the problem with all the methods I discovered - the brick would come out whitewashed rather than painted. Some better, some worse. I considered the best of the lot and then would go in and retouch the bricks that were the worst. I then chanced upon a discussion in the Adobe Forum which got me the closest:


I think, as I mentioned above, there probably is no single method for this. Depending on color, texture, and quality of image, one method may have more success than another.

Worked two days just fooling with the brick...:facepalm:
 
Painting the brick white can be quick and simple if some factors are present. In this case the mortar is lighter than the brick and, if not, the brick color can be changed appropriately using a Hue/Saturation layer and making the bricks lighter.

Universally the biggest time consuming issue is selecting the bricks-mortar. After that is done, the next three steps to that selection are extremely quick; maybe 15-20 seconds total.
  1. CTRL + I …invert that selection…the darkish bricks turn light and the lightish mortar turns darker
  2. CTRL + L … a levels adjustment to appropriate tonality.
  3. Select or create an appropriate white color and create a Solid Color Layer in Color Mode. Make sure this layer is directly above the brick selection layer and create a clipping mask.
In this case my luck runs out because there are shadows on the brick that are now darker or maybe lighter than they should be. My quick solution in this case is to flatten the bricks and duplicate the layer and then use Levels to tweak one of these layers to match the shadows and the other to match the lights. I feathered the edges using a big eraser brush with a big soft edge. It almost works…but the whole process is quite quick

While the methodology I’m listing below doesn’t work if the bricks is made up a variety of brick values (for example a dark red, light mauve and some form of buff) it should work for many situations depending on how good a job is needed.

In a related thread more sophisticated solutions are proposed and the question arises, “How to change the reflectivity of the white surface to make it more glossy.” I was convinced that is was a matter of contrast…specifically localized contrast. I tried various Clarity and even spent way to much time using large radius small amount USM (say somewhere like 40,120,04) I’m not sure it is the answer, but I’m not sure it isn’t part of the answer either.

White Brick_PSG.jpg
 

Back
Top