Hi,
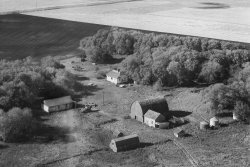
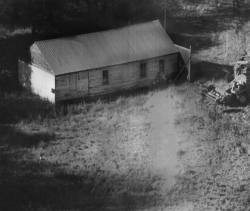
I tried to mend your image just out of curiosity and it turned out (not ideal) but surprisingly good. I did things like that before and they never worked out. Probably because I’ve used levels wrongly, plus my photos were in color, so it complicated the case some more. I must say it’s all based on Guy Gowans methods. He can be pretty irritating to listen (feel yourself warned), but in the same time I find him quite interesting.

The idea is to recover as many original details as possible in this specific spot. While doing it, you must disregard all area around it. Then, after that, paint it gradually back in to the original picture.
First I’ve tried to do just that, by copying your original layer and running auto level on it (inside the Levels options you should have clipping set to zero). It didn’t do much difference, because it disposed all shades of grey among pixels of the hole image. Not only on the problematic spot.
So I tried again but this time before levels, I’ve erased whole properly exposed portion of the picture, living only the white splotch and some area around it, needed for a repair. This gave much better result.
Finally I’ve added a black mask to it and with a soft brush around 10 or 20% opacity I’ve painted it in to the original.
The effect wasn’t perfect yet, but now I had same details to work with. To lighten or darken them to my liking.
I did it this way. With my new composite layer selected and visible, I went to Channels Window and by clicking (with ctrl pressed) on RBG channel, I’ve loaded a selection. Then I went back to layers and choose Curves. This gave me an adjustment layer with a mask proportionally protecting shadows. I called it highlights, because by moving the curve up I’ve only lighten bright areas. Then I put it in the group so I could add too it a second, simple black mask and paint it to the composite only in specific places.
To add more shadows I’ve copied the same group, but moved a curve down and inverted the inner mask with Ctr+I (the one copied from channels) . Than painted it in where I wanted.
To add more contrast with one stroke of a brush, you can put those two Curve Layers together inside one group. And this way, paint them in with one shared mask on top of a whole group.
There are still same additional problems to resolve. Like under a house, there is a fragment with no details at all. It probably must be mended by a tool like Content Aware Fill, Patch or Stamp Tool. The doors between windows were so feint that I practically painted them with highlights and shadows like on a painting. There are little vertical stripes in the middle of the house roof and front wall that need fixing. And bits that were initially invisible are more noisy and less sharp than rest of the image.

So by no means I say It’s the best or the fastest way to do it. Just it would be great, if my attempt could give you some useful idea.