What's new
Photoshop Gurus Forum

Welcome to Photoshop Gurus forum. Register a free account today to become a member! It's completely free. Once signed in, you'll enjoy an ad-free experience and be able to participate on this site by adding your own topics and posts, as well as connect with other members through your own private inbox!

Cleaning Up Noise


Landlocation

Well-Known Member
Premium Member
Messages
184
Likes
23
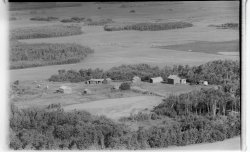
I am looking for suggestions on how to clean up the noise on this 35mm scan, looking to print this to a 14x20 image, have tried a few steps but I think there is more that I can do, ?????? Thanks, Kim
 

JeffK

Guru
Messages
2,497
Likes
2,898
I've actually been playing with Adobe Sharpen AI - did the trial and bought it. Now looking for excuses to use it. :)
The shot was quite blurry aside from noisy.
So I ran it thru the software then back in Photoshop, I used the Reduce Noise filter without preserving details, and then Surface Blur.
Got a decent result with more details and less noise. Let me know what you think.
- Jeff
Map 219-49-S1-0034-AI-edited.jpg
 

Landlocation

Well-Known Member
Premium Member
Messages
184
Likes
23
That is impressive, now I just need t o know how to do this, have more to work on, also have one that has some real bad markings on it , looks like something from the negative, neg is about 60 years old.
 

thebestcpu

Guru
Messages
2,994
Likes
2,760
HI @Landlocation
I rushed out my image and unlike @JeffK, totally forgot to include the steps on my approach. My apologies, rushing off to dinner and I left it off. Here are the steps.
- I used Topaz DeNoise to reduced the noise. I used manual mode to get a reasonable balance between noise reduction and sharpening other areas. I saved as TIFF so as not to introduce any additional issues from JPEG compression.
- I brought the TIFF file into PS and converted it into a Smart Object so I could apply filters as Smart Filters where I could go back and make adjustments as necessary.
- I then used the Camera Raw Filter for most of the other adjustments
--I used the graduated filter from top going downwards and increased the exposure since the top had a bit of dimming.
-- In the normal edit section I
---increased the contrast quite a bit (this also makes it look sharper
---reduced shadows slider and increased highlights slider to taste
---added a bit of clarity again to taste
---and added a bit of texture which does a decent job to fool the eye into sharpenss
---I did not use DeHaze yet for a grayscale image you might want to give that a try as well
--In the Details Section
---I increased the sharpness a little bit

I did not do much more yet for my own final product, I would do some cropping at the edges of the negative.

Hope adding the explanation if useful
John Wheeler
 

Top