What's new
Photoshop Gurus Forum

Welcome to Photoshop Gurus forum. Register a free account today to become a member! It's completely free. Once signed in, you'll enjoy an ad-free experience and be able to participate on this site by adding your own topics and posts, as well as connect with other members through your own private inbox!

Create a mask and subtract a specific part


Haris1977

Member
Messages
5
Likes
3
Greetings!

I am relatively new to photoshop but i came accross this:
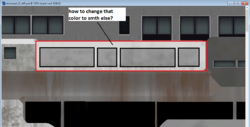
Untitled.png

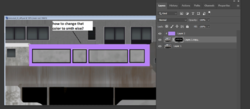
I want to change the color of the space betwwen the red box and the black boxes. I know how to create the mask (for the red box) but when i try to create masks for the other 4 boxes it wont let me (i know i do smth wrong here)

How can i subtract the middle one and change its color?
 

JeffK

Guru
Messages
2,486
Likes
2,890
You can work on the mask you've already created and just use your brushes to edit the mask.

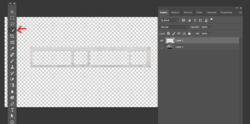
Here I've masked out the red bordered area from the rest of the image (note I duplicated the image and turned off bottom layer to only show the edited area):

1651525546236.png

Now using the selection tool you prefer - I used the pen tool - select those three boxes:

1651525937097.png

With the mask selected, go to Edit > Fill > Black

1651526099007.png

Click OK and then those boxes will be masked out:

1651526348356.png

Now you can choose a color fill layer and clip it to the masked layer - I've just popped in a purple:

1651527479051.png

Finished:

1651527559218.png

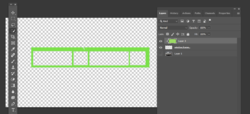
Simpler - just use a selection tool to choose the gray surrounding area and place it on another layer:

1651527780248.png

Again add a color fill layer above the selected layer, add a color, and clip it to the layer below:

1651527894176.png

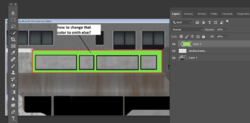
Finished (the red border is still there since I didn't choose it):

1651527951950.png

If you want to change colors, just change the color in the fill layer...

Hope this helps and I've answered your question.

- Jeff
 

thebestcpu

Guru
Messages
2,988
Likes
2,747
HI @harrison121
I that it is more the art of selections as there are many ways to go about creating a selection.
Here is another way.

- Duplicate the Layer for creating a mask
- Using Magic wand (at relatively low tolerance setting) select the red boundary and fill it with black

Screen Shot 2022-05-02 at 5.10.07 PM.jpg
- Delete the selection and make a selection in the area of between the black and the red (now black) outer boundary with a fairly high tolerance setting (I used 192) to catch all the variations of white in that area.

Screen Shot 2022-05-02 at 5.17.10 PM.jpg

- Then just delete the temporary Layer used to create the selection and there you go. You could fill any color into that selection in the original Layer or in a sepearte Layer depending on your needs.

Screen Shot 2022-05-02 at 5.19.49 PM.jpg

Lots of ways to go about it. Hope this gives you a direction to consider.
John Wheeler
 

Haris1977

Member
Messages
5
Likes
3
Thanks all for your replies. I ve managed to do it simpler, by creating a mask (by using the subtract from selection option).

Then i filled the inside with my color :)
 

IamSam

Administrator
Staff member
Administrator
Messages
22,721
Likes
13,258
Both @JeffK and @thebestcpu explained to you how to subtract from the selection on a layer mask.

I ve managed to do it simpler, by creating a mask (by using the subtract from selection option).
What did you use to "subtract from the selection"?

I know what it is!
The Marquis tools...........in this example, the Rectangular.
Screen Shot 2022-05-03 at 10.52.28 AM.png

The Pen Tool or Shape Tool?
Screen Shot 2022-05-03 at 11.11.19 AM.png

How and what did you use to make the selection that you used to subtract????

You had to make a selection in order to subtract from a selection.

What tool did you use? The Rectangular Marquis Tool? The Pen Tool? Did you use an existing layer(s) that was not described or made available in your original post? Opt/Alt + Cmd/Cntrl + click layer thumbnail?

Please explain so that future readers of this thread will know what you did!

Thanks!
 

Haris1977

Member
Messages
5
Likes
3
I forgot to say that i am using photoshop cs3 version. But i guess the steps should be similar in main photoshop version ;)
What i did:

a) i duplicated my background layer. I gave it a "mask" name (or whatever you want)
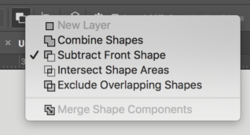
b) i selected "subtract from selection" from main menu

1.png

c) in "mask" layer i started creating first my "red" rectangle (i chose the polygonal lasso tool) and after that my 3 black rectangles (all in one mask). When i finished all of them, i hit the "add the mask" button (down right, right of fx button) to create the mask (with all of them)
d) i chose the mask and started to paint my color with the "Brush Tool"
 

IamSam

Administrator
Staff member
Administrator
Messages
22,721
Likes
13,258
Excellent! Thanks!

There are so many ways to accomplish the same outcome in Ps. None of which are any easier, it's just which one is easiest for you! Accuracy is most important for me, so I would choose the most accurate method rather than the easiest.

Is it possible to post a link to the texture set you are trying to edit?
 

Top