What's new
Photoshop Gurus Forum

Welcome to Photoshop Gurus forum. Register a free account today to become a member! It's completely free. Once signed in, you'll enjoy an ad-free experience and be able to participate on this site by adding your own topics and posts, as well as connect with other members through your own private inbox!

Creating a square selection based on the centre of an image - is it possible?


Paul Sinyard

Member
Messages
10
Likes
0
Hello all,

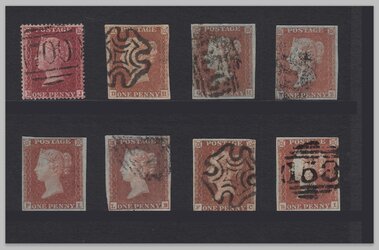
I scan images of stamps on stocksheets and then work on that large image to create smaller images of each individual stamp. This involves a select, crop, and save for web for each individual stamp. I have attached an example PSD file and a resulting image for reference.

I was wondering if there was any way to automate this. The trickiest part may be creating a square selection (ratio 1:1) of the stamp on the sheet with a defined gap height at the top and bottom. I have not been able to find a way to do this after searching on the web.

I suspect this is impossible, but I thought it was worth asking the question. Any help would be greatly appreciated.

Many thanks,
Paul

one-stamp.jpg
 

Attachments

  • sheet.psd
    28.5 MB · Views: 5

thebestcpu

Guru
Messages
2,988
Likes
2,747
HI @Paul Sinyard
Yes there is a pretty easy solution.
If you put your stamps on a slight more even background (no black stripes under the stamps and the white bar as in the picture below,
Then you can use the File > Automate > Crop and Straighten tool and 8 new documents each with its own stamp will open up in Photoshop while leaving the original untouched
Worked like a charm for me with the image below (I just painted over the black underline and the white on the right with the gray color of the rest of the background:
Hope this helps
John Wheeler


Screen Shot 2023-02-04 at 7.30.47 PM.jpg
 

Paul Sinyard

Member
Messages
10
Likes
0
Hi John,

Thanks for that. Unfortunately, it will not provide the square output I am seeking and crops off parts of the edges of some stamps.

I was wondering if I could add a special selection method to a Photoshop action to provide batch automation. As the position of the stamps on each sheet is roughly constant this did seem feasible.

However, I am now fairly sure this can't be done with the front images, as when I try to select the stamp images the quick selector gets confused between the black background and the postmarks on the stamps.

It is a different case for the back images (scan provided). With these, I can use the quick selector in the middle of each stamp followed by expand 20px to make a selection of the stamp with an even border (I still can't get the desired square selection using this method). I tried this as part of an action but it failed and stated that "The command "Expand" is not currently available", followed by "Could not complete the command because the selection area is empty.".

So to summarise, I can't find a way of creating a square selection and I don't seem able to incorporate a selection expand command into an action to allow batch automation.

Kind regards,
Paul
 

Attachments

  • backs.psd
    19.3 MB · Views: 1

thebestcpu

Guru
Messages
2,988
Likes
2,747
Hi @Paul Sinyard

Note that if you have high repeatability of stamp size and position there are options that would work with an overlay layer that defines the boundary of the image and then use the Crop and Straighten Process.

However, if that is not possible and you may have varying stamp sizes, then I do have a way that should work automatically.
First though you have to scan the stamps so the background is consistent i.e. no white areas on the edges or wide variance in the black or gray background. Without those conditions I think you will need smarter processing that is readily available and might have to go to custom scripts.

So given those initial conditions, here are the steps that I believe will help you get there. It might involve running two separate actions yet I believe it works.

So you start with a more uniform background as shown below with the Layer turned into a Smart Object (that's important)
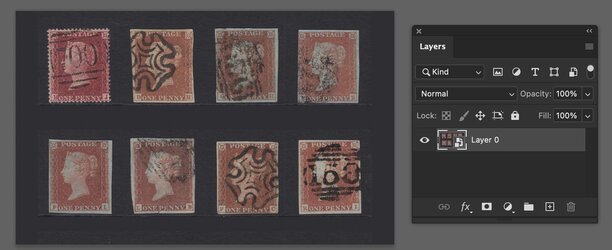
Screen Shot 2023-02-05 at 1.27.19 PM.jpg

You duplicate the Layer Apply a Filter > Blur > Box Blur to get rid of the variation in the background (don't worry about it being fuzzy as this is just a copy).
Then apply the Filter > Other > HSB/HSL with it set to convert from HSB to HSL (this gives a high contrast type image)
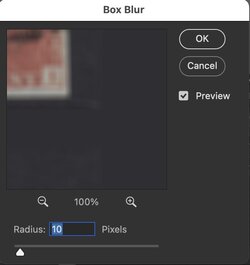
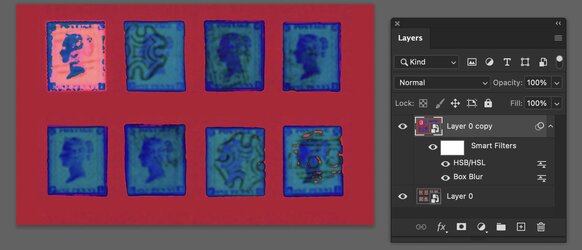
Screen Shot 2023-02-05 at 1.27.49 PM.jpg

Screen Shot 2023-02-05 at 1.28.19 PM.jpg


Rasterize th4 Smart Object and then apply the Filter > Channel Mixer setting it to Monocromatic and Red=0, Green = 100 and Blue=0. This shows the Saturation map of the image which is reasaonbly high contrast.
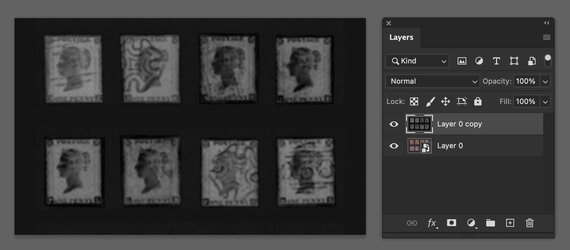
Screen Shot 2023-02-05 at 1.41.00 PM.jpg

From here run the Crop and Straighten Automation command and it will break apart the images each into their own open PS document (don't worry about how it cuts the edges at this point)

Below is the one of the resulting images:
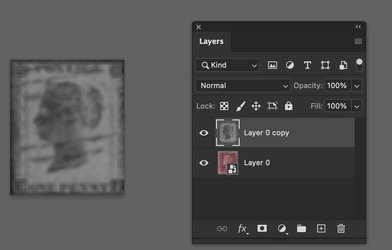
Screen Shot 2023-02-05 at 1.42.03 PM.jpg


Use the Image > Canvas command in with the relative box checked increase by 20% to 40% in width and height depending how much original background you want . Since the Smart Object is below it will capture the surrounding of the original image. You can delete this grayscale image and the result is:
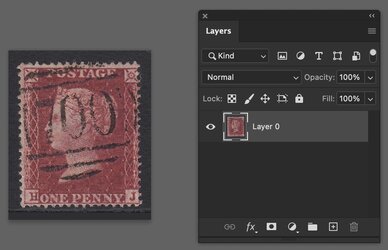
Screen Shot 2023-02-05 at 2.34.07 PM.jpg

After deleting the grayscale image, rasterize the Smart Object, select the whole image and use Image > Crop (this removes the rest of the original image hiding in the wings)

We are now going to make the surroundings square.
First duplicate the Layer and rotate it 90 degrees.
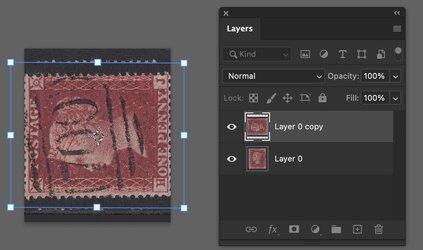
Screen Shot 2023-02-05 at 2.39.44 PM.jpg

Accept the transformation and then use the Command Image > Reveal All This will create some transparency around the images in an exact square size as requested
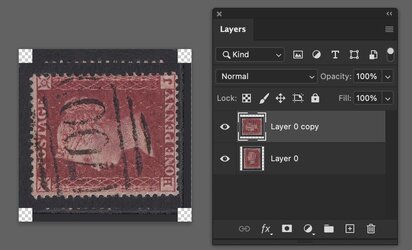
Screen Shot 2023-02-05 at 2.40.12 PM.jpg

All that is left is to delete the top Layer, Add a black background as the bottom Layer and you have your result (or adding a background very similar to the background blackness/gray that you used in original image):
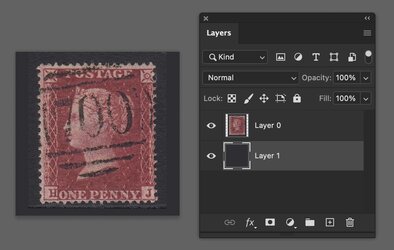
Screen Shot 2023-02-05 at 2.40.33 PM.jpg

In summary the first part of the action is to create the individual images in separate documents and then runa File >
Automate > Batch where you select the second Action to apply to the open images.

Both of these Actions could be called from a third Action

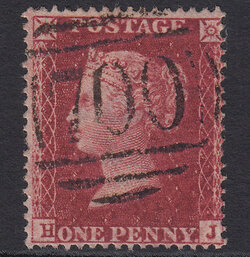
This a proof in concept and there are probably some details that I have not covered that the Action would need to do yet this appears that it would work for various size images as long as the background is pretty consistently black and the there is enough spacing around each of the stamps.

Hope this gives you an approach to consider.
John Wheeler
 
Last edited:

thebestcpu

Guru
Messages
2,988
Likes
2,747
Hi @Paul Sinyard
As an aside, you first post, the example extracted image is actually not exactly square. I was not sure if exact squareness was needed/desirable yet made the action to do so.
John Wheeler
 

Paul Sinyard

Member
Messages
10
Likes
0
Thank you very much, John, the time and effort you have taken are really appreciated.

I have spent the last two days looking at how to make this work. Inspired by your help I have developed a way of selecting the images effectively for the crop and straighten function. This is by using an inverse selection based on image focus and subsequent color fill.

But unfortunately, I don't think I can get this to work how I need it to. The big problem is the crop and straighten function.

Firstly, for some of the stamps it is "straightening" images that don't need straightening, resulting in wonky images.

Secondly, it is carrying out the crops in a non-linear fashion. I really need the cropping to go from left to right and then top to bottom in order to have a safe way of identifying the images that are output. This is because each image on the sheet responds to a filing position that is assigned to the image via its title. Plus there will be front and back images for each stamp and they need to have the same name but with a different suffix (eg 1a and 1b for the first stamp and 49a and 49b for the last). I risk mixing up front and back images of stamps if I can't be sure of the output order.

I have searched to see if there are any alternative scripts out there that would allow me to carry out the "crop and straighten" without the straightening part and it seems there are none. Even if there were it would still not work for me if I could not specify the order in which images are output. I think I would need to write my own script based on a very deep understanding of Photoshop functions and right now I don't have the time available to learn either. It is a shame as such a script would probably be useful for many people.

For now, I will keep up with the manual drudgery of doing the work on a stamp-by-stamp basis.

Thanks again,
Paul
 

thebestcpu

Guru
Messages
2,988
Likes
2,747
You’re more than welcome @Paul Sinyard.

Before we give up totally, there is anotgher possible option (with its own limiations).

If your stamps are always in a very fixed grid pattern, the stamps in any scan are all the same size, and spaced the same, it would not be hard to create and action that moves a selection one by one over the stamps and extract them and save them to a file. At the very most, for each group of stamps we would just need to position a template above over the stamps before running the Action if the X,Y position was not certain.
Would that be of interest?

The more repeatable the pattern is for extraction, the easier it is to do it in an Action.

John Wheeler
 

Paul Sinyard

Member
Messages
10
Likes
0
Hi John,

I now have a solution I am happy with. I have created a relatively short action that will automate the cropping and creation of a square image once I have made a selection using the quick select tool. This is based on the help you provided.

While not totally automated, it is quicker and more accurate than my old method of making manual selections for cropping. This allows me to preview each image before I commit to saving and gives me complete control of the file name (I save each image to a template where the correct file names are already set up).

I have compared my manually cropped images to the ones created with the new action and the new ones actually look better.

So I have better images and a quicker method for producing them which makes the last few days time well spent :).

Many thanks once again for all your help with this.

Best wishes,
Paul
 

thebestcpu

Guru
Messages
2,988
Likes
2,747
Hi John,

I now have a solution I am happy with. I have created a relatively short action that will automate the cropping and creation of a square image once I have made a selection using the quick select tool. This is based on the help you provided.

While not totally automated, it is quicker and more accurate than my old method of making manual selections for cropping. This allows me to preview each image before I commit to saving and gives me complete control of the file name (I save each image to a template where the correct file names are already set up).

I have compared my manually cropped images to the ones created with the new action and the new ones actually look better.

So I have better images and a quicker method for producing them which makes the last few days time well spent :).

Many thanks once again for all your help with this.

Best wishes,
Paul
You’re welcome. That’s great @Paul Sinyard about your solution and best of skill on your project.
 

Jack Indabaux

Banned
Messages
6
Likes
5
Hi @Paul Sinyard
As an aside, you first post, the example extracted image is actually not exactly square. I was not sure if exact squareness was needed/desirable yet made the action to do so.
John Wheeler
I use the following on my images to make them square. Make sure your background color closely matches the color behind the stamp.

var doc = activeDocument
var savedRuler= app.preferences.rulerUnits;
app.preferences.rulerUnits = Units.PIXELS;
var w = app.activeDocument.width;
var h = app.activeDocument.height;
if(w>h) app.activeDocument.resizeCanvas (w, w, AnchorPosition.MIDDLECENTER);
if(w<h) app.activeDocument.resizeCanvas (h, h, AnchorPosition.MIDDLECENTER);
app.preferences.rulerUnits = savedRuler;
 

Top