What's new
Photoshop Gurus Forum

Welcome to Photoshop Gurus forum. Register a free account today to become a member! It's completely free. Once signed in, you'll enjoy an ad-free experience and be able to participate on this site by adding your own topics and posts, as well as connect with other members through your own private inbox!
Brushes Fixing image with an area of artefactual colour


Aragorn1976

Well-Known Member
Messages
49
Likes
11
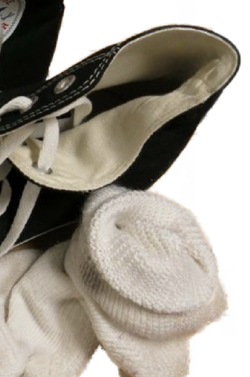
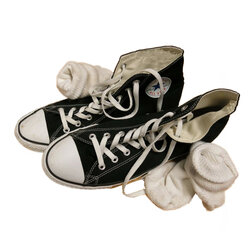
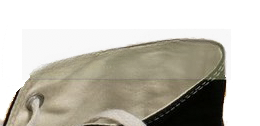
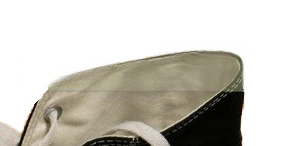
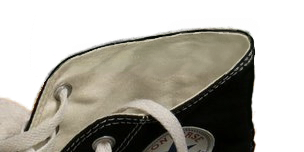
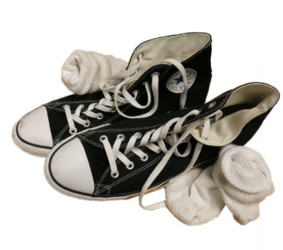
Hi, I would like to fix the upper area of the right shoe (see attachment), which has got artefactual colours. Could you please suggest me how to do it? Anything more precise than the clone tool? And if I have to use the clone tool, what kind of pencil would work better? Thanks

DJL2Fg7VYAEqVa0_inPixio.jpg
 
For me, the easiest way would be to paint it in with the Brush Tool.

Expand the canvas.
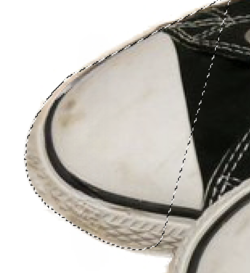
Create a boundary selection with the Pen Tool
Screen Shot 2023-03-12 at 5.11.13 PM.png

Then start painting.
Screen Shot 2023-03-12 at 5.11.55 PM.png

Finished!
Screen Shot 2023-03-12 at 5.12.02 PM.png
Screen Shot 2023-03-12 at 5.15.24 PM.png
 
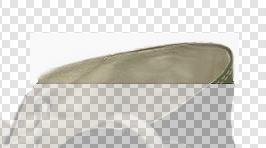
Added..........I would Borrow and mask for the sock.

Borrowed by selecting and using Cmd/Cntrl + J to copy to it's own layer.
Move into position with the Move Tool.
Resized using Free Transform.
Then add a layer mask and blend.
Screen Shot 2023-03-12 at 5.20.03 PM.png


Same borrowing techniques for the lower portion of the sock edge.
Screen Shot 2023-03-12 at 5.21.12 PM.png

Finished.
Screen Shot 2023-03-12 at 5.21.40 PM.png
 
Thanks for your reply. How can I paint and keep the colours of the adjacent part of the picture please? Meanwhile, this is my preliminary result, but I am really bad with the clone tool....I will try to use the spot healing one. If you could please explain how I could paint with the same colours pattern, I would probably be able to fix it!!! Thanks :)

Shoesandsocksedited.jpg
 
Thanks for your reply. How can I paint and keep the colours of the adjacent part of the picture please?
Sample the colors of the adjacent areas.
If you could please explain how I could paint with the same colours pattern
Nothing special here! Just sample the color from the adjacent areas and simulate/paint the texture..............there's not much texture here so it's not a huge concern.
 
I regenerated all the missing parts with the clone tool, which is a bit messy
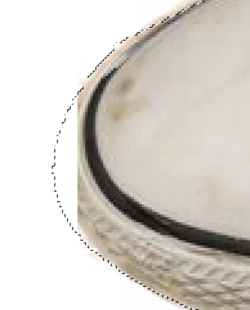
Yeah.............you need to create guiding selections using the Pen Tool then paint..............this is not the best situation for the Clone Stamp Tool.

You may getaway with it on the upper shoes missing toe section.
Selection
Screen Shot 2023-03-12 at 5.33.54 PM.png

Constrained (by the selection) Clone Stamp and Painting
Screen Shot 2023-03-12 at 5.37.21 PM.png
 
Screen Shot 2023-03-12 at 5.40.27 PM.png

Are you interested in knowing how to repair the green area? This is not a job for the Clone Stamp Tool!
 
This is my result, after some spot cleaning. Not too bad, but far from perfect. Especially the rounded tops, which are quite irregular

Shoesandsocksedited_inPixio.png
 
Yes please. could you please show me how to do it and the final result?
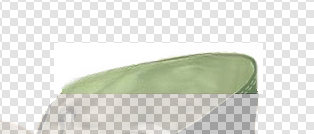
Sorry..............got busy and have only just found the time to respond.

I first made a selection and copy of the green area of the top shoe.
Screen Shot 2023-03-13 at 11.08.31 AM.png

I then used a Hue & Saturation adjustment layer clipped to the copy to remove the tint.
I also added a Curves adjustment layer clipped to the copy to to adjust the contrast.
Screen Shot 2023-03-13 at 11.08.46 AM.png

Since the selected layer was visible against the white background, I added a layer mask to clean up.
Before layer mask
Screen Shot 2023-03-13 at 11.15.42 AM.png
After layer mask
Screen Shot 2023-03-13 at 11.18.20 AM.png

Next, I mainly used the Brush Tool to paint in the missing area and to remove/blend the "line/edge"
Screen Shot 2023-03-13 at 11.09.20 AM.png

Finished
Screen Shot 2023-03-13 at 11.09.47 AM.png
 
This is my result, after some spot cleaning. Not too bad, but far from perfect. Especially the rounded tops, which are quite irregular
Looks great!
You need to use the Pen Tool selections I described above to make and constrain any work on the rounded areas.
 
Hi, I am struggling to constrain my work to any specific areas. Could you please give me more information on the steps to follow? Do I have to select the pen tool, the freeform pen tool, the content-aware tracing tool, or the curvature pen tool? Also, from the tool options, do I need to select shapes, path, or pixels? Finally, once I have created a selection with the pen tool, what should I do to constrain the pen tool to that area? Is there an option for that? Or will the selection automatically constrain the brush tool? Thanks
 
Hi, I am struggling to constrain my work to any specific areas.
OK.

Could you please give me more information on the steps to follow?
I will try.
Do I have to select the pen tool, the freeform pen tool, the content-aware tracing tool, or the curvature pen tool?
I have already answered this question. Please read post #2.............
Create a boundary selection with the Pen Tool
Please read post #7
Yeah.............you need to create guiding selections using the Pen Tool then paint

Also, from the tool options, do I need to select shapes, path, or pixels?
Great question! You should use the "path" setting.

Finally, once I have created a selection with the pen tool, what should I do to constrain the pen tool to that area?
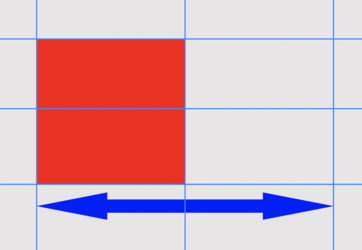
Not sure I understand this question. You would not work within a selection using the Pen Tool. Do you mean the Clone Stamp Tool possibly?

The Pen Tool is used to create the selection. The selection is what constrains or limits an area within which to work.

Here is a rectangle that's missing it's right half. Just like a part of a missing shoe.
Screen Shot 2023-07-05 at 6.42.02 PM.png

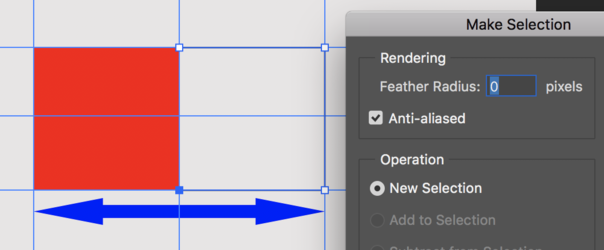
I use the Pen Tool set to path to define the area I wish to complete or otherwise work in.
Screen Shot 2023-07-05 at 6.44.33 PM.png

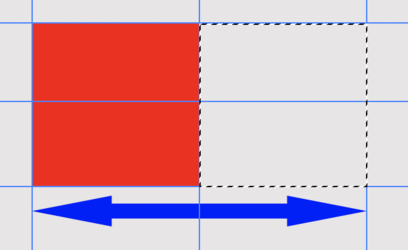
I right click and choose make a selection, no feather, then hit enter.
I now have a selection of the right side of the rectangle.
Screen Shot 2023-07-05 at 6.45.02 PM.png

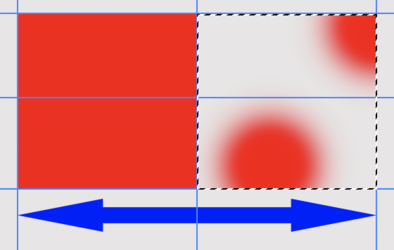
Now that I have a selection which defines a specific area in which to work, I can use the Brush Tool to brush inside the constrains of the selected area!!!
Here are two brush clicks inside the selection..................note that the brush click stays within the selected area.
Screen Shot 2023-07-05 at 6.51.58 PM.png

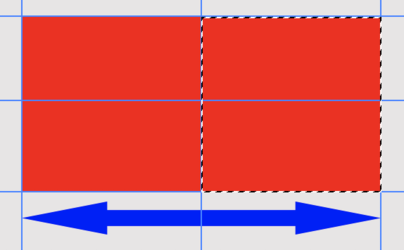
Or...........I could just fill the selection in thereby completing the rectangle! Or the shoe!
Screen Shot 2023-07-05 at 6.53.48 PM.png

Once you have made a selection of an area that requires a specific part of it to be constrained, you can use any tool to work within the selected/constrained area.
 
Another example.

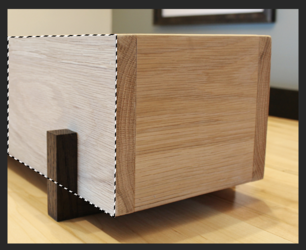
I have this wooden box and my client wants me to remove a part off of the side.
I use my Pen Tool (set to path) do make a selection that defines and constrains the area I want to work in.
Screen Shot 2023-07-05 at 7.22.05 PM.png

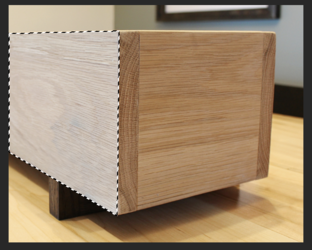
I then use the Clone Stamp Tool to remove the part.
Screen Shot 2023-07-05 at 7.25.05 PM.png

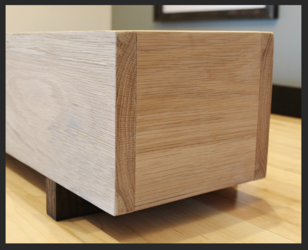
It's like coloring inside lines or area! Using this method ensures your work will be contained!
Screen Shot 2023-07-05 at 7.30.32 PM.png
 
Lots of great detail by @IamSam on a great approach to take. I wanted to provide a slightly different approach for consideration that I have regularly used.

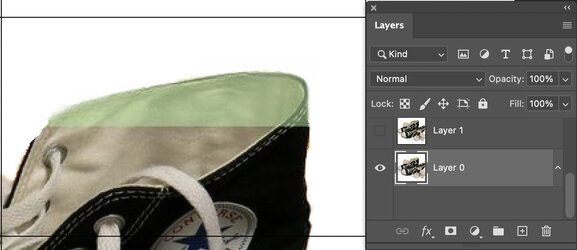
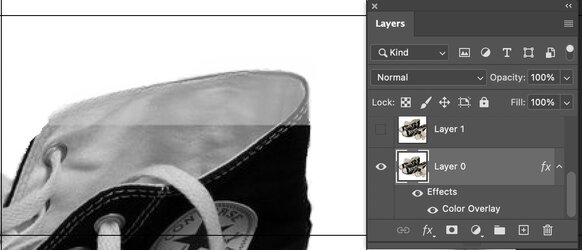
First duplicate the image Layer for now turn off visibility of the duplicated image.

Please ignore the extra black lines. Those were guidelines I inlcuded to help me copy and paste from the screen more consistently and are not part of the image proper.


Screen Shot 2023-07-06 at 9.38.35 AM.jpg


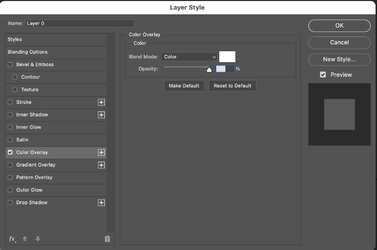
Now we are adding a Layer Style to the image using the Color Overlay with a white Color and Bend set to White. This will remove the color and only leave the Luminosity:

Screen Shot 2023-07-06 at 9.39.48 AM.jpg

Here is the resulting image with the Image Style added:

Screen Shot 2023-07-06 at 9.51.37 AM.jpg

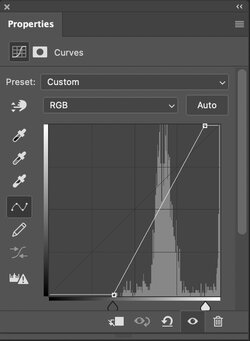
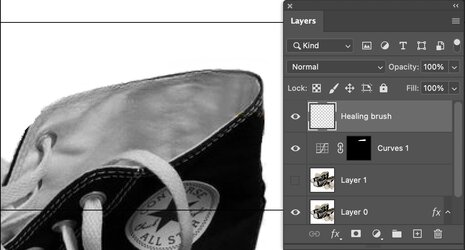
Using the polygon lasso tool, select the off color area. In this case selecting some of the white area above the shoe does not matter. Add the Curves adjustment Layer and then click the icon at the bottom of the Layers Panel (box with circle in the middle) which will turn the selection into a Layer Mask with the Curves Adjustment Layer. I adjusted the Curves Adjustment Layer as shown by changing the black and white point to match the luminosity of the previously colored area to match the rest of the shoe:


Screen Shot 2023-07-06 at 9.53.09 AM.jpg

The resulting image is shown below with match luminosity yet you still can see a boundary issue.

Screen Shot 2023-07-06 at 9.52.42 AM.jpg

Now I add a blank Layer above all the Layers and use the Healing Brush along the rough transition area with the resulting image below:

Screen Shot 2023-07-06 at 9.54.55 AM.jpg

Note that both the interior of the shoe and outside edge match.
Now what we need to do is add back the color and do some correction.

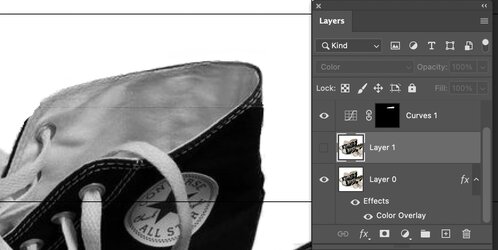
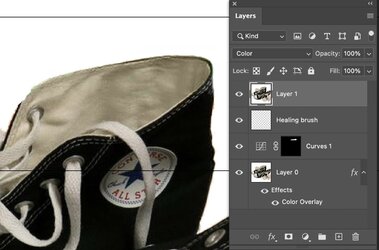
Take the duplicated original image and drag it to the top of the Layer Stack and set the blend mode to color.
Sample the color inside the shoe and brush over the areas that had the green tint and now both the luminosity and now the color is corrected. This salvages the original texture that was in the image as well.
Here is the final image below with the above approach and hope this helps.
John Wheeler

Screen Shot 2023-07-06 at 9.56.06 AM.jpg


Write your reply...

Back
Top