What's new
Photoshop Gurus Forum

Welcome to Photoshop Gurus forum. Register a free account today to become a member! It's completely free. Once signed in, you'll enjoy an ad-free experience and be able to participate on this site by adding your own topics and posts, as well as connect with other members through your own private inbox!

Help achieving “xeroxed to death” look


anxiety

New Member
Messages
3
Likes
0
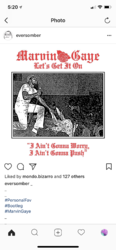
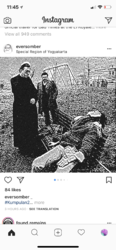
I’m tying to get this look without using an old xerox machine. I’ve been told it can be done in photoshop but I’m not getting anywhere on my own. Anyone have any tips for me? Here are examples:
 

Attachments

  • 694E47E0-5DDB-4971-AE18-CA1F863A04A6.png
    694E47E0-5DDB-4971-AE18-CA1F863A04A6.png
    7.2 MB · Views: 17
  • 9B384BCF-8EFA-43B8-AF45-DEBBFECA9C6C.png
    9B384BCF-8EFA-43B8-AF45-DEBBFECA9C6C.png
    1.9 MB · Views: 16
  • E0770B1D-A3D1-4FF8-87ED-6059D2365EE5.png
    E0770B1D-A3D1-4FF8-87ED-6059D2365EE5.png
    2 MB · Views: 20
  • 14EA4D1F-1A4B-42B1-8407-E3C55D26FF15.png
    14EA4D1F-1A4B-42B1-8407-E3C55D26FF15.png
    2.4 MB · Views: 22
  • 1C004499-45C0-4731-BC2E-248F59259762.png
    1C004499-45C0-4731-BC2E-248F59259762.png
    2.4 MB · Views: 21

Rich54

Guru
Messages
1,732
Likes
3,412
I experimented and came up with this Before & After. Let me know if something like this is what you're after and I'll show you the steps. There are probably several other ways of achieving this effect that others may come up with.

Jessica Alba.jpgAfter.jpg
 

anxiety

New Member
Messages
3
Likes
0
I experimented and came up with this Before & After. Let me know if something like this is what you're after and I'll show you the steps. There are probably several other ways of achieving this effect that others may come up with.

View attachment 88937View attachment 88938
Definitely close but not quite there. Needs that almost diffusion/stiply sort of degraded quality. I’ve been wrestling with this for a long time. Wish I could figure it out.
 

anxiety

New Member
Messages
3
Likes
0
I would too actually, now that I think about it. While it doesn’t match my examples it could be a great launching pad to mess around a bit more.
 

Rich54

Guru
Messages
1,732
Likes
3,412
Sorry for the delay... my internet service was down most of the day. Here are the steps I used:

1. Create a new layer above the original image and fill it with black. Change the blend mode to Hue. (Alternatively, create a duplicate of your background layer and convert to Black & White.)
2. On a new layer above the black layer, press Shft+Ctrl+Alt+E (stamp visible).
3. Change the blend mode of this layer to Divide. At this point your top layer should be almost entirely white. Then gradually apply Gaussian Blur until an image begins to emerge. The amount of blur to use is trial & error, but my final result of this particular step looked like this:
Image.jpg

4. Copy this to a new layer by again applying Stamp Visible. Then go to Filter>Artistic>Poster Edges. I used Edge Thickness = 4; Edge Intensity = 4; Posterization = 0.
5. The final step is to add a Threshold adjustment layer. I set the slider all the way to the right.

This all sounds very scientific like I knew exactly what I was doing, but I only had a vague idea of how it would turn out. Steps 1-3 are a known technique for converting an image to a line drawing (if you apply less Gaussian Blur than what I did here). From there I was just making things up to get to a point with a lot of heavy black lines and lots of white areas, similar to what multiple Xeroxing does.

Happy experimenting.
 

Top