What's new
Photoshop Gurus Forum

Welcome to Photoshop Gurus forum. Register a free account today to become a member! It's completely free. Once signed in, you'll enjoy an ad-free experience and be able to participate on this site by adding your own topics and posts, as well as connect with other members through your own private inbox!

How can I focus in on the Taj Mahal?


Paradise19

Well-Known Member
Messages
61
Likes
1
Hey guys,

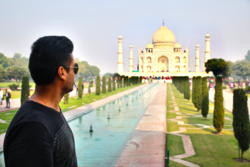
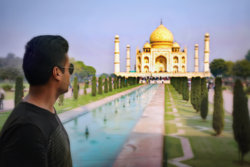
I asked someone to take a pic of me at the Taj Mahal and I came out focused and the Taj Mahal didn't. Is there a way I can fix this in Photoshop? I tried the High Pass--Overlay option and that didn't work. Any suggestions would greatly be appreciated. Original image is too large to upload so here's a screenshot.
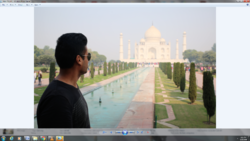
1529976133561.png
 

Paradise19

Well-Known Member
Messages
61
Likes
1
In my opinion, replace the out of focus Taj in your picture with another Taj from the internet or maybe from your collection of Taj pics on the same trip.

Good idea! Thanks for mentioning that. Didn't even cross my mind. I do have a few other pics of the Taj that I could possibly do what you said. Would I just select, cut this Taj and copy paste the other and resize it etc?
 

JJLAPIN

Guru
Messages
1,064
Likes
1,316
Taj will be your base image.
1.Open image of yourself and cut a Path using the pen tool.
2.Make a selection of the path and make a Layer Mask with it.
3.Drag that layer and mask on to your Taj image. Position and size to where you like.
4.Use various brushes to fine tune the mask around your hair.
 

Paradise19

Well-Known Member
Messages
61
Likes
1
Taj will be your base image.
1.Open image of yourself and cut a Path using the pen tool.
2.Make a selection of the path and make a Layer Mask with it.
3.Drag that layer and mask on to your Taj image. Position and size to where you like.
4.Use various brushes to fine tune the mask around your hair.
Taj will be your base image.
1.Open image of yourself and cut a Path using the pen tool.
2.Make a selection of the path and make a Layer Mask with it.
3.Drag that layer and mask on to your Taj image. Position and size to where you like.
4.Use various brushes to fine tune the mask around your hair.


Thank you for that info! Appreciate it.
 

JJLAPIN

Guru
Messages
1,064
Likes
1,316
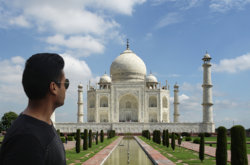
Holy!!! That looks amazing!!! Thank you so much! Is there any way to get that second pillar on the left to show? I can't stop looking at this pic! If I can just get that second pillar to show that would be great. Maybe shrink me down a bit? lol....by the way, how did you do this? Truly breathtaking.
Thanks, Pulled the image off of the internet. Followed the steps I outlined for you above. 5 Minute job.:)
Taj_Mahal-2.jpg
 

JJLAPIN

Guru
Messages
1,064
Likes
1,316
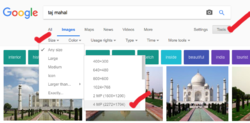
Just in case you didn't know, when doing a Google Search select tools on the far right side and then choose size and search for the largest size image possible.
Screen Shot 2018-06-27 at 10.18.12 AM.png
 

Paradise19

Well-Known Member
Messages
61
Likes
1
Thanks, Pulled the image off of the internet. Followed the steps I outlined for you above. 5 Minute job.:)
View attachment 89578
Can't thank you enough! 5 min job for you but a long time for me hehe. I guess practice makes perfect. Can't wait to share this with every one. Full credits go to you! Hopefully Facebook and Instagram will allow me to post this in landscape mode in its current size/aspect ratio.
 

Babine

Guru
Messages
2,719
Likes
3,794
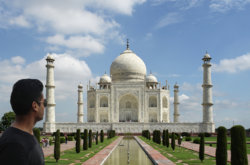
Dehazed a copy in ACR, applied to another copy of the original to clear the structure and BG, revealed the picture right tower with the clone tool; saturation and contrast with curves adjustments and applied selectively with the masks for focus on the structure; desaturated some of the distracting colours of the pedestrians; applied iris blur centered on the structure; selective sharpening with the mask.

Taj.jpg
 

Paradise19

Well-Known Member
Messages
61
Likes
1
Dehazed a copy in ACR, applied to another copy of the original to clear the structure and BG, revealed the picture right tower with the clone tool; saturation and contrast with curves adjustments and applied selectively with the masks for focus on the structure; desaturated some of the distracting colours of the pedestrians; applied iris blur centered on the structure; selective sharpening with the mask.

View attachment 89590
Thanks for the detailed info. Appreciate it!
 

Top