What's new
Photoshop Gurus Forum

Welcome to Photoshop Gurus forum. Register a free account today to become a member! It's completely free. Once signed in, you'll enjoy an ad-free experience and be able to participate on this site by adding your own topics and posts, as well as connect with other members through your own private inbox!

How do I achieve this style of digital painting in photoshop?


Messages
3
Likes
2
Hello,

I have been using photoshop for colouring drawings. I am trying to get a look similar to a traditional ink airbrush.
How can I recreate the look/effect of the attached photo?

many thanks in advance for any help


Screen Shot 2017-11-20 at 10.37.34.png
 

IamSam

Administrator
Staff member
Administrator
Messages
22,721
Likes
13,258
Hello and welcome to PSG.

Just as you might color in a drawing, you would do the same here, start with a drawing and color it in. Digital painting is similar to traditional painting. If you have or had any experience with traditional airbrushing techniques, they will translate to the digital version as well. These types of paintings require planning, usually working from the background forward. The masking techniques used in traditional airbrushing (friskit, vellum, etc.) can still be used with Photoshop just in a different manner and in grouped, organized layers. There's a lot going on in your sample image which would be hard to cover in a single post, so if you have any specific questions about a certain area, just let us know.

The biggest secret to this painting is knowing how to set up your Brush Tool. The transparent hood is just done with a shape (with or without a selection), and lowered brush settings to simulate transparency. Note that mostly the edge contains color.
 

Trevor Dennis

Well-Known Member
Messages
153
Likes
99
I use two approaches depending on context. Never forget how useful Layer Styles are. Rather than use a Bevel & Emboss layer style, try using two Inner Shadow (so long as you are using CC). Set one to black and multiply as per the defualt, and thew other to white and screen. The advantage of this approach is that you can copy the layer and the light direction will remain correct after you rotate it as per below.
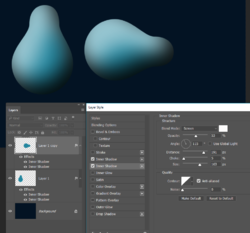
1511234855908.png

The other method I use is to clip a layer to the shape and paint in the highlight, or shadow. Make that layer a Smart Object and use Gaussian Blur to give you the gradient. This gives you the option of adjusting the degree of blur, and the Free Transform > Warp the shadow or highlight (Note when you FT Warp an SO it temporarily turns off the filters, so you are seeing the unblurred state of the highlight layer below. You can also adjust layer opacity and position. If you want to firm it up, copy the layer or add another one.
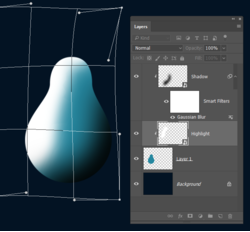
1511235513072.png

Where this falls down is that you need to use multiple layers for complex shapes, but if you have a steady hand, you can make your shape and lock its transparency, and by checking Build-up in the brush settings, paint in your shadows and highlights. I always prefer to use separate layers clipped to the underlying shape because it leaves you so many options.

Another trick. Let's say we produced the shape with the Pen tool, because, well, that would be the right way to do it. So we either make it a Shape layer, or raster layer by filling the path, and we have a path that matches the shape.
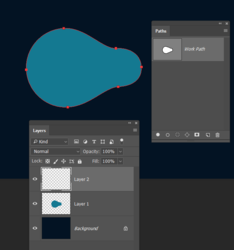
1511236140321.png

Drag the path to the new path icon a couple of times so we have a copy. Add some points and delete the ones we don't need
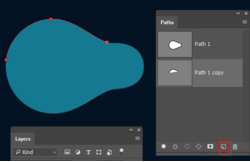
1511236351720.png
We can now stroke the path on a new layer, and with Simulate Pressure checked, get a tapered stroke.
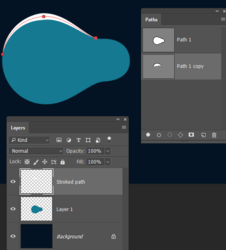
1511236469813.png
And then clip the stroke layer, and blur to suite
1511236622495.png
 

IamSam

Administrator
Staff member
Administrator
Messages
22,721
Likes
13,258
As I stated, this type of painting requires planning and the use of positive and negative selection processes to achieve the effect.

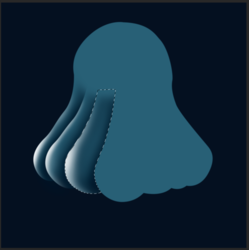
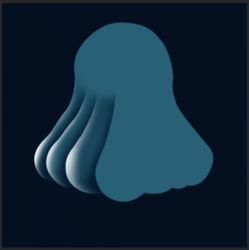
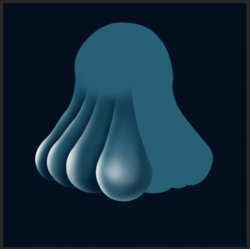
For example, here's one aspect of the painting in your example.
You start with a basic design and create your shapes. You use selections and inverted selections created and saved with the Pen Tool to create the delineations of the internal shapes....

Screen Shot 2017-11-20 at 11.06.28 PM.png

Screen Shot 2017-11-20 at 11.09.33 PM.png

Selecting colors from a well developed and pre-selected color palette and using the Brush Tool to paint in the tonal gradations.
Screen Shot 2017-11-20 at 11.13.14 PM.png

As I said above, this is a matter of knowing your Brush Tool and understanding how to create and use selections. Using layer styles most likely will not work for painting complex structures like this.
Screen Shot 2017-11-20 at 11.13.37 PM.png

And so on.....
Screen Shot 2017-11-20 at 11.50.21 PM.png

Screen Shot 2017-11-20 at 11.49.51 PM.png

Screen Shot 2017-11-21 at 12.33.04 PM.png
 

Trevor Dennis

Well-Known Member
Messages
153
Likes
99
I've always thought of this sort of work as similar to air brush art, but where they use stensils, we use masks. I like to use lots of layers — even if you are not using all the layers to build the finished art work, I find it super convenient to be able to quickly load each selection by Ctrl clicking the appropriate layer (which could be hidden further down the stack. You can do the same thing Ctrl clicking a work path of course.
 

IamSam

Administrator
Staff member
Administrator
Messages
22,721
Likes
13,258
As both Trevor and myself have stated, this type of painting is similar to airbrush painting but I feel the need to explain some differences of terms.

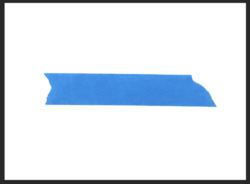
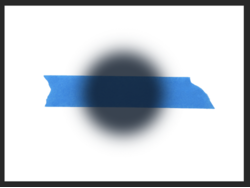
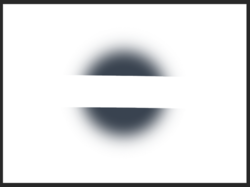
In airbrushing, for this example, you might use something like masking tape to make a mask. A mask in airbrushing was used primarily to keep any paint from getting on the support where the tape was applied.

Tape....
Screen Shot 2017-11-21 at 9.44.36 AM.png

Paint on tape....
Screen Shot 2017-11-21 at 9.44.53 AM.png

Tape removed....
Screen Shot 2017-11-21 at 9.45.09 AM.png

Masking, while similar, is a bit different in Photoshop. I like to refer to the airbrush style of masking as stencils, stenciling, or templates.

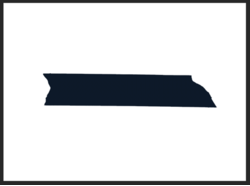
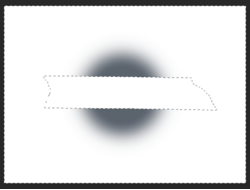
Let's say we have made a template of the masking tape using the Pen Tool set to path. Then we save the path, convert the path to a selection, and fill the selection with black and we call it "Tape Template 1".
Screen Shot 2017-11-21 at 10.56.26 AM.png

We can now turn off or deactivate the "Tape Template 1" and place it in a group.
We can, at any time return to the template and use it to make a selection by Cmd/Cntrl + clicking the templates thumbnail.

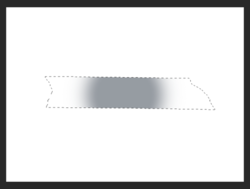
Using that selection, we can paint inside the selection...
Screen Shot 2017-11-21 at 9.48.32 AM.png

...or by reversing the selection (note the marching ants on the outer edge) we can paint outside the selection (which technically is still inside the selection..........but let's try to avoid confusion).
Screen Shot 2017-11-21 at 11.05.13 AM.png

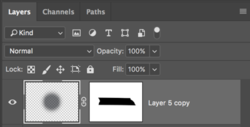
We could also use the selection to create a layer mask to accomplish the same thing!

This layer mask......
Screen Shot 2017-11-21 at 11.12.16 AM.png

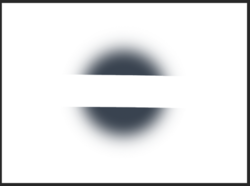
.....produces this.
Screen Shot 2017-11-21 at 11.11.19 AM.png

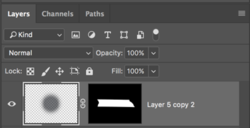
And this layer mask...........
Screen Shot 2017-11-21 at 11.13.59 AM.png

.....produces this.
Screen Shot 2017-11-21 at 11.14.08 AM.png

It's all in knowing and understanding the differences in how traditional airbrushing techniques translate to Photoshop.
 

Trevor Dennis

Well-Known Member
Messages
153
Likes
99
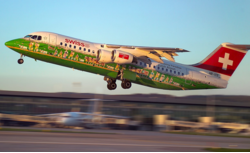
An old buddy of mine was really into air brushing back in the day. In fact he is quite well known nowadays It weas facinating watching him cut out stencils with a scalple, and spread film over a surface and carefull cut out where the paint needed to go. I trained as a layout artist back in the days of paste up, which is how I knew Paul, and we got a lot of practice and a steady hand with a scalpel. Paul has done some pretty large surfaces including a 747 jet for Swiss Air if memory serves. Blimey, I just checked with Google and he has done a few large jets!
1511293179190.png
 

IamSam

Administrator
Staff member
Administrator
Messages
22,721
Likes
13,258
Sorry to keep adding posts............but I keep thinking of pertinent information to add! I'll stop with this one until the OP replies.

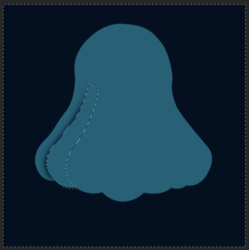
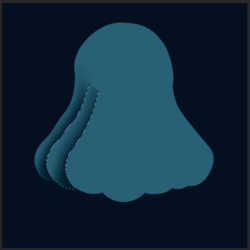
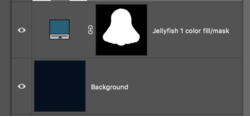
After my initial base drawing, I like to block out large area's to be painted. I do that by using the Pen Tool set to path, to create a shape as I did for this demo. On a new layer I create the template by converting the Pen Tool path into a selection and filling that selection with white. I save the path. I save the template, turn it off, and place it into a group with other templates.

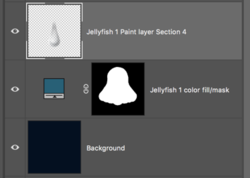
I then use a Color Fill adjustment layer with a layer mask made from the to fill the shape with the base color. I use a CFAL because I can quickly and easily adjust the base color if needed by double clicking the layers thumbnail icon.
Screen Shot 2017-11-21 at 1.22.54 PM.png
Screen Shot 2017-11-21 at 1.22.40 PM.png

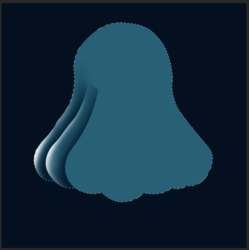
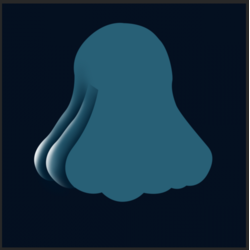
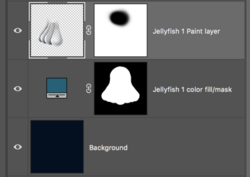
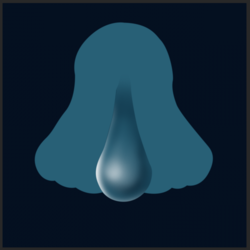
I don't want to paint directly on the base color layer, so I create a "Paint Layer" that I actually paint on. Of course I use the templates to create the selections that I paint within and around like I described in post #4.
Screen Shot 2017-11-21 at 1.24.36 PM.png
Screen Shot 2017-11-21 at 1.24.24 PM.png

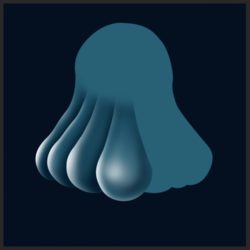
However, I sometimes create new layers for each individual sections.........this is probably better.
Screen Shot 2017-11-21 at 1.57.34 PM.png
Screen Shot 2017-11-21 at 2.02.46 PM.png
 
Messages
3
Likes
2
IamSam & Trevor Dennis, thank you so much for your thorough and knowledgeable answers. I really appreciate it. I haven't had a go with these instructions yet, but i am sure i will manage.
There's one more thing i would like to ask you. You have both mentioned it is important to have the right brush settings. could you clarify what these settings would be to achieve the look desired? which brush do i choose? and what about brush presets such as shape dynamics, dual brush, texture, noise etc...?

many thanks
 

Trevor Dennis

Well-Known Member
Messages
153
Likes
99
We have been getting a good few threads on the Adobe forums about banding with soft brushes with the last two versions of Photoshop, and I am not inclined to rely on a soft brush to get a really feathered edge. Gaussian Blur finishes it off nicely, and is usually my preferred way to blend one tonal area into another.

It is definitely worth learning at least the basics of the brush engine IMO. Someone like Kyle Webster spends countless hours just messing with brush and tool presets, and you'll have noticed all the Kyle Webster presets if you have CC 2018. I am not KW, but I often spend an hour two practicing brush strokes and trying out settings.

If you want to get a soft edge just using the brush, check Build Up which is the same as turning on Air Brush in the Options bar. Set the brush flow really low — say 10%, and move the cursor slowly letting the cover build.

I actually don't use a heap of different brushes for most of what I do, although I do have a 100 brush sets. Fully hard, pressure affects size is my most used preset, and my favorite set is Hair & Skin Brushes by Castrochew. I also have a set with size set to fade which I use for hair and eye lashes eye brows etc. If anyone has ever wondered what the Fade figure relates to, it is brush spacing. I tend to use 10% brush spacing as the default 25% is way too course.

Incidentally, if you want to get into digital art, I was invited to go to MAX last year as a Teaching Assistant and I worked with Bert Monroy. All the MAX content is shared publically, and linked to from the ProDesignTools site. Bert's workshop was not filmed, so I have put the workbook from workbook on Dropbox. LINK The MAX 2016 content can be found HERE and this year's HERE I have seen a link to the direct downloads on PSG, so I think you are familiar with ProDesignTools.
 
Last edited by a moderator:

IamSam

Administrator
Staff member
Administrator
Messages
22,721
Likes
13,258
You have both mentioned it is important to have the right brush settings. could you clarify what these settings would be to achieve the look desired? which brush do i choose? and what about brush presets such as shape dynamics, dual brush, texture, noise etc...?
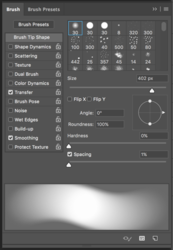
Good question! For this type of painting only, in the style your asking about in this thread, these are the Brush settings you'll need.

First let me say that if your going to do any painting in Photoshop you will have to have some type of graphics tablet and pen. If you don't have one, get one. I recommend the Wacom Intuos Pro.

Here are the brush settings for this type of painting.
Screen Shot 2017-11-23 at 7.38.58 AM.png
Screen Shot 2017-11-23 at 7.39.15 AM.png

That's it! Everything I did in my examples above I used these settings.
 

Top