What's new
Photoshop Gurus Forum

Welcome to Photoshop Gurus forum. Register a free account today to become a member! It's completely free. Once signed in, you'll enjoy an ad-free experience and be able to participate on this site by adding your own topics and posts, as well as connect with other members through your own private inbox!

How do I do this lighting?


L i am

Member
Messages
17
Likes
4
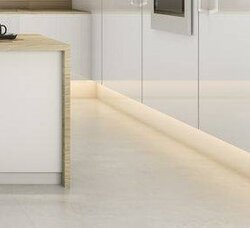
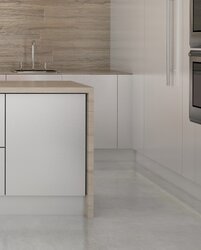
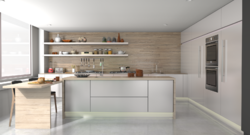
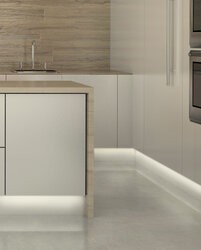
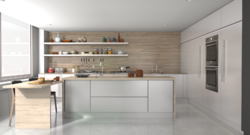
Hi, I am very new to photoshop and am interested in rendering post production. I have attached 2 images of some renders. Could somebody please explain how to achieve the lighting under the cupboards How would I accheive this in photoshop? I assume I make a mask ( not that I have any experience in this yet. From there I have no idea. Could somebody please give me some hints please?

Lighting under toe kick.
Gurus lights.jpg

No lighting
Gurus no light.jpg
 
So very sorry, I missed this thread.

I have a simple solution that I can explain later..........right now I have to run to the real job!

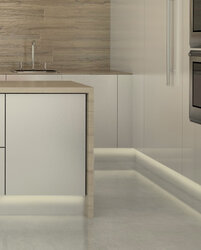
Here is a quick example that needs some tuning.
GurusNoLightLight added_01.jpg
 
@IamSam will no doubt come up with an easier solution than I can offer. But i'd been playing with this and here's what i've come up with:

First open up you image andusing a selection tool -either the pen or the plygonal lasso - select an area under the toe kick and also a bit of floor so the light can "spill" onto it.
Then create a new layer above the image and make sure it's active:]
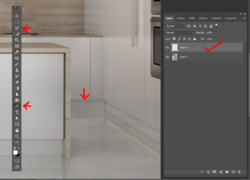
1654267853304.png

Now uing a large soft brush, begin painting white into the selected area. The brush will only be about halfway in so there's no hard edge on the light spilling onto the floor.
Then change the blend mode to overlay. Click Ctrl+D (Command+D on Mac) to deselect the area:
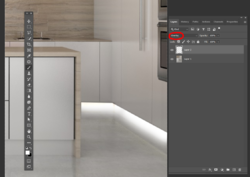
1654268334633.png

Then using black with a soft brush at a low opacity on the mask,, begin brushing away the the light from the bottom of the toe kick and along the edges where the floor meets the cabinet and the two cabinets meet. The add a slight gaussian blur (ie 1-2 pixels) to the layer. You can also slightly reduce the opacity of the layer:
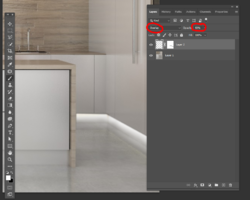
1654269650354.png

If you like, you can also add a curves layer to slighlty darken the image or a photo filter to warm it up and change the mood overall:
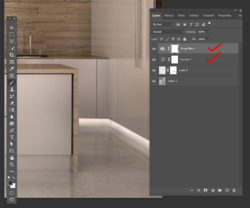
1654269804916.png

Takes a bit of fooling with it and as I mentioned, Sam may come up with an easier method. :)
 
Thank you so much JeffK. I will have a go today :) I like your tutorial format. But please be open to some questions as I am so new to this.
 
Thank you so much JeffK. I will have a go today :) I like your tutorial format. But please be open to some questions as I am so new to this.
You're most welcome - glad to help. Any questions you have, let me/us know...
 
Total newbie question, when I choose the pen tool to make my shape I only get a blue line. Could somebody please explain ?
Thanks
 
Thanks for your help JeffK, I got lost a few times and I had issues with trying to keep my hand steady with the brush tool. I also had some issues understanding the last bit as I could not make the Gausian blur nest into my layers. But half way through the 2 hours, yes 2 hours it took to do this (I thought my head was going to explode when you mentioned Gausian blur;) Anyway this is the best I can do for now. But I know it is not convincing at all. So I am open to any assistance in making it better, and or easier, I would like to have another go at itPS training 2.png
 
Again sorry that I did not get back to to this, but Jeff did a great job in explaining the basic process. I used a completely different method in adding the light but it would be the same masking process.

I wish I had the original image to work with.............would have been much easier.

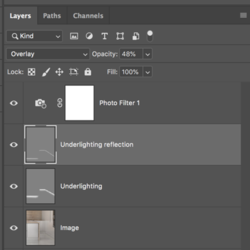
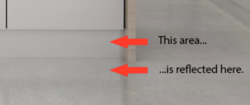
I think the hard part is depicting the reflection of the underlighting on the floor.

GurusNoLightLight added_03.jpg

I used 2 50% grey layers set to overlay, a selection (made with the Pen Tool), and the Dodge Tool to create the lighting.
Screen Shot 2022-06-04 at 8.13.27 AM.png
 
Cheers IamSam, did you do it with gradients? Drawing the Masking was fairly easy It was controling with the brush that was hard.
 
Oh and some general hints on how to improve the image would be great as well;)
Actually I don't see much wrong with it. You've got a nice fade to the lights and considering the brightness of the room, the illumination in the toe kick is realistic. Nice work.

And don't worry about the amount of time you spent. Each move you make is a learning moment. I'm no expert in this - I could swear that I probably take ten times longer with my edits than anyone else here. Photoshop does have a big and long learning curve. As I always say, to learn the thing you have to do the thing. :)
 
Thanks JeffK, But I am not so happy with it perhaps that is because I know I did it :unsure:
 
Maybe in principal I could do the original downlights, chop them out free transform, copy and roatate?
 
Maybe in principal I could do the original downlights, chop them out free transform, copy and roatate?
Possibly! Give it a try! Thant's the beauty of Ps...........many ways to accomplish things.

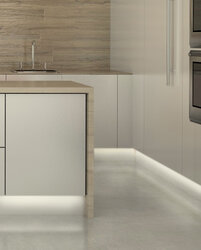
I'm finally happy with the reflection here! For me, this looks the most realistic.
I can explain how I did it later, for now...it's off to work. Filling in for a colleague.
As I stated above, I wish I had the original image to work on.
GurusNoLightLight added_04.jpg
 

Back
Top