What's new
Photoshop Gurus Forum

Welcome to Photoshop Gurus forum. Register a free account today to become a member! It's completely free. Once signed in, you'll enjoy an ad-free experience and be able to participate on this site by adding your own topics and posts, as well as connect with other members through your own private inbox!
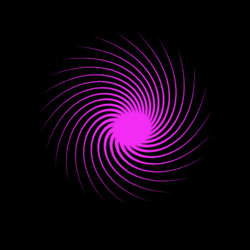
How make this effect in photoshop


IamSam

Administrator
Staff member
Administrator
Messages
22,721
Likes
13,258
Hello and welcome.

What is your level of Photoshop experience?

Which part of this effect are you having trouble with?

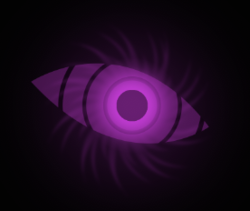
The eyes? Drawn with the Pen Tool, made into a selection, added to a layer mask on a solid color adjustment layer. Then duplicated, reversed, for other eye.
The concentric circles? Created with the Ellipse Tool or the Elliptical Marquee Tool.
The Pupil? Created with the Ellipse Tool or the Elliptical Marquee Tool.
The glow? Which is created using a layer style and "outer glow".
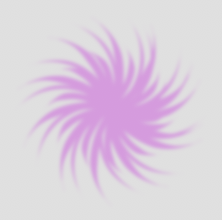
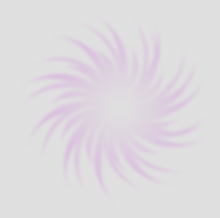
The spinning starburst effect? Created with the Brush Tool, duplicated, and placed over each eye. Color added with a layer style and "color overlay".

There's a lot of different techniques going on here, it would greatly help if you could be more specific.
 

Kunkypotsoup

New Member
Messages
3
Likes
0
Yes I was referring to the spinning starburst effect was a special effect filter used or just with the brush tool ?
 

IamSam

Administrator
Staff member
Administrator
Messages
22,721
Likes
13,258
There are actually many ways that this effect might be done. This is just one way.

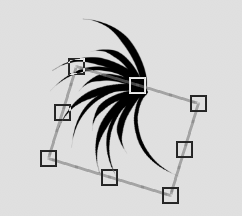
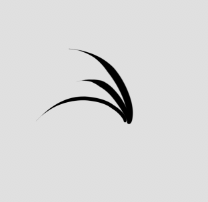
Use your Brush Tool to create a few tapered strokes.
Screen Shot 2020-01-12 at 10.06.01 AM.png

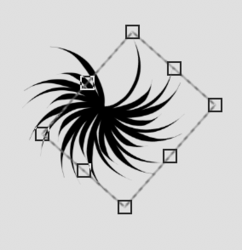
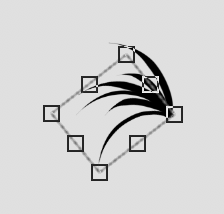
Duplicate this layer and rotate using Free Transform (Cmd/Cntrl + T). You can reposition the center pivot point by holding down the Opt/Alt key and click where you want the pivot.
Screen Shot 2020-01-12 at 10.05.51 AM.png

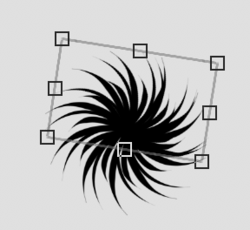
Now you have two layers. Highlight the two layers and duplicate (Cmd/Cntrl + J), then hit Cmd/Cntrl + E to merge. Rotate this layer as described above.
Screen Shot 2020-01-12 at 10.06.53 AM.png

Repeat the process until satisfied.
Screen Shot 2020-01-12 at 10.08.51 AM.png
Screen Shot 2020-01-12 at 10.09.30 AM.png

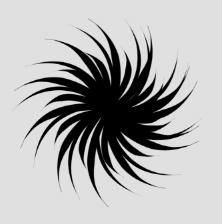
Once you have the layers looking like you want, you can now merge them all or make a stamp visible layer (Turn of any background, Select/highlight uppermost active layer, Shift + Opt/Alt + Cmd/Cntrl + E).
Screen Shot 2020-01-12 at 10.19.34 AM.png

You can create a brush from this by adding back a white background layer or use it just as it is.

You can now convert the wheel into a smart object (Right click layer and choose "convert to smart object")
Add a smart filter - Gaussian Blur
Add a layer Style set to color overlay
Lower opacity
Screen Shot 2020-01-12 at 10.24.03 AM.png

Add a layer mask and a radial gradient..
Screen Shot 2020-01-12 at 10.29.59 AM.png

This was created very fast as a quick example, so it's not exact!!!!
Screen Shot 2020-01-12 at 10.54.01 AM.png

I will try to post some other methods if no one else jumps in.
 

Rich54

Guru
Messages
1,732
Likes
3,412
Here's another way to achieve a similar effect that's more uniform and "exact". (However, in this particular situation I think I prefer IamSam's result).
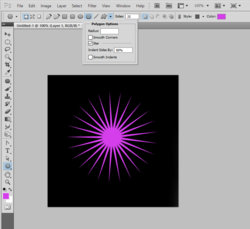
  1. Use the Polygon tool to create a shape with as many sides as you like. I chose 25 sides and I set the indentation to 80%. You should get something that looks like this. (You could also try drawing a shape like this freehand to get a feel more like IamSam's approach.)

    Polygon1.jpg

  2. If you used the Polygon tool, you'll need to either rasterize the layer or copy the polygon shape to a new layer. Then go to Filter>Distort>Twirl. Adjust the amount of twirl to whatever looks best for you. This gives you the shape below. You can apply some gaussian blur if you want and also experiment with the layer opacity.

    Polygon2.jpg
 

IamSam

Administrator
Staff member
Administrator
Messages
22,721
Likes
13,258
IamSam's Do you know what brush was used in your First image ?
It was a normal Hard Round brush, 1% spacing, 70% hardness. With the " (Pen)Pressure for size" button clicked on in the tools options bar. Since you didn't answer my question about your experience, I made the assumption that you were experienced and probably had a tablet.

If you don't have a pen and tablet and can only use a mouse, this technique has to be approached by setting the brush size, then using the Pen Tool set to path, drag out a curved path, right click and choose "stroke path", add simulate pressure in order to create the tapered brush strokes. You would need to do this on each of the original bush strokes changing the brush size and the length and curvature of the path (like my first image). Otherwise, the rest of the technique I describe above is the same.
 

Top