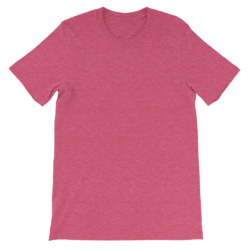
1. Start off by getting / taking a picture of a Plain T shirt with a Solid, Light color.
2. Make a Selection (using any of the selection tools) on the T Shirt, in the shape of the pattern that you will be adding onto the T Shirt. In my case, I was going to be adding a Rectangular Logo, hence I made a Rectangular Selection. If you're changing the pattern and color of the T shirt, select the whole shirt (I haven't tried this, so I'm not sure of the exact results.)
3. Fill the selection with any color of you choice; it's just to demarcate where the design goes.
Right Click on this layer and select the option "Convert to Smart Object". This lets you edit this Red Area any number of times and add in your designs, while maintaining the shape, transformations (like warping etc) to it, as well as the "Displacement" Effect to it, which I have explained further on.

4. [Optional] - In case your T shirt is being worn by a person, you will have to warp the Red Area in order to take the Curves and Bends on the sides of the person, so that it looks realistic. Do this by
Selecting the Red Area Layer > Ctrl+T > Right Click on the Transformation Box > Warp.
5. Now double click on the Red Area Layer OR right click on the layer and select the "Edit Contents" option. This will open a New Layer Window (which has a .psb extention). Now, this is where you will add your design. Drag and Drop your Design into this Window, adjust it to fit within the bounds of the layer. Hide the Red Color Area so that only your design is visible.
Hit
Ctrl+S after you've done your adjustments.

6. You will now see your design on the shirt. But as you can see, it doesn't have the wrinkles on it, and it looks pasted on. To add in the wrinkles, make a selection conforming to the shape of the Design you have added. You can do this by
holding Ctrl and clicking on the Layer containing your design. Now select the background layer (which contains only the T shirt) and press
Ctrl+J. This will create a new layer containing only the selection. Drag this new layer ABOVE the Layer containing your Design.

- Layer 1 = Contains the Design
- Layer 2 = Contains the T Shirt Wrinkles (new layer containing what was selected)
7. Now open a Curves Adjustment Layer and clip it onto Layer 2. Do this by holding
Alt and clicking on the edge between Curves Layer and Layer 2 (your cursor will change into a small down arrow). Now adjust the Curves layer in such a way that the layer becomes as White as possible while the wrinkles are still visible, like I have done.
[This is why you need a plain T shirt with a light color. It makes this step 10 fold easier.]

8. Now right click on Layer 2 and change its Blend Mode to "Multiply". Now the wrinkles will be visible on the Design.
But if you look closely, the Text does not bend along with the wrinkles and folds on the T shirt.

9. To make the text and the borders etc to bend along with the curves and the folds of the T shirt, we will use the "Displacement" Filter.
Hide the Layer containing the Design (Layer 1) so that only the Wrinkles later and curves adjustment layer are visible.
Save this as a .PSD to anywhere on your desktop, with any name you want. Here I have named it 'Wrinkles.psd".

10. Now make the Design Layer visible and select it. Navigate to
Filter > Distort > Displace. Set any value for you Horizontal Scale and your Vertical Scale. Since your Design Layer is a Smart Object, you can change these values at any time.

11. Once you click OK, you will have to select the .PSD file that you had saved earlier. I had saved it as "Wrinkles". Once you select the file, you get these results.
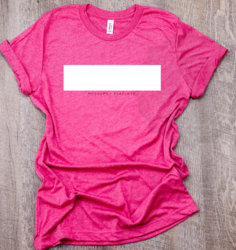
The design has conformed with the wrinkles and folds on the T shirt. You can now double click on the Smart Filter (visible below your Design Later) and change the Horizontal and Vertical Scale values to your liberty.

This is the Final Result.

I hope the way I've explained isn't too confusing. Feel free to ask me any questions.


")