What's new
Photoshop Gurus Forum

Welcome to Photoshop Gurus forum. Register a free account today to become a member! It's completely free. Once signed in, you'll enjoy an ad-free experience and be able to participate on this site by adding your own topics and posts, as well as connect with other members through your own private inbox!

How to Manually Change Eye Direction in Photoshop?


lbarbieri

New Member
Messages
3
Likes
0
Hey everyone,

I've found some tools with AI but quality of their output is quite messy. I'm working on a photo edit where I need to change the direction of the subject's eyes. I've been messing around with the tools in Photoshop but I'm finding it quite tricky. Can anyone guide me on how to manually alter eye direction in a realistic manner? Any tips, tricks or step-by-step instructions would be hugely appreciated!

Thanks in advance!
 
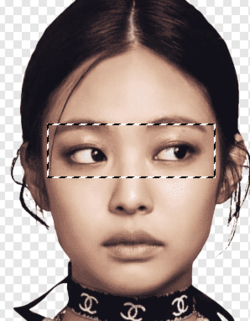
Select the eyes with the Rectangular Marquee Tool, Cmd/Cntrl + J to copy to it's own layer.

Screen Shot 2023-08-03 at 8.04.02 AM.png

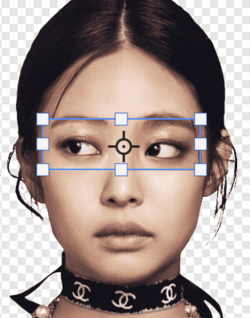
Select the copied "eyes" layer, Cmd/Cntrl + T to enter free transform, right click and choose flip horizontal

Screen Shot 2023-08-03 at 8.07.36 AM.png
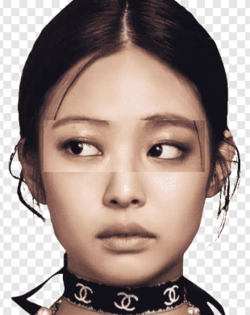
Screen Shot 2023-08-03 at 8.10.00 AM.png

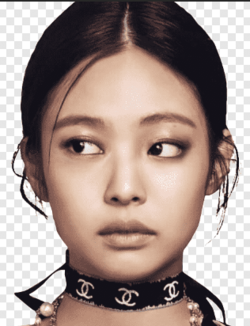
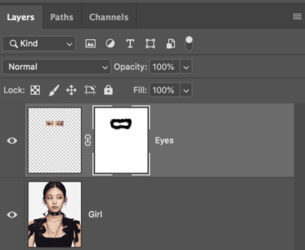
Add a layer mask to to the "eyes" layer, use the Brush Tool to blend.

Screen Shot 2023-08-03 at 8.12.12 AM.png

Screen Shot 2023-08-03 at 8.12.42 AM.png
 
I'm not sure where you are having problems within the filters in Photoshop although it can be hit and miss. Here's a very quick example using the latest version; duplicated the original (should the filter add/subtract/distort too much .... you can mask out selectively..); then Filter/Neural/Smart Portrait/Eye Direction.

i.e.

Eyes.jpg
 
Hi Guys! Thank you very much! That's what I've been looking for. It seems pretty easy than I thought, thanks again!
 
Manually altering eye direction realistically in Photoshop requires precise masking and blending. Duplicate your image layer, then use the Liquify filter to subtly warp the iris and pupil towards the desired gaze. Refine the edges with the Elliptical Marquee Tool and carefully blend the warped area with the original using the Burn and Dodge tools.

Adjust brightness and contrast for natural lighting, and consider adding subtle iris reflections for added realism. Remember, less is more - aim for subtle shifts to maintain natural eye proportions. For trickier angles, consider warping the outer eye corners slightly to match the new gaze. Practice on low-pressure edits first, and don't be afraid to experiment!
 

Back
Top