What's new
Photoshop Gurus Forum

Welcome to Photoshop Gurus forum. Register a free account today to become a member! It's completely free. Once signed in, you'll enjoy an ad-free experience and be able to participate on this site by adding your own topics and posts, as well as connect with other members through your own private inbox!

How to remove grey areas in text image


juco

Member
Messages
23
Likes
2
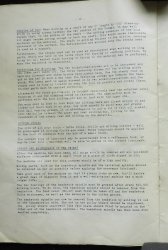
I have photographed a document which I need to print. I have used fill to get a white background but when I print it there are greyish patches.
I have used the magic wand and then paint brush over the page to try and eliminate them but this reduces the quality of the print. Anything else I can try.

(see attached)
print.JPG.
 

IamSam

Administrator
Staff member
Administrator
Messages
22,721
Likes
13,258
Hell and welcome.

Can you post the the original photograph of the page? It's best to start from scratch here.
 

IamSam

Administrator
Staff member
Administrator
Messages
22,721
Likes
13,258
Thanks! Some one will walk you through the steps of cleaning up the photo and giving it a nice consistent white background.
 

polarwoc

Guru
Messages
1,576
Likes
1,421
1) Make a copy of the background layer.
2) Have a White layer underneath it. So, at this stage there should be three layers - Background copy, White, Background - from top to bottom on the layers list.
3) Hide the Background layer. This is how the layers panel should look like.
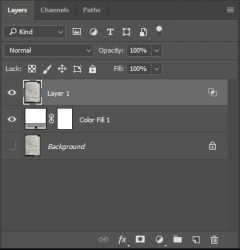
q1.png
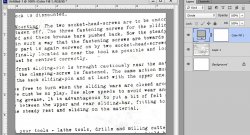
4) Double Click on the top layer (do not double click on the layer name or thumbnail, but beside it), to open Layer styles window. As "Blending Options" is selected by default, look at the "Blend If" options. Ensure "Grey" is selected. We will not need to alter the "Underlying Layer" sliders. Now, move the White slider in "This Layer" towards the center while noticing the Grey colour background in the picture disappear. If you move it too much, the black text will start disappearing too. Find the right balance. I found it at about 164.
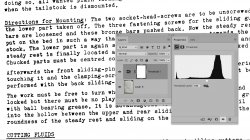
5) Now, while keeping the Alt key pressed, click + drag on the White slider to split it. Move the two halves to suit. This is how my Layer Styles window settings look like:
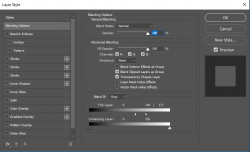
q2.png
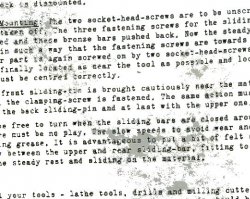
6) Accordingly, here is how my picture looks like:
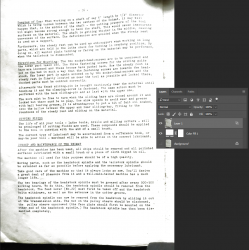
q3.png
Note: There is still grey visible, but this is not within the text, so it can be easily erased or masked.
Note: There are several ways of doing this, but I think this is the quickest way.
 

juco

Member
Messages
23
Likes
2
polarwoc,hawkeye thanks for your reply, it will take me a while to follow your instructions as my use of PS is just normally basic stuff.
I will report back the outcome when done.
 

thebestcpu

Guru
Messages
2,989
Likes
2,750
Hi juco
Here is another approach to take.
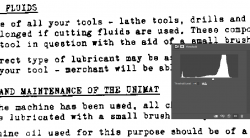
Just apply a Threshold Adjustment Layer and tune the slider to get the desired result.
Doing if with your image leaves the edges a bit jaggy due to the scanning resolution used.
So in my image, I initially upsized with Gigapixel AI from Topaz and then applied the Threshold Adjustment Layer.
Decent results in my mind
Hope this gives you another direction to consdier
John Wheeler

text-to-crispen-adj.jpg
 

juco

Member
Messages
23
Likes
2
Thank you the bestcpu, I will give that a try (I am using photoshop 6.0) that aside the when I attempt to improve the image when it appears to be good when I then print (laser b&W only) that is when it shows the what I call the patchy greyish blobs around some of the text that are almost undetectable to the naked eye.
Your image appears to be free of that so will give it a go.
P.S. I am not scanning but taking an actual photograph and then using that image on photoshop.
 

juco

Member
Messages
23
Likes
2
thebestcpu....
That works sufficiently for my needs and is giving me a very much better printed page than my own feeble efforts.

Thanks to all who contributed.
 

thebestcpu

Guru
Messages
2,989
Likes
2,750
Glad it worked for you @juco
I learned some techniques from the other forum member posts in this thread as well
John Wheeler
 

polarwoc

Guru
Messages
1,576
Likes
1,421
So in my image, I initially upsized with Gigapixel AI from Topaz and then applied the Threshold Adjustment Layer.
John,
I applied the Threshold Adj layer with similar numbers but had jagged rough edges on letters. I think Gigapixel AI did a lot of magic in improving the quality of image you posted.
q1.png
 

thebestcpu

Guru
Messages
2,989
Likes
2,750
Hi @polarwoc
No question that Gigapixel helps some yet less than you may think. In the attached image, all I did was increase the size of the image by 6X (same as I did in Gigapixel) using the default enlargement rendering of PS and then apply the Threshold Adjustment Layer. Very similar results.

Part of what gets in the way (from my understanding) is that the eye brain combination is an excellent edge detector and so our eyes see the edges (pixelation) very well and it interferes with the cognition of the letters (the edges are distractors). So any higher resolution blurring and then sharpening makes it easier to read especially if you are viewing at larger magnifications. It helps to see whole words and ignore the imperfections.

John Wheeler

Crispen-text-wtihout-Gigapixel.jpg
 

Top