What's new
Photoshop Gurus Forum

Welcome to Photoshop Gurus forum. Register a free account today to become a member! It's completely free. Once signed in, you'll enjoy an ad-free experience and be able to participate on this site by adding your own topics and posts, as well as connect with other members through your own private inbox!

How to Remove Makeup


sparklyturtle4177

New Member
Messages
3
Likes
1
Hi everyone -

My niece got engaged today!!! Unfortunately, her makeup rubbed off on her fiancee's chin, and I cannot for the life of me figure out how to fix it without making his skintone look all weird. Can anyone show me how to do this?

Here is one of the photos -

IMGP2543.jpeg
 
Here's an edited photo.

Do you have any Photoshop abilities? If yes, I can tell you how I did it and you can try it on the other photos you have.

IMGP2543.jpeg
 
Thank you so much! I do have photoshop abilities, but could not figure this one out. It’s probably way simple and I just was overthinking it.
 
I've no doubt @Rich54 will come up with a better/easier method - just tried a technique I stumbled not long ago.

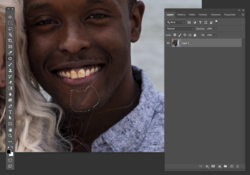
With your image active, use the lasso tool to select the "stain" area:

1654523880367.png

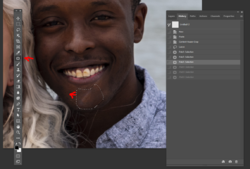
Now, click on the patch tool, hover over the selected area, and start moving it to the left. But not all at once - move a bit to the left, let go of your mouse and stop, move a bit to the left, let go of your mouse and stop, etc. So instead of one large pull, you're doing small incremental pulls:

1654524775741.png

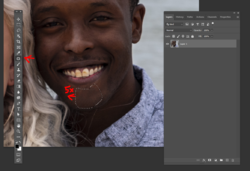
And again:

1654524863797.png

And again - I did this in about 5 small steps:

1654524962850.png

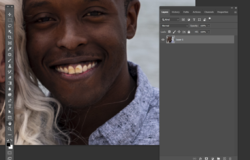
This was final result:

1654525042167.png

You can also go in with the healing brush - not the spot healing - and make some additional correction.

I went ahead and did some additional work - selected the teeth of both, added a hue/saturation adjustment layer, lowered the yellow saturation of the teeth, and then brightened up a bit. Used the cloning tool to repair the staining on the teeth. Also popped into camera raw to open the shadows and added some clarity. I'm sure that more could be done but here's what i have for a beautiful couple and a beautiful memory:

engagement photo.jpg
 
Thank you! I am going to try this and will let you know how it goes. I know Joe will appreciate the teeth whitening - he had a terrible infection as a child and the antibiotics permanently stained his teeth - even the dentist can't fix it.
 
Thank you! I am going to try this and will let you know how it goes. I know Joe will appreciate the teeth whitening - he had a terrible infection as a child and the antibiotics permanently stained his teeth - even the dentist can't fix it.
You're very welcome. As I said, Rich may come up with another solution as well. This was one that I started using a short time ago and as in all things Photoshop, is probably one of many different ways to approach it. Just comes down to what works in what situation.
Hope you don't mind that I did some retouching. Permanent staining is an issue - they do have thin veneers that can be placed on the teeth but I have no idea of the out-of-pocket costs.
Let us know how you do!
 
Sometimes the patch tool, healing brush or clone stamp are the only way to go. But those tools replace the targeted pixels with different pixels and are therefore "destructive". My bias is always to first try to leave the existing pixels intact (especially on skin). In this case, my plan is to use a Curves adjustment on the chin to change the color of the light pixels to match the rest of the darker skin.

I used the Color Sampler to select two spots of skin right next to each other that ought to be the same color, but are not. You can see them below labeled #1 and #2 (where the white arrows are pointing). When you use the Color Sampler, the Info panel pops up, displaying the RGB values of the two spots. You can see that Spot #2 reads R89, G64, B60. But it needs to be the same as Spot #1, which reads R64, B36, G29.
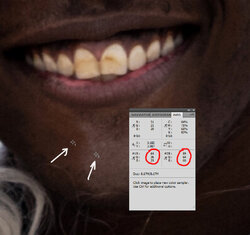
Step1.jpg


Using the Lasso tool, create a very rough selection (no need to be careful—this is only temporary) of the chin that includes Spot#2 but excludes Spot #1. With that selection active, open a Curves adjustment layer.
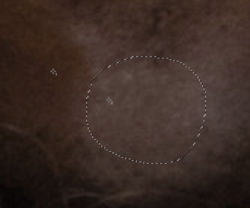
1654538564690.png


In the Curves layer, select the Red channel and activate the little hand-pointer icon (where the red arrow is pointing). Using that icon, click it exactly onto Spot #2 in the image (on the man's chin). The Curves layer identifies that spot and displays the Output and Input values for it. We are interested in the Output (where the other red arrow is pointing) that currently reads 90. From Spot #1, we know that Red needs to be 64. So, in the Curves adjustment itself, click the mouse onto the Output figure that reads 90 and change it to 64 in that little box. Press Enter, and the Curves adjustment will reset the Red value of Spot #2 from 90 to 64.

Repeat this exact process in the Curves adjustment for the Green channel and the Blue channel. Once done, you have changed the color of Spot #2 to the desired value of R64, G36, B29.
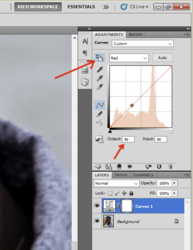
1654536683104.png


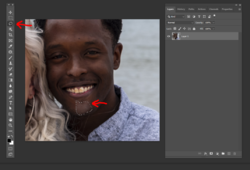
Now fill the layer mask of the Curves adjustment entirely with black. Use a soft brush and paint with white in the layer mask to reveal the curves adjustment on the stained area of the chin. Do only the central, obvious parts of the chin and avoid the edges where it borders the good skin. Once you've got the central part done, change the Flow setting of the brush to something very low, like 5%. With that low-Flow brush, gradually paint white into the layer mask to feather-in the transition from the stained area of skin to the good area. It takes a little patience and you may need to vary the brush size. If you go too far and accidentally darken a part of the skin that was already dark to begin with, change the color to black and paint in the mask to restore that skin back to where it was.
 

Back
Top