I had made a previous post on this thread that had a pilot error and it was deleted.
Here is my second go at a solution based on observations in getting from the left image to the right image.
Here were my beginning observations about the image to determine the steps I would attempt to duplicate the effect.
- The overall tone needed to be mostly increased yet mostly in the higher luminosity areas
- Also noticed that there was a bit of blur yet only in the more colored areas
With those clues here are the steps I took and the samples shown are where the left image was adjusted and the image on the right was untouched through masking.
Here is the starting image for reference:

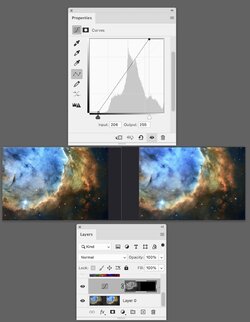
To change the tone mostly in the higher luminosity areas I created a luminosity selection by clicking on the RGB chip in the color channel and masked out the right side:

I used a Curves adjustment Layer which picked up that selection as a mask and changed the White Point and the Black Point to get a pretty good match with the image on the right:

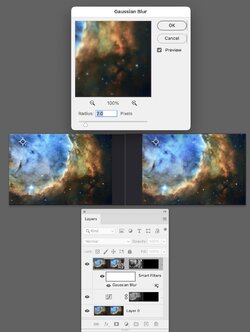
The last step was to add some blur in the more color saturated areas.
I stamped the Layer which would be a temporary Layer.
I also duplicated that Layer and converted that to a Smart Object
With the temporary Layer, I used the RGB to HSB filter and used the Green Channel (which after the applied filter represents the Saturation Channel and I copied that Channel to the Layer Mask of the Smart Object. I then deleted the HSB temporary Layer
I applied a Gaussian Blur of 2 pixels to the Smart Object Layer and the result is shown below.
I think it is pretty close to the right image visually.

There are no doubt many ways to get close to the final image from the starting image and this is no doubt just one of many approaches
Hope this is of some help
John Wheeler