What's new
Photoshop Gurus Forum

Welcome to Photoshop Gurus forum. Register a free account today to become a member! It's completely free. Once signed in, you'll enjoy an ad-free experience and be able to participate on this site by adding your own topics and posts, as well as connect with other members through your own private inbox!

mockup help


babilonki36

Member
Messages
19
Likes
2
please can somebody show me where to upload this mockup ?
because it happen to find free ones but the picture looks so small
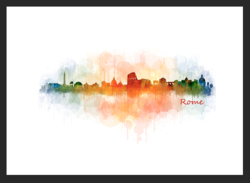
i want something to apear like this
Capture.PNG

not like this
1.PNG
 

babilonki36

Member
Messages
19
Likes
2
i need a mockup with frame like the first one . because it show perfect dimonsions of the art when i past it on it.
 

IamSam

Administrator
Staff member
Administrator
Messages
22,721
Likes
13,258
Please explain what you mean by mockup.

A mock up is usually a PSD file that allows you to create a sample of a product in a real-world setting without actually having to create a physical product. It usually consists of product that can be edited using smart objects to accommodate easy and quick changes.

Are you wanting a picture frame mockup ?
 

IamSam

Administrator
Staff member
Administrator
Messages
22,721
Likes
13,258
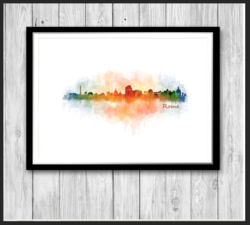
Something like this?

This is very easy to make.
PictureFrameMockup_01.jpg

Screen Shot 2019-05-28 at 3.47.37 PM.png
 

IamSam

Administrator
Staff member
Administrator
Messages
22,721
Likes
13,258
Here's how to make this simple mockup. This is also referred to as a synced smart object mockup.

Open your sample image.

Select/highlight the original image layer.
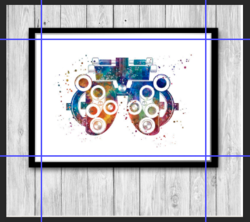
Set up guidelines to outline the area you want to use as the cell or field that will be made into an editable smart object.
Screen Shot 2019-05-29 at 5.16.22 PM.png

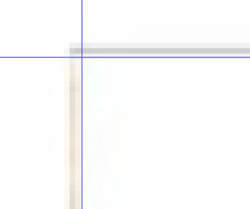
Make sure that you place the guidelines inside the matting of the picture frame.
Screen Shot 2019-05-29 at 5.16.53 PM.png

Once you have all of your guidelines in position......
Create a new layer.
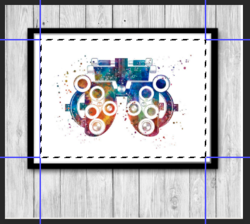
Select the Rectangular Marquis Tool and create a selection using the guidelines.
Screen Shot 2019-05-29 at 5.25.29 PM.png

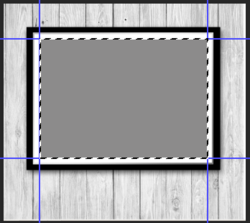
Fill that selection with any color you desire, I picked grey.

Screen Shot 2019-05-29 at 5.27.05 PM.png

Name that layer, "Image Cell".
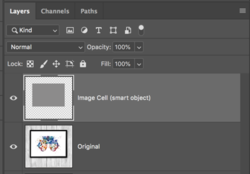
This is what you should have in your layers panel so far.
Screen Shot 2019-05-29 at 5.31.38 PM.png

With "image layer" selected/highlighted, right click the body of the layer and choose, "convert to smart object.
Now duplicate that layer using Cmd/Cntrl + J
Rename the second or duplicated smart object layer, "Double click this layer to change image".
Turn off the second or duplicated smart object layer.
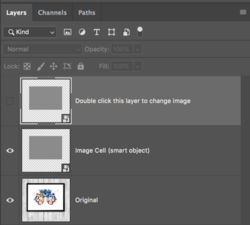
Your layers panel should now look like this. Note that the smart object layers thumbnails now have the smart object icon located in the lower right hand corner.
Screen Shot 2019-05-29 at 5.35.57 PM.png

Your done! Name and save the PSD file.

To edit...........just double click on the layer thumbnail of the layer that reads, "Double click this layer to change image"
This will open a PSB extension file.
Then drag and drop the image you would like to appear in the mockup onto the canvas.
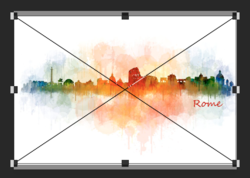
This will open the image as a smart object and it will have a transform box ready to be adjusted.
Screen Shot 2019-05-29 at 5.48.19 PM.png

Adjust the image to fit and hit the checkmark (tickmark) or enter/return.
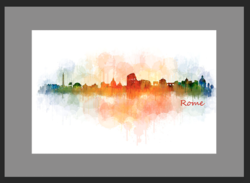
This is exactly how it will appear.
Screen Shot 2019-05-29 at 5.52.16 PM.png

I don't want the grey border so I will create a new layer below the image layer and above the cell layer, I will fill that layer with white.
Screen Shot 2019-05-29 at 5.58.58 PM.png

You can turn off the original cell layer or not.
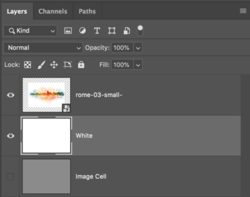
Here's what your layers panel in the PSB file will look like.....
Screen Shot 2019-05-29 at 5.55.04 PM.png

Now save the PSB and close.
Your mockup has now been updated!
Screen Shot 2019-05-29 at 5.56.19 PM.png

You can change or edit the image with the Picture frame anytime by double clicking the "Double click this layer to change image" layer!

Any questions?
 

babilonki36

Member
Messages
19
Likes
2
Here's how to make this simple mockup. This is also referred to as a synced smart object mockup.

Open your sample image.

Select/highlight the original image layer.
Set up guidelines to outline the area you want to use as the cell or field that will be made into an editable smart object.
View attachment 99080

Make sure that you place the guidelines inside the matting of the picture frame.
View attachment 99081

Once you have all of your guidelines in position......
Create a new layer.
Select the Rectangular Marquis Tool and create a selection using the guidelines.
View attachment 99082

Fill that selection with any color you desire, I picked grey.

View attachment 99083

Name that layer, "Image Cell".
This is what you should have in your layers panel so far.
View attachment 99086

With "image layer" selected/highlighted, right click the body of the layer and choose, "convert to smart object.
Now duplicate that layer using Cmd/Cntrl + J
Rename the second or duplicated smart object layer, "Double click this layer to change image".
Turn off the second or duplicated smart object layer.
Your layers panel should now look like this. Note that the smart object layers thumbnails now have the smart object icon located in the lower right hand corner.
View attachment 99087

Your done! Name and save the PSD file.

To edit...........just double click on the layer thumbnail of the layer that reads, "Double click this layer to change image"
This will open a PSB extension file.
Then drag and drop the image you would like to appear in the mockup onto the canvas.
This will open the image as a smart object and it will have a transform box ready to be adjusted.
View attachment 99088

Adjust the image to fit and hit the checkmark (tickmark) or enter/return.
This is exactly how it will appear.
View attachment 99089

I don't want the grey border so I will create a new layer below the image layer and above the cell layer, I will fill that layer with white.
View attachment 99093

You can turn off the original cell layer or not.
Here's what your layers panel in the PSB file will look like.....
View attachment 99090

Now save the PSB and close.
Your mockup has now been updated!
View attachment 99091

You can change or edit the image with the Picture frame anytime by double clicking the "Double click this layer to change image" layer!

Any questions?
now i understand , your explain is really easy and awsome , by the way nice skyline picture where can i download vectors like this?
many thanks ur the best
 

Top