What's new
Photoshop Gurus Forum

Welcome to Photoshop Gurus forum. Register a free account today to become a member! It's completely free. Once signed in, you'll enjoy an ad-free experience and be able to participate on this site by adding your own topics and posts, as well as connect with other members through your own private inbox!

need help to fix two different problems in photoshop


Michael1980

Well-Known Member
Messages
53
Likes
4
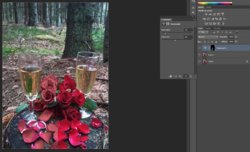
the first problem is this picture. it seems like there are to much intensity on the color when i print it. I have printet on glossy photopapper and choosed that option at my hp printer. can I improve the picture in photoshop and how ???
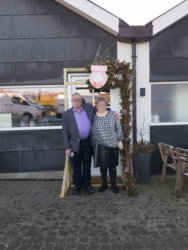
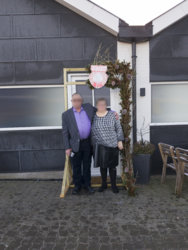
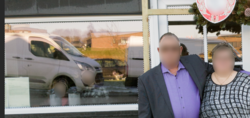
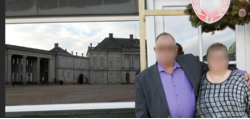
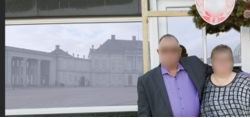
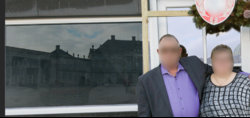
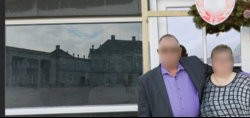
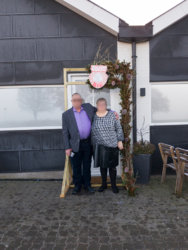
the second problem is a picture with reflection on the window how do I remove it so it looks normal
 

Attachments

  • midte2.jpg
    midte2.jpg
    257.4 KB · Views: 16
  • help.jpg
    help.jpg
    7.7 MB · Views: 18

Michael1980

Well-Known Member
Messages
53
Likes
4
Thanks but the real question was more 1 how did you fix the refleksion it is very good.
2 whay the problem with picture of Roses and how do i fix it and what should i pay attention to when i want to print
 

IamSam

Administrator
Staff member
Administrator
Messages
22,763
Likes
13,269
Thanks but the real question was more 1 how did you fix the refleksion it is very good.

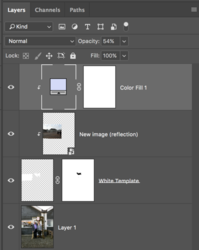
First you make a selection of all the surfaces you want to change the reflection in. I used the Pen Tool.
Screen Shot 2017-12-19 at 1.15.26 PM.png

On a new layer, fill that selection with white (or any color), name this layer "White Template".
(note: You will have to use a layer mask on this layer to add back the boughs of the Wreath and it's shadow.)
Screen Shot 2017-12-19 at 1.15.52 PM.png

Then you add the new image above the White Template layer, and use a clipping mask.....

Place the new image layer above the White Template layer.
Right click the new image layer and select create clipping mask or hover your cursor between the two layers while holding down the alt/option key, you will see the cursor turn into a box with a black angled arrow pointing down, then click.
Or........Select the new image layer, then you can go to LAYER > CREATE CLIPPING MASK
Or.....Select the new image layer use the keyboard shortcut, Alt/Opt + CMD/Cntrl + G.

Screen Shot 2017-12-19 at 1.16.07 PM.png

Now just add a solid color fill adjustment layer set to a bluish white, and clip it to the new image layer.
Lower the opacity to suite.
Screen Shot 2017-12-19 at 1.16.30 PM.png

Screen Shot 2017-12-19 at 1.29.51 PM.png
 

Isac

Banned
Messages
213
Likes
298
Thanks Sam, being a newbie I thought we could only do the edit and not a tutorial. Never mind. I would also blur the new images as they as they would probably be slightly out of focus. Just IMO. Cheers.
 

IamSam

Administrator
Staff member
Administrator
Messages
22,763
Likes
13,269
Thanks Sam, being a newbie I thought we could only do the edit and not a tutorial.
No problem, this thread was accidentally started in the Free Edit section and was later relocated to the General Photoshop forum.
 

Argos

Guru
Messages
3,460
Likes
5,255
I took Iamsam examples and play a little, you can also add different images and play with the light to add more realism.

Screen Shot 2017-12-19 at 1.16ff.jpg
Screen Shot 2017-12-19 at 1.16fff.jpg
 

Argos

Guru
Messages
3,460
Likes
5,255
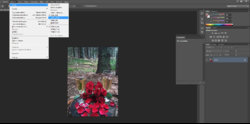
First if your want to print on paper you need to change the mode to CMYK intead of RGB so you see whats colours actually are going to print.

capturada4.jpg

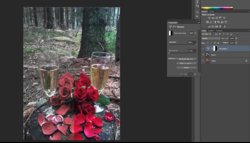
Second you can desaturate the image like Isac did like this.

capturada.jpg

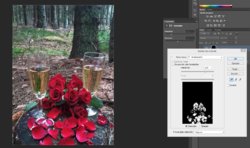
Ano0ther option if you dont want to lose color saturation in all the image you can make a color selection for example and desaturate the reds only.

capturada2.jpg


capturada3.jpg

Cheers!
 

Michael1980

Well-Known Member
Messages
53
Likes
4
Thanks a lot good explanation. But why cmyk when my printer is just blsck or color. Think it is rgb
 

Argos

Guru
Messages
3,460
Likes
5,255
In a simple explanation, Rgb is the colours used and adapted for monitors... this ones have his own ilumination and need diferent setting that something print in paper.
 

fogo00

Power User
Messages
279
Likes
361
cmyk stands for cyan, magenta, yellow and key(black). When talking about light, (like on a monitor, for example) you have something black (a turned off monitor) and use light to make it lighter and to make the colors. on that case the primary colors are red, blue and green (RGB) because in our eyes, we have three types of color receptor cells: those that capture red, those that capture green, and those that capture blue. thats why RGB are the primary colors. But when you are PRINTING something, its the other way around: you have a WHITE background (a blank paper) and adding ink makes the paper darker. Therefore, if you are making the paper DARKER instead of LIGHTER, you are doing the exact opposite. And what's the opposite of Red, Blue and Green? That's right. Those colors, when inverted, become Cyan, Yellow and Magenta (the main colors of ink on a printer). Black is also there so you don't end up concentrating the three types of ink on a spot, then black is used instead
 

Michael1980

Well-Known Member
Messages
53
Likes
4
any one who cant explain how i make sure the pictures are great before printing. the one with the roses were to saturated in colors i think and therefore the details got a little lost in the print on some photo paper. I would really like to know because i am about to print our personal calender for next year
 

Isac

Banned
Messages
213
Likes
298
isac how did you fix the window issue. I really like your way to fix this picture
Hi Michael
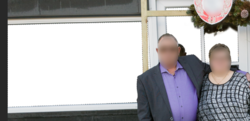
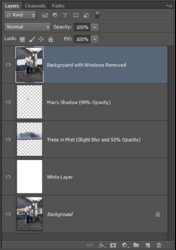
1: Firstly I made a copy of the background and on layer 1, I used the polygonal tool to select each of the window sections and deleted them. I then copied The RHS window and made copies of it and blurred them, then moved them into the other window cut-outs. You can also use another image as I have shown to just drop in behind Layer 1, to have different looks. I shortened the small branch that was over the RHS window because it was not a significant part of the image.

2: All I did with the roses image, was desaturate a little with a Hue/Saturation adjustment layer but other suggestions here would probably be more effective.
help-A.jpg
Layers Used.
529 31-Dec-17.jpg
 

Michael1980

Well-Known Member
Messages
53
Likes
4
thanks Isac, and ofcourse a sligt shadow from the man will end at the window. didnt think of that, but it make it more realistic. I like your way to fix the window. in this case it seems more realistic woitout showing a different reflection of the scene behind the fotografer.
do you bt any changes now how I can see at a picture it should be desaturated or in other way fixed before a print.

again thanks a lot and happy new year
 

Top