What's new
Photoshop Gurus Forum

Welcome to Photoshop Gurus forum. Register a free account today to become a member! It's completely free. Once signed in, you'll enjoy an ad-free experience and be able to participate on this site by adding your own topics and posts, as well as connect with other members through your own private inbox!

Need help with enlarging a canvas and "completing" my image


woezel1980

New Member
Messages
2
Likes
1
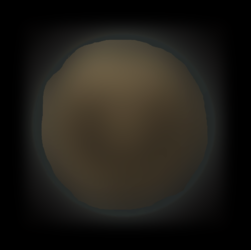
I have this image.
Note that the golden part is blurred out, as that is private. My question is about the overflowing grey to black part. As you can see, the overflowing does not fit within the canvas, because on the most outer parts of the edges of the image, the color is not black yet but still a bit grey.
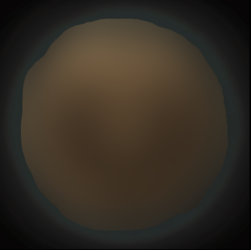
Screenshot_2.png

When I enlarge the canvas, I end up with this hard border (see the red line).
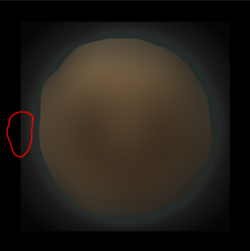
Screenshot_3.png

How do I "complete" the image so that the overflowing colours are right and there is no hard border anymore?
 
There is probably a lot of ways to do this and here is one off the top of my head.
I leveraged that fact that the gradient yet need out to the boundaries exists in the corners.
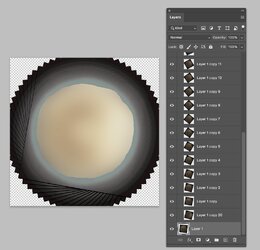
So I used a Step and Repeat technique to rotate the image in small increments with each increment creating a new Layer
Here are the stops
Copy the original Layer to the next Layer (Cmd+J or Cntl+J on PCs)
Use transform on the new Layer with Cmd+T or Cntl + T on PCs)
Set the angle for transformation in the Option bar to 5 degrees
Now the magic. Once that is done you create the next step with the shortcut Shift+Opt+Cmd+T (Shift +Alt+Cntl+T on PCs) and you get another Layer copy moved another 5 degress.
Continue that until you have gone 90 degrees or about 9 steps.
You will get an image that looks like the following (I increased the brightness with a Curves Adjustment Layer to see the details:

Screen Shot 2023-01-28 at 9.45.30 AM.jpg

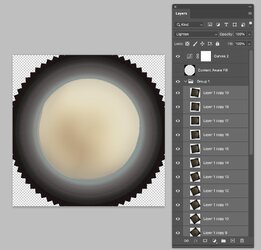
I selected all of these new repeated Layers and set the blend to Lighten:

Screen Shot 2023-01-28 at 9.47.16 AM.jpg


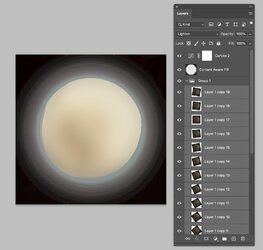
And then I selected the transparent areas, grew the selection 5 to 10 pixels and did an Edit> Content Aware Fill to yield:

Screen Shot 2023-01-28 at 9.47.28 AM.jpg


You could try out other blends and could also mask the result if there were parts that you wanted to preserve parts of the original image.

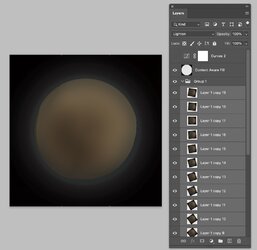
There were some small bits of white line visible so you can Stamp the whole image to one Layer or group the Layers into a Smart Object and apply a Scratches and Dust Filter or Blur filter.
I did that and turned off the Curves adjustment Layer yielding the following result.

Screen Shot 2023-01-28 at 9.47.39 AM.jpg

Hope this gives you an idea of one approach the the problem
John Wheeler
 
I'm not sure how precise the "overflow" gray area needs to be. If all you need is a gradual fade to black with no hard edges, here's another suggestion.
  • Once you've enlarged the canvas and filled with black, copy the entire image onto its own layer using Stamp Visible (Shft+Ctrl+Alt+E). You should now have one layer that looks exactly like the second image you posted—the one with the hard edge.
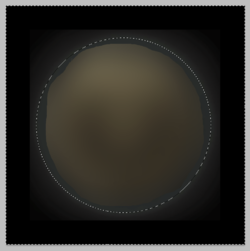
  • Using the elliptical marquee tool, create a circular selection around the perimeter of your gray overflow area. The border of your selection should be about in the middle of the gray area, as shown in the first image below.
  • Invert the selection and feather it by 3 or 4 pixels (Select>Modify>Feather).
  • With this selection active, apply a healthy gaussian blur. I used about 22 pixels.
  • The final result is my second image, below.

1674926188919.png

1674926239581.png
 

Back
Top