What's new
Photoshop Gurus Forum

Welcome to Photoshop Gurus forum. Register a free account today to become a member! It's completely free. Once signed in, you'll enjoy an ad-free experience and be able to participate on this site by adding your own topics and posts, as well as connect with other members through your own private inbox!

Photo Retouching #10


IamSam

Administrator
Staff member
Administrator
Messages
22,756
Likes
13,268
Hey everyone, I've had a few members who have asked to have a retouching challenge. It's so that they can post their skills, see the skill of others and possibly learn from others if needed. A great opportunity to share techniques. Critiques and questions are invited for all edits.

In advance, I want to thank any of you who participate...................it will be highly appreciated.!

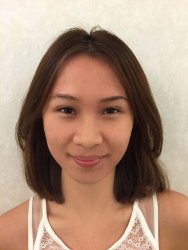
I carefully searched for an image that had not already been edited somewhere on the net. I could have missed something so if you guys can find a site where this particular image has been retouched, let me know.

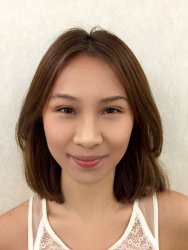
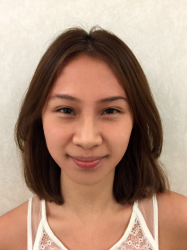
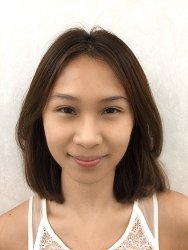
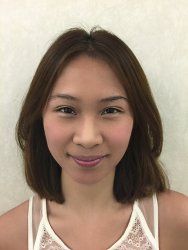
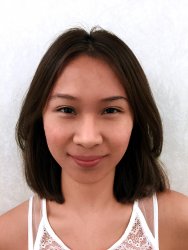
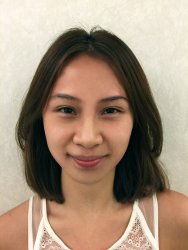
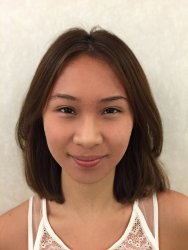
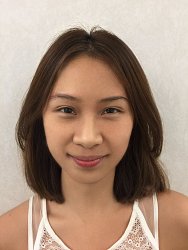
This is a beautiful young woman who just needs a little help.
Retouch_12.jpg
 

IamSam

Administrator
Staff member
Administrator
Messages
22,756
Likes
13,268
@GeneGraphics - Nice. Very natural and not the usual over smoothed porcelain look. Good work all the way to the edges. The color is a bit off for me, but that's not a biggie. Great job!

Can you offer a brief rundown on your process?
 
Messages
681
Likes
485
When dealing with skin retouching, I always use Frequency Separation Method. In this way, we can retouch the skin without losing its natural texture.

First, we need to duplicate the photo twice. You can name it Blur and Texture for reference.

1.PNG

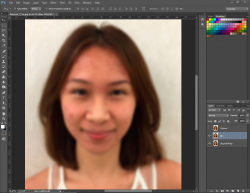
Then select the Blur Layer. Go to Filter-Blur-Gaussian Blur. Adjust the slider to the desired level until some details of the face like spots/pimples became not visible.

2.PNG

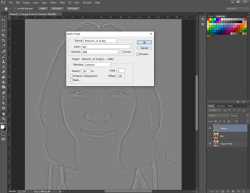
Then select the Texture Layer. Go to Image-Apply Image. Keep the settings on the Apply Image Window. Especially the Layer, Blending, Scale and Offset.

3.PNG

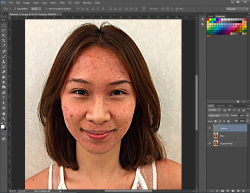
After that, change the Blending Mode of the Texture Layer to Linear Light.

4.PNG

Select the Blur Layer, add a Layer Mask, invert (Ctrl+I) it to make it color black. This will now hide the Blur Layer.
Next is to unhide some parts of the Blur Layer by applying White Brush to the face. As you will notice some spots vanish but the texture of the face remains.
You can still adjust the Gaussian Blur of the Blur Layer to get better results. Some spots will still not be removed at this time, so proceed to the next step.

Next is to add another layer at the top of the Texture Layer. Select Spot Healing Brush Tool. Apply it manually to spots needed to remove.
Then that's it. Add some Color Corrections, Liquify some parts of the face if needed.
 

Rich54

Guru
Messages
1,739
Likes
3,425
Here's mine. This was a difficult edit because almost none of her skin is unblemished, so there was no "good" skin texture to clone from.
  • I first used the spot healing brush on the largest areas of acne.
  • Two Hue/Sat adjustments to remove the red blotchiness from the skin and make it a uniform yellow, matching the nose.
  • Used yet another Hue/Sat to introduce some red back into the skin.
  • Used Frequency Separation with a very heavy blur on the bottom (low frequency) layer. On the high-frequency layer, I painted directly on the layer with 50% gray to eliminate most of the blemishes.
  • Used two Surface Blur layers, one set to Darken and one set to Lighten. Put masks on both and selectively masked away remaining blemishes.
  • At this point I had skin that was very smooth, but lacking in texture. I created two texture layers using Noise and a small amount of gaussian blur.
  • I imported the high-frequency layer from a completely different image (a photo of Kate Moss!) to further create natural-looking skin texture.
  • Lastly, I created a new high-frequency layer from the original starting image and brought that all the way to the top of the stack. Changed the blend mode from Linear Light to Hard Light (less intense) and masked-away any obviously bad blemishes.
One thing that's bugging me is that her lips look dry and chapped. But it's beyond my ability to convincingly fix that.

Retouch_Challenge.jpg
 
Last edited:
Messages
681
Likes
485
B
Here's mine. This was a difficult edit because almost none of her skin is unblemished, so there was no "good" skin texture to clone from.
  • I first used the spot healing brush on the largest areas of acne.
  • Two Hue/Sat adjustments to remove the red blotchiness from the skin and make it a uniform yellow, matching the nose.
  • Used yet another Hue/Sat to introduce some red back into the skin.
  • Used Frequency Separation with a very heavy blur on the bottom (low frequency) layer. On the high-frequency layer, I painted directly on the layer with 50% gray to eliminate most of the blemishes.
  • Used two Surface Blur layers, one set to Darken and one set to Lighten. Put masks on both and selectively masked away remaining blemishes.
  • At this point I had skin that was very smooth, but lacking in texture. I created two texture layers using Noise and a small amount of gaussian blur.
  • I imported the high-frequency layer from a completely different image (a photo of Kate Moss!) to further create natural-looking skin texture.
  • Lastly, I created a new high-frequency layer from the original starting image and brought that all the way to the top of the stack. Changed the blend mode from Linear Light to Hard Light (less intense) and masked-away any obviously bad blemishes.
One thing that's bugging me is that her lips look dry and chapped. But it's beyond my ability to convincingly fix that.

View attachment 125278

Beautiful!
 

IamSam

Administrator
Staff member
Administrator
Messages
22,756
Likes
13,268
As it's Thursday, I have to run to work. I will post my procedure later this evening.

I do more photo retouching than I like but I don't really enjoy doing them. Like most of you I like to preserve the skin texture. I don't care much for the plastic smooth look. My nemesis is now and has always been color adjustments. My monitor is calibrated and I realize we all have our own ideas as to how a photo's color should be, but I always think that mine are not quite as good as others.

Retouch_13.jpg
 

JeffK

Guru
Messages
2,497
Likes
2,898
My talents aren't anywhere near the other members replying - but decided to jump in with a try.
Played with neural filters, spot healing, some cloning, and using high pass filter for spot sharpening.
I left some texture on the skin and did make any color changes.

Retouch_12 edit.jpg
 
Messages
4,145
Likes
6,072
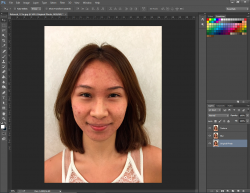
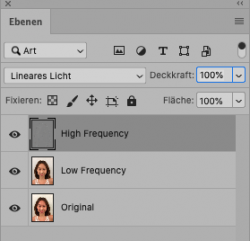
For my retouching I applied the frequency separation method.
For this I created 2 new layers from the image.

The top one is for high frequency retouching. Only the skin structure and the pores are changed.
The middle layer is for low frequency retouching. Only the modulation of the skin is changed.
The lowest layer remains as original and serves for the regular comparison of the progressing retouching. (See the screenshot of the layers).
Bildschirmfoto 2021-11-04 um 18.28.46.png

1. high frequency layer
Go to Filters, other filters, High pass filter. apply two pixels. select linear light for this layer.
This layer looks black and white. Here you retouch the blemishes of the skin with a hard brush. (time consuming)

2. low frequency layer
Go to Filters, Gaussian blur, apply 3 pixels. Here you retouch the blemishes of the skin with a soft brush. (little time consuming)
With Dodge and Burn or curves you can also work here.

This is my result.

Retouch_12chrisdesign.jpg
 

IamSam

Administrator
Staff member
Administrator
Messages
22,756
Likes
13,268
I first used the Spot Healing Brush Tool and the Clone Stamp Tool to make my initial clean up.
Like everyone else, I also used a high and low frequency separation similar to what Rich and Chris describe above.

I then added back some of the skin texture using the Brush Tool and a skin brush.
Screen Shot 2021-11-05 at 8.14.19 AM.png

With three different tonal layers starting with SKIN, then MIDTONE SKIN,
Screen Shot 2021-11-05 at 8.11.46 AM.png

and finally two HIGHLIGHT layers and a Curves Adjustment layer.
Screen Shot 2021-11-05 at 8.13.15 AM.png

Screen Shot 2021-11-05 at 8.08.30 AM.png
 

Rich54

Guru
Messages
1,739
Likes
3,425
...with three different tonal layers starting with SKIN, then MIDTONE SKIN,
and finally two HIGHLIGHT layers and a Curves Adjustment layer.

@IamSam, I like yours better than mine and I think it's your highlight layers that make the difference. Your skin looks healthy and glowing as if she's used moisturizer. My skin looks too dry. If I were to go back to mine, I would very slightly soften the skin texture and then add highlights as you did.

How, exactly, did you achieve the highlights? I usually create highlights by painting white with a blend mode of soft light, then adjusting the blur and opacity as needed.
 

IamSam

Administrator
Staff member
Administrator
Messages
22,756
Likes
13,268
How, exactly, did you achieve the highlights?
Sorry, I forgot to describe this!

This can vary from image to image. I usually use two curves adjustment layers with hide all layer masks.........one dark and one light. Then I use a very soft round brush with the flow set to 1 to 5%, and gently add back the naturally occurring highlights and shadows. I like this method because you use lighter and darker aspects of the actual skin.

However, for this photo I didn't really alter the darker areas of her existing skin so I only used the lighter Curves adjustment layer to bring out the soft highlights. This was the first HIGHLIGHT layer that I spoke of. Nothing too complicated there.

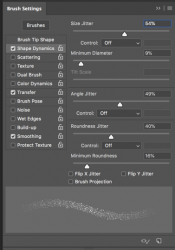
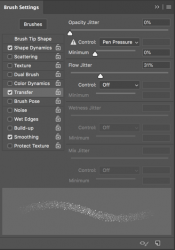
The second HIGHLIGHT layer I referred to was done with the Skin Brush! Set to about 40% Flow. Don't forget I use a Wacom Tablet which makes life much easier.
This brush gives the skin that porous (as in skin pores) look.
Screen Shot 2021-11-05 at 8.00.01 PM.png Screen Shot 2021-11-05 at 8.00.24 PM.png

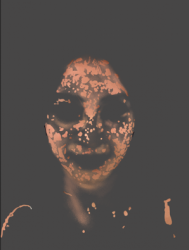
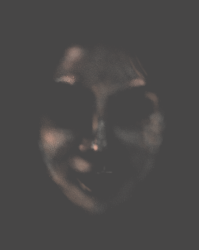
The following screenshot shows the second "skin brush" HIGHLIGHT layer against a dark contrasting background. It appears heavy but it's actually very subtle and blends well.
Screen Shot 2021-11-05 at 7.57.55 PM.png

Hope that helps. Let me know if you have any further questions.
 

Top