What's new
Photoshop Gurus Forum

Welcome to Photoshop Gurus forum. Register a free account today to become a member! It's completely free. Once signed in, you'll enjoy an ad-free experience and be able to participate on this site by adding your own topics and posts, as well as connect with other members through your own private inbox!

PLease Guys Help Me


hacklife

New Member
Messages
4
Likes
0
Hello All
i know you all are experts
But if u are gurus for real
pleaase help me wid this

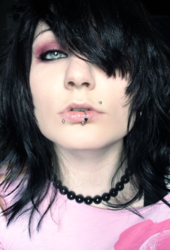
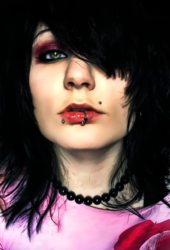
FROM THISnei5cg.png TO THIS11vsgpl.png
 
real easy way >image>adjustments>variations >darker I just did this in 1 minute with it....... probably 30 seconds
 
Last edited:
real easy way >image>adjustments>variations >darker I just did this in 1 minute with it....... probably 30 seconds

nei5cgedit.png

Brother
I Think Youre Not Understanding
I am Giving You a clear Example:
Look


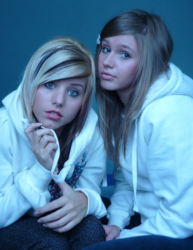
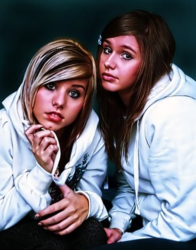
FROM THIS 33fcc9v.png TO THIS 205vcl1.png
 
I could be wrong, but it look like it may be a paintover. Basically on a separate layer, one would set the opacity lower and paint over the photo. If this is the technique, there's no way I could replicate it. I got some that matched the color, softness and contrast, but there's some kind of paint effect on it too. That could just be a filter I don't have...

So... Not really sure. Whoever did it is good. Maybe if you gave us a source, that would help.

Subscribing. I'd like to know how to do this.
 
Last edited:
yeah, I'm on the same page as Ira Garcia. In a little more detail, here's what I think you need to do:

1. Use a curve tool (on an adjustment layer, not directly) and pull up the highlights and pull down the darks. The curve will look like an 'S' turned 90 degrees right. Play with this a little till you get the contrast right. This will also give you some saturation.
2. Add saturation (again, adjustment layer not directly) to taste.
3. Group the Sat and Curve to your base image.
3. Now to get the glow: Copy these three layers (curve, sat, and original image) to make a second group on top of the first three. in this second group, set the base layer to 'screen'. Now play with the curve in this second group. Bring the darks WAY down. Now add a little blur to the base image of the second group, just a little! Then bring the opacity pretty far down.
4. Now above everything throw on a little color correction. Everyone does this differently, and you may want to treat different areas of the image differently. But some basic tools to play with: Curve tool's Reg, Green, and Blue layers. Photo filters. Use an image over itself and set it to 'overlay', then vary opacity. I don't know. From here you have to play around to taste.

Good luck!
 
Not sure these are exact but I posted the original next to it and the one I tried to copy form the first post:

nei5cg.png nei5cg2.png
To do this I used Topaz adjust as a photoshop plug in.
 

Back
Top