Photofinish
Active Member
- Messages
- 43
- Likes
- 13
Welcome to Photoshop Gurus forum. Register a free account today to become a member! It's completely free. Once signed in, you'll enjoy an ad-free experience and be able to participate on this site by adding your own topics and posts, as well as connect with other members through your own private inbox!
Hey @raoirfan that's nice but I need that specific background (it goes with the theme). I know how hard is to fix the background after the removal of the object. I really need to learn how to properly use content-aware tool in photoshop. Anyways, hope someone can do it with the original background and fix the background and the tiles on the floor.
For instance, I wanna remove the man from the image, and here is my result (as you can see I was able to remove him but my background is now completely messy)I'm not sure what you mean by 'fix the background' but here is my interpretation of that.
View attachment 120702

Thank you so much, I hope it works because I really need the background for my video.@Photofinish, I understand what you're asking for. I'm about 80% done and will post something later this evening.
For all others: the request is to remove the man and then fill-in the missing background and floor.


Wow this is AMAZINGHere it is. This was a good challenge. It was difficult because a portion of the wall juts out right where the guy was standing, so all of that had to be estimated. Hope this works.
View attachment 120704
 !!! BTW did you use photoshop to do it? Also is there any good tutorial on youtube when it comes to content aware fill? I would really like to learn how to remove and then fix the BG because I got a lot of BGs to fix and I don't know how. I do know how to remove an object like in this particular case (individual), the problem is the Background (and I know how difficult it is to fix it). I found a few online sites for removing the object but they are quite expensive, here https://topten.ai/inpaint-alternatives-to-remove-object-from-photo-review/#1_TouchRetouch. I use photoshop and it's really difficult when it comes to content aware tool.
 Yeah this is great too, you did your thing for sure. I really appreciate you guys. Also did you use photoshop? Again thank you for your timeThis was definitely a challenge. All of the straight lines that actually diverge was something I never tried replacing before. The floor tiles looked like they should be easy to fill in, but they really were not. Hope you like my results. I wasn’t sure if you wanted to keep the background dark or not. I just tried to bring out the colors in the floors. I was impressed with the previous post. His fill/replace work was very good. I was already working on this edit too, so I put it out there as another option to look at. Hope you like the results. I gave it my best shot.
View attachment 120705
To start with I did use Photoshop for my edits. I have tried content aware fill, but it really only works well if the background is easy like skies, and some backgrounds. I didn’t even start with content aware for this edit. I mainly used the clone stamp tool, selection tools and paint brush for most of this. I spend at least 30 minutes on just the floor. Because of all of the straight lines I used the polygon selection tool to help create the proper location of the missing floor tiles. I then used the clone stamp tool to fill in each tile with the correct color. I also used the clone stamp tool for the back wall and the selection tool to help line up the wood moldings, but they still didn’t come out as straight as I wanted them. I would suggest learning the clone stamp tool first. Also display the Clone Source window. It allows for a lot of control over the cloned object. You can flip left/right, top/bottom, and even angle. These adjustment help me clone the circle on the wall from the available information. This tool requires a lot of practice to be skilled at. I am still learning, but exercises like this background force me to figure out some new techniques. I learned a lot about selection and overlapping selections on the floor. I will use that knowledge in the future. Good luck with you background work.
Wow this is AMAZING!!! BTW did you use photoshop to do it? Also is there any good tutorial on youtube when it comes to content aware fill?


Thank you. This was done 100% in Photoshop and took about two hours.
Content-aware fill will never work if you need precise lines, edges and shapes. It only works for the interior of amorphous areas like leaves, sandy beaches, grass, etc. I hardly ever use content-aware for anything.
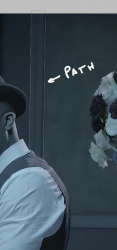
I'm a big fan of the Pen Tool. I used it to create several shapes to get the precise outlines of the various frames and the borders where the wall meets the floor. Once I had those paths established with the Pen tool, I rebuilt the missing areas by copying "good" areas and then stretching them. Here's an example:
View attachment 120722
- I created a path with the Pen tool for the left side of the frame.
View attachment 120723
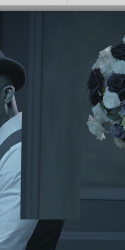
- I copied a "good" portion of the frame—the area between his hat and his collar—onto a new layer and then stretched it down using Edit>Transform>Scale.
- Because of the odd perspective in this image, there are very few truly vertical lines. After I stretched it, I used Edit>Transform>Skew to nudge it into proper perspective.
- I deliberately extended the frame too far down. From here, I went back to the path I had already created. I made a selection of the path and deleted anything that fell outside of it. That resulted in a perfectly clean left-side of the frame.
I pretty much repeated this process everywhere, carefully filling-in all the individual missing pieces. I did the floor by copying good areas of the floor and nudging them into perspective using Edit>Transform>Skew.
As a last step, I applied a canvas texture to all my edited areas to get it to blend in with the original textures.
