David B.
Member
- Messages
- 15
- Likes
- 3
Hello 
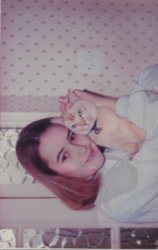
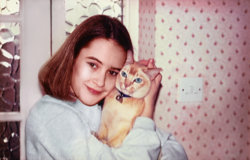
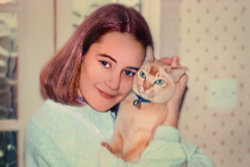
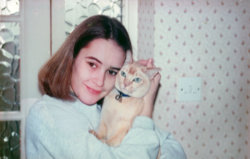
Restoration of a favourite photograph requested - my daughter and 'Suki' - taken about 25 years ago.
I received some great help here last year when I asked for a photograph of my granddad, killed during the fist world war, to be renovated. I was really pleased with the result and so was my sister!
The photograph attached, in a frame, was somehow subjected to water damage and set aside when we moved house some 16 years ago. My wife has recently unearthed it but, sadly, the photograph is now stuck onto much of the glass. I have, therefore, scanned it whilst still attached to the glass so will understand if nobody here can improve/enhance the image. The only important part is my daughter and our cat - none of the background is required or is relevant.
If anyone can produce a 'picture' which my wife and I can once again enjoy, we will be 'over the moon'. Our granddaughters might enjoy seeing this image of their mum too!
Thanks.

Restoration of a favourite photograph requested - my daughter and 'Suki' - taken about 25 years ago.
I received some great help here last year when I asked for a photograph of my granddad, killed during the fist world war, to be renovated. I was really pleased with the result and so was my sister!
The photograph attached, in a frame, was somehow subjected to water damage and set aside when we moved house some 16 years ago. My wife has recently unearthed it but, sadly, the photograph is now stuck onto much of the glass. I have, therefore, scanned it whilst still attached to the glass so will understand if nobody here can improve/enhance the image. The only important part is my daughter and our cat - none of the background is required or is relevant.
If anyone can produce a 'picture' which my wife and I can once again enjoy, we will be 'over the moon'. Our granddaughters might enjoy seeing this image of their mum too!

Thanks.


