
@Turnt4834 it would be best to post your PSD so someone can point out what went wrong. Otherwise, with so many layers it is difficult to pin where the fault lies.
Photoshop Gurus Forum
Welcome to Photoshop Gurus forum. Register a free account today to become a member! It's completely free. Once signed in, you'll enjoy an ad-free experience and be able to participate on this site by adding your own topics and posts, as well as connect with other members through your own private inbox!
You are using an out of date browser. It may not display this or other websites correctly.
You should upgrade or use an alternative browser.
You should upgrade or use an alternative browser.
Trying to figure out an easier way to change fabric samples! help!
- Thread starter Turnt4834
- Start date
yeah. i'm trying to save these so people can see. give me a few minutes to rename these and upload@Turnt4834 it would be best to post your PSD so someone can point out what went wrong. Otherwise, with so many layers it is difficult to pin where the fault lies.
pardon the toes. (yes they were clean) https://www.dropbox.com/s/svce3xhrf1bkea7/ADST.psd?dl=0
Attachments
I just saw your PSD file. What is it that you do not like about the way you have the settings at the moment?...but my current issue is that one of my designs isn't coming out looking too good.
You could also give the seat layer "Layer1" other blending modes like "Darken". You used Overlay Blending mode on the Curves adjustment layer after lightening it considerably, which makes the contrast come out but on the lighter colours, ignoring the dark ones.
Another thing you could play around with is duplicating "Layer 1", giving different blending modes to the clones and altering their opacity levels.
You should try @revnart's excellent PSD template as well.
revnart
Power User
- Messages
- 357
- Likes
- 327
Hey, you use color blending mode on your graphics parts, its completely not necessary since you don't have anything below to cast this color onto. And to show you shadows and highlights you multiply your armchair at top and then use levels to compensate darkening - this darkening happens because your chair is not white, its mostly gray. Try steps below:
1. set graphic elements to normal mode
2. move your chair photo at bottom of layers stack and set it to normal blend mode
3. duplicate chair layer and move it at top of stack, and desaturate it ( Cmd+Shift+U - on mac )
4. duplicate it once again ( the chair layer , now you have two of them at top of stack )
5. select one of duplicated and desaturated layers and apply curves ( Cmd+M ):

6. Set mode of this layer to Screen, to show only light parts of photo (we darkened image almost completely leaving only highlights bright)
7. Select second of desaturated chair layers and apply curves to brighten everything but not shadows:

8. Set this layers blend mode to multiply to show only dark parts of photo.
Tip. Lock position of Shadow and Highlights layers we created to not move them by accident")
@polarwoc - this is also answer to your question about shadows and highlights method I used
1. set graphic elements to normal mode
2. move your chair photo at bottom of layers stack and set it to normal blend mode
3. duplicate chair layer and move it at top of stack, and desaturate it ( Cmd+Shift+U - on mac )
4. duplicate it once again ( the chair layer
, now you have two of them at top of stack )5. select one of duplicated and desaturated layers and apply curves ( Cmd+M ):
6. Set mode of this layer to Screen, to show only light parts of photo (we darkened image almost completely leaving only highlights bright)
7. Select second of desaturated chair layers and apply curves to brighten everything but not shadows:
8. Set this layers blend mode to multiply to show only dark parts of photo.
Tip. Lock position of Shadow and Highlights layers we created to not move them by accident
@polarwoc - this is also answer to your question about shadows and highlights method I used
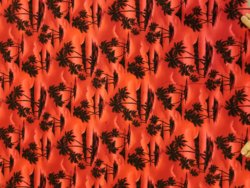
yeah, buy you have NO idea how many people actually want to see that combo lol.Also, the colour combination of Yellow sides and the Red sunset Palms-On-Island silhouette pic could be a culprit?
i'm going to play with that template a little bit, i want to see if i can get the solid side colors to match a little better using that template!! hopefully i can play with it later this weekend.I just saw your PSD file. What is it that you do not like about the way you have the settings at the moment?
You could also give the seat layer "Layer1" other blending modes like "Darken". You used Overlay Blending mode on the Curves adjustment layer after lightening it considerably, which makes the contrast come out but on the lighter colours, ignoring the dark ones.
Another thing you could play around with is duplicating "Layer 1", giving different blending modes to the clones and altering their opacity levels.
You should try @revnart's excellent PSD template as well.
I had a feeling it was the type of layer i used to try to blend the colors and stuff. however, I need to be able to match the design with the original fabric so a few hours of staring at that along with the fabric infront of me kinda makes my eyes hurt so I try to come back with fresh eyes and start a new. I have a TON of different fabric/designs I need to go through so my eyes start getting tired really fast now lol.Hey, you use color blending mode on your graphics parts, its completely not necessary since you don't have anything below to cast this color onto. And to show you shadows and highlights you multiply your armchair at top and then use levels to compensate darkening - this darkening happens because your chair is not white, its mostly gray. Try steps below:
1. set graphic elements to normal mode
2. move your chair photo at bottom of layers stack and set it to normal blend mode
3. duplicate chair layer and move it at top of stack, and desaturate it ( Cmd+Shift+U - on mac )
4. duplicate it once again ( the chair layer
5. select one of duplicated and desaturated layers and apply curves ( Cmd+M ):
View attachment 88119
6. Set mode of this layer to Screen, to show only light parts of photo (we darkened image almost completely leaving only highlights bright)
7. Select second of desaturated chair layers and apply curves to brighten everything but not shadows:
View attachment 88120
8. Set this layers blend mode to multiply to show only dark parts of photo.
Tip. Lock position of Shadow and Highlights layers we created to not move them by accident
@polarwoc - this is also answer to your question about shadows and highlights method I used
Your other template is a bit complex for my n00b skills. I'm going to play with it some more because i really like how it looks. I'm just super stuck on those sunset prints right now and I wish this was a private thread so I could be more forth coming with my designs and stuff....but it's not and I have to try to limit the amount of stuff I post because of the line ofwork and these sneaky competitorsHey, you use color blending mode on your graphics parts, its completely not necessary since you don't have anything below to cast this color onto. And to show you shadows and highlights you multiply your armchair at top and then use levels to compensate darkening - this darkening happens because your chair is not white, its mostly gray. Try steps below:
1. set graphic elements to normal mode
2. move your chair photo at bottom of layers stack and set it to normal blend mode
3. duplicate chair layer and move it at top of stack, and desaturate it ( Cmd+Shift+U - on mac )
4. duplicate it once again ( the chair layer
5. select one of duplicated and desaturated layers and apply curves ( Cmd+M ):
View attachment 88119
6. Set mode of this layer to Screen, to show only light parts of photo (we darkened image almost completely leaving only highlights bright)
7. Select second of desaturated chair layers and apply curves to brighten everything but not shadows:
View attachment 88120
8. Set this layers blend mode to multiply to show only dark parts of photo.
Tip. Lock position of Shadow and Highlights layers we created to not move them by accident
@polarwoc - this is also answer to your question about shadows and highlights method I used
revnart
Power User
- Messages
- 357
- Likes
- 327
Here is a quick video showing how to edit my template (sorry for watermark ;P it was made with camtasia trial):
link: https://www.dropbox.com/s/77kxwfwfjybnn4e/chair_edit.mp4?dl=0
hope it helps you a little
link: https://www.dropbox.com/s/77kxwfwfjybnn4e/chair_edit.mp4?dl=0
hope it helps you a little
hey thanks! i'll review this now and try it. you guys are awesome!Here is a quick video showing how to edit my template (sorry for watermark ;P it was made with camtasia trial):
link: https://www.dropbox.com/s/77kxwfwfjybnn4e/chair_edit.mp4?dl=0
hope it helps you a little