What's new
Photoshop Gurus Forum

Welcome to Photoshop Gurus forum. Register a free account today to become a member! It's completely free. Once signed in, you'll enjoy an ad-free experience and be able to participate on this site by adding your own topics and posts, as well as connect with other members through your own private inbox!

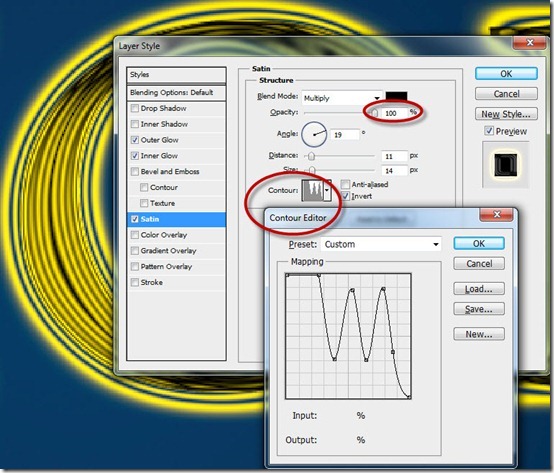
Understanding the Contour Editor


Rich54

Guru
Messages
1,744
Likes
3,432
Does anybody know of a tutorial that explains the Contour Editor? Photoshop comes with several pre-set contour settings and also has an editor where you can customize and create your own. But, other than trial & error guesswork, I can't figure out how to predict ahead of time what a particular shape in the contour editor will actually do. If I imagine a contour effect in my head, I have no idea what shape the contour editor curve needs to be in order to achieve it.

In the example below, I applied Bevel & Emboss to some basic shapes and selected the pre-set contour style called Rolling Slope Descending. But when I look at the shape of that curve in the contour editor, nothing about that little graph suggests the actual result that I see on my blue shapes. What are the X and Y axes measuring in the contour editor?

Thanks,
Rich
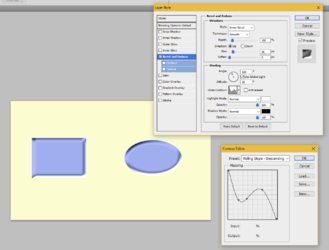
1666630451663.png
 
Does anybody know of a tutorial that explains the Contour Editor?
Don't know, but I will check.

I can't figure out how to predict ahead of time what a particular shape in the contour editor will actually do.
Bingo! I've had the same problem since I first started playing with the contour editor.

nothing about that little graph suggests the actual result that I see on my blue shapes.
Basically I use the experimentation process whereby I just re-adjust the contour until I get it the way I want it. But like you, it makes no sense to me at all.

What are the X and Y axes measuring in the contour editor?
Not sure..............I will have to learn along side you on this one!
 
I spent an hour trying to find tutorials, but never came across the one you just attached. I have to go out now, but this looks like what I'm after, so I'll study it more carefully later.
 
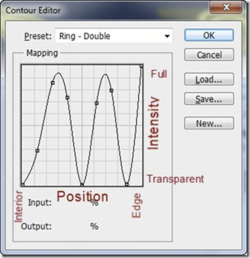
These tutorials are exactly what I was looking for. I pretty much get it now. The key take-away is this graph, which explains what the shape of the curve means:
  • The vertical height of the curve determines the intensity of the layer style. The very bottom means that the layer style will be transparent; the very top means that the layer style will be at full intensity.
  • The horizontal positioning of the curve determines where the layer style appears on your shape: toward the left means that the layer style will affect the center interior of your shape. Towards the right means that the layer style will affect the shape out near its edges.

1666655514844.png


For anybody else interested in experimenting with this, it's best to work big (try very large, chunky text) to really see what's happening. It's also best to start with Inner Glow, which is the easiest to see exactly what's going on with the different contour effects. My mistake in the past is that I was applying contours to the Bevel & Emboss layer style. You can do it, but it's much less intuitive to understanding gloss contours because the B&E layer style has an additional component—the light direction—which can greatly confuse the issue.
 

Back
Top